Sage 50 Accounts plugin
Our plugin for Sage 50 Accounts supports the following features:
Sage 50 Accounts Versions
We currently support Sage 50 Accounts v25 to v30.
Installation
Once you have downloaded the plugin, run the downloaded file to install the plugin. Close Sage 50 Accounts if it is open, then re-open it. You should now see a "Data8" option in the top menu to indicate that it has been installed successfully.
Should you need to uninstall the plugin at any time, close Sage 50 Accounts, go to the Windows Add/Remove Programs option, select the "Data8 Postcode Lookup for Sage 50 Accounts" option and click "Uninstall"
Configuration
Before the plugin will have any effect you must configure it to link it to your Data8 account. In Sage, click the new "Data8" menu, then click "Settings".
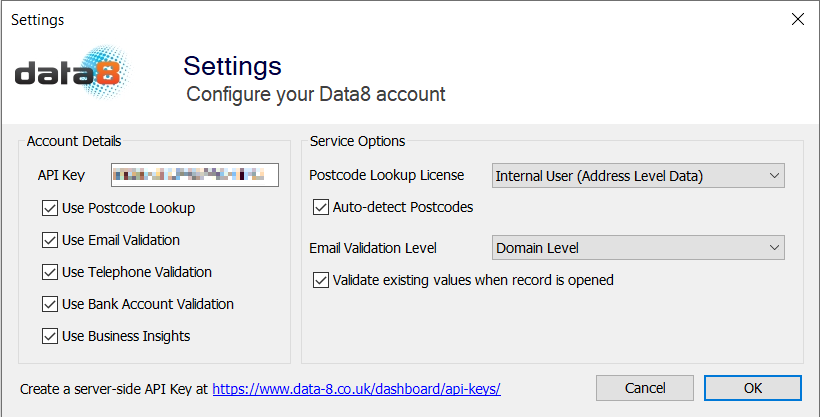
On the configuration screen, enter your Data8 API Key. This can be obtained from your dashboard - click "Add API Key", select "I will use it server-side", click Next, then Save. Your newly created API Key will then be shown, in the format xxxx-xxxx-xxxx-xxxx. Copy & paste this into the settings screen. Any of the available services you have access to on your account will then be enabled for you to tick.
Usage
Once you have ticked the services you want to use, those services will be applied the next time you open any appropriate forms in Sage.
Postcode Lookup
When Postcode Lookup is enabled, a ? button is shown next to the postcode field of any address entry section. Click this button to open the Postcode Lookup form. Enter a postcode and click Search to find the address you want, then double-click on an address to populate the address field in Sage.
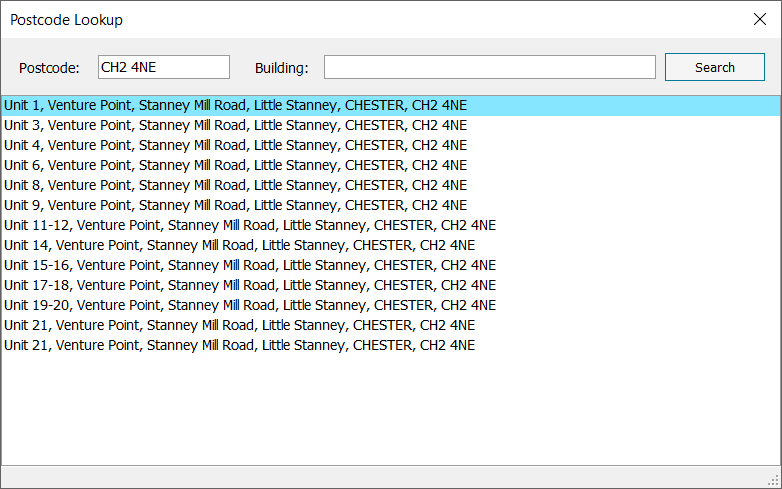
Depending on which screen you are on within Sage, any company name that is available for the address may be placed in a separate field. For example, when creating or editing a customer record, the company name associated with the address is placed in the Company Name field. To avoid losing any data you may already have entered, if the company name field already contains any information it will not be automatically overwritten.
Telephone Validation
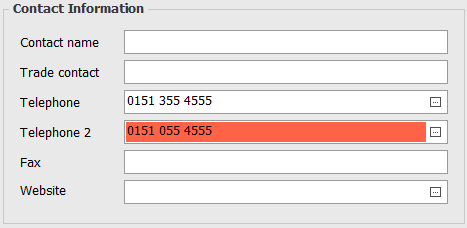
When Telephone Validation is enabled, all telephone number fields are validated automatically. If an invalid telephone number is identified, the field will change colour to red.
Email Validation
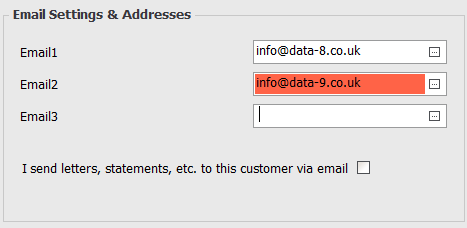
When Email Validation is enabled, all email address fields are validated automatically. If an invalid email address is identified, the field will change colour to red.
Bank Account Validation
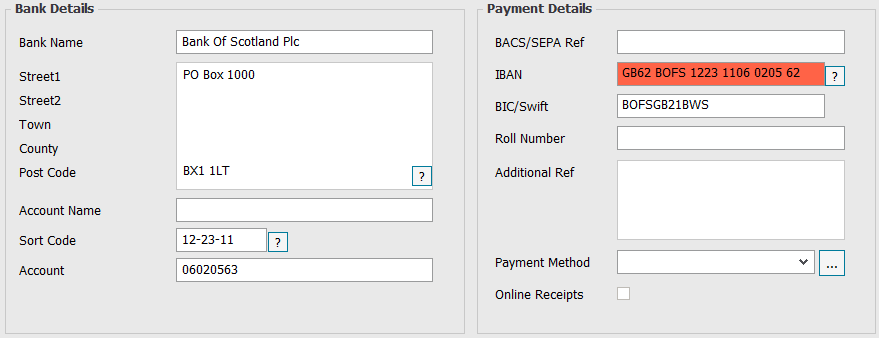
When Bank Account Validation is enabled, all sort code, bank account numbers, BIC and IBAN fields are validated automatically. Any errors are highlighted in red.
A "?" button will be shown next to the Sort Code field. If the sort code is populated, clicking this button will automatically fill in the Bank Name and Bank Address fields.
In addition, a "?" button will be shown next to the IBAN field. If the sort code and account number are populated, clicking this button will automatically populate the BIC and IBAN fields with the equivalent numbers.
Business Insights
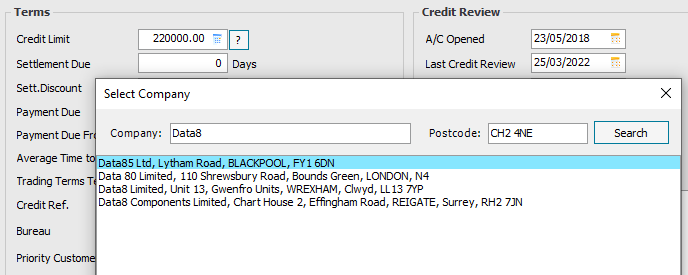
When Business Insights is enabled, the Credit Limit fields on customer and supplier records will have a "?" button shown next to them. Click this to obtain the latest recommended credit limit for this company.
The latest recommended credit limit will be automatically placed in this field, and the current date will be shown in the Last Credit Review field.
If this is the first time you have used this option on the record, you will first be prompted to select the correct company to obtain the credit limit for. After selecting the correct company, the associated company registration number will be stored in the Credit Ref field for future use.
Upgrading Sage
After upgrading to a newer version of Sage, you may find that the Data8 menu disappears and you lose the functionality of the plugin. To restore it, please follow the installation steps above to re-install the plugin again. Your previous configuration will be retained.