Skip to the content

Unbounce Plugin

Our integration for Unbounce supports the following features:

  • Phone Validation
  • Email Validation

Step 1: Generate your configuration code using the form below

Simply fill out the form and click generate to get your custom code.

Each validation service requires the necessary credits to function.

An API key is required to use any of the validation services. You can generate one from the Dashboard, under the Validation tab or by clicking here

Client API Key
Use Email Validation
Email Validation Level
In addition to the Server level checks, validates that the mail server accepts mail for the full email address.
Email Validation Message
Use Phone Validation
Default Country Code
Specify the ISO 2-character country code or international dialling code of the country to validate the telephone number in, unless that number contains an explicit country code prefix. i.e. 'GB' or '44'
Phone Validation Message

Step 2: Add JavaScript code to your Unbounce page.

Having generated your code above, you can now copy and paste this into your Unbounce page after the body tags:

  1. Log in to your Unbounce account and locate the builder of the page you would like to add Data8 validation to.
  2. Click the 'Javascripts' button in the bottom left of the builder. A new dialog box will appear.  
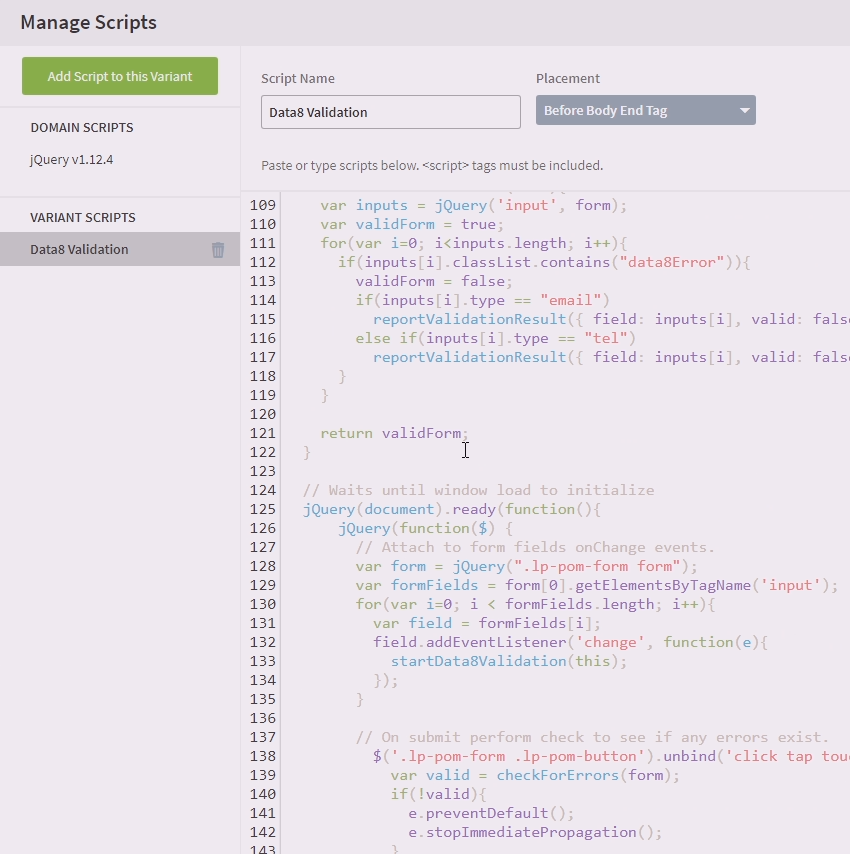
  3. In the new Manage Scripts Dialog box, fill out the following information:
    1. Enter a name for the script into the 'Script Name' field, for example 'Data8 Code'
    2. In the 'Placement' drop-down menu, select 'After Body Tag'.
    3. Paste the script generated above into the blank field.
  4. Click the 'Done' button at the bottom right-hand corner of the dialog box.
  5. Ensure that jQuery is added to your page. Our integration relies on it and will not work if jQuery is missing. If you do not yet have jQuery on your page(s), you can add this as a domain script or as a script onto this page alone.


Should you ever wish to remove the Data8 Validation from your Unbounce page, simply remove the code you generated above from your page.

Step 3: Add styling code to your Unbounce page.

Having added your JavaScript code to your page, your validation should now be working. However, invalid fields will not be very obvious to your users and you may want to add some styling to the errored fields to highlight them. To do this:

  1. In your Unbounce page builder, click the 'Stylesheets' button in the bottom left of the builder. A new dialog box will appear.  
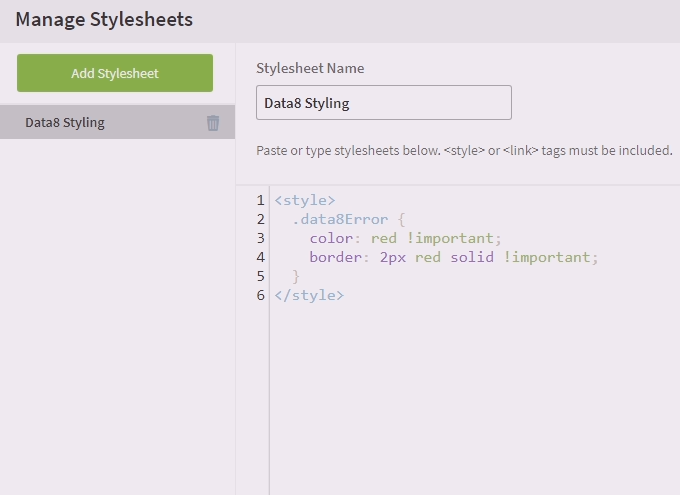
  2. In the new Manage Stylesheets Dialog box, fill out the following information:
    1. Enter a name for the styling into the 'Stylesheet Name' field, for example 'Data8 Styling'
    2. Add your styling code here. For a simple example, see the image to the left.
  3. Click the 'Done' button at the bottom right-hand corner of the dialog box.


Should you ever wish to remove Data8 Validation from your Unbounce page, simply remove the code from your page.

That's it! Data8 Validation has been applied to your page, depending on the options you selected.

Usage

After setting up the options to suit your needs, the relevant validation will be applied to the appropriate fields on your data-capture forms.

Telephone Validation

When Telephone Validation is enabled, all suitable telephone number fields are validated automatically. There are also two additional options available for further control of validation: Default Country Code, as well as a custom message to display. If entered data is identified as invalid, the error will be highlighted suitably on the form.

Option Description
Default Country Code The ISO 2-character country code or international dialling code of the country to validate the telephone number in, unless that number contains an explicit country code prefix.

Email Validation

When Email Validation is enabled, all suitable email address fields are validated automatically. The level of validation to apply to entered email addresses can be selected from a drop down on the settings page. See the table below for information on each level. If entered data is identified as invalid, the error will be highlighted suitably on the form.

Email Validation Levels:

Level Description
Syntax The supplied email is checked to ensure that it meets the standard email address format. This is the quickest option and would reject such incorrect email addresses as "noone@nowhere" and "N/A", but would accept incorrect email addresses that are correctly formed but that do not include a valid domain name such as "noone@data-9.com".
Domain The supplied email is checked to ensure that the domain name (the part to the right of the @ sign) exists and is set up to receive email. This is still normally very quick, but can take a few seconds in some cases. This check would reject incorrectly formatted email addresses in the same way as the Syntax check, and would also reject a misspelled domain name such as "noone@data-9.com". It can also detect when a domain name exists but does not handle email, such as "noone@example.com". It does not verify that the part of the email address to the left of the @ sign exists.
Server In addition to the Domain level checks, validates that at least one of the mail servers advertised for the domain is actually live.
Address In addition to the Server level checks, validates that the mail server accepts mail for the full email address.