How to Mange Dashboard Widgets

The guide will provide step-by-step instructions on how to add, customise, rearrange and remove widgets to optimise your dashboard for improved data visibility and workflow efficiency.

Accessing Your Dashboard

The Dashboard screen will open when you first log in to the Data8 Online Portal. 

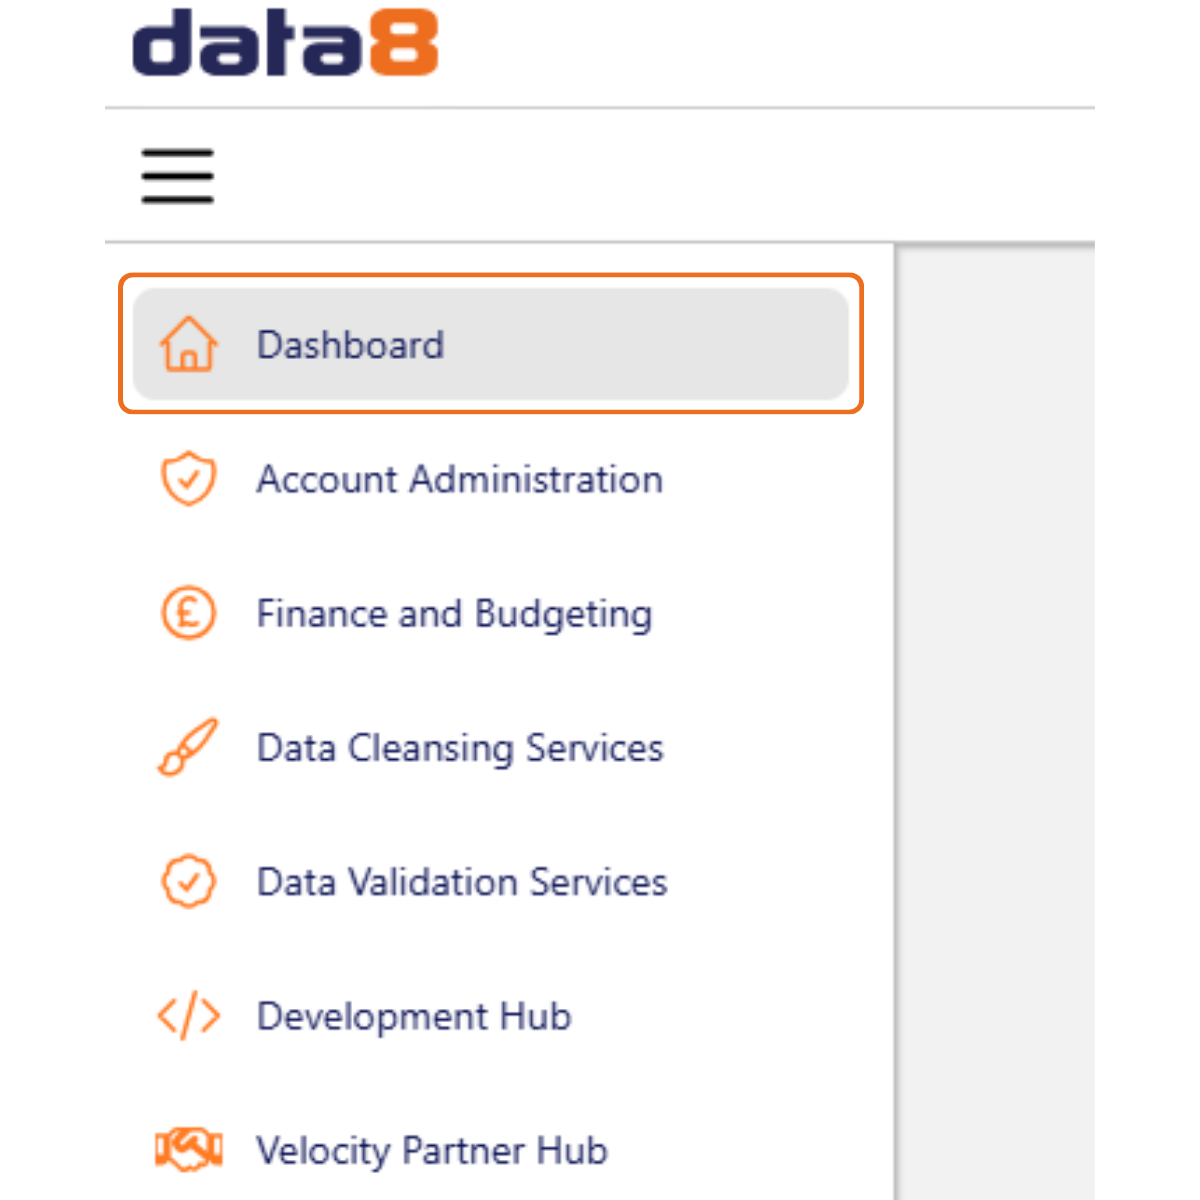
If you are working in a different area of the portal, click the Dashboard tab to take you to the Dashboard screen. 

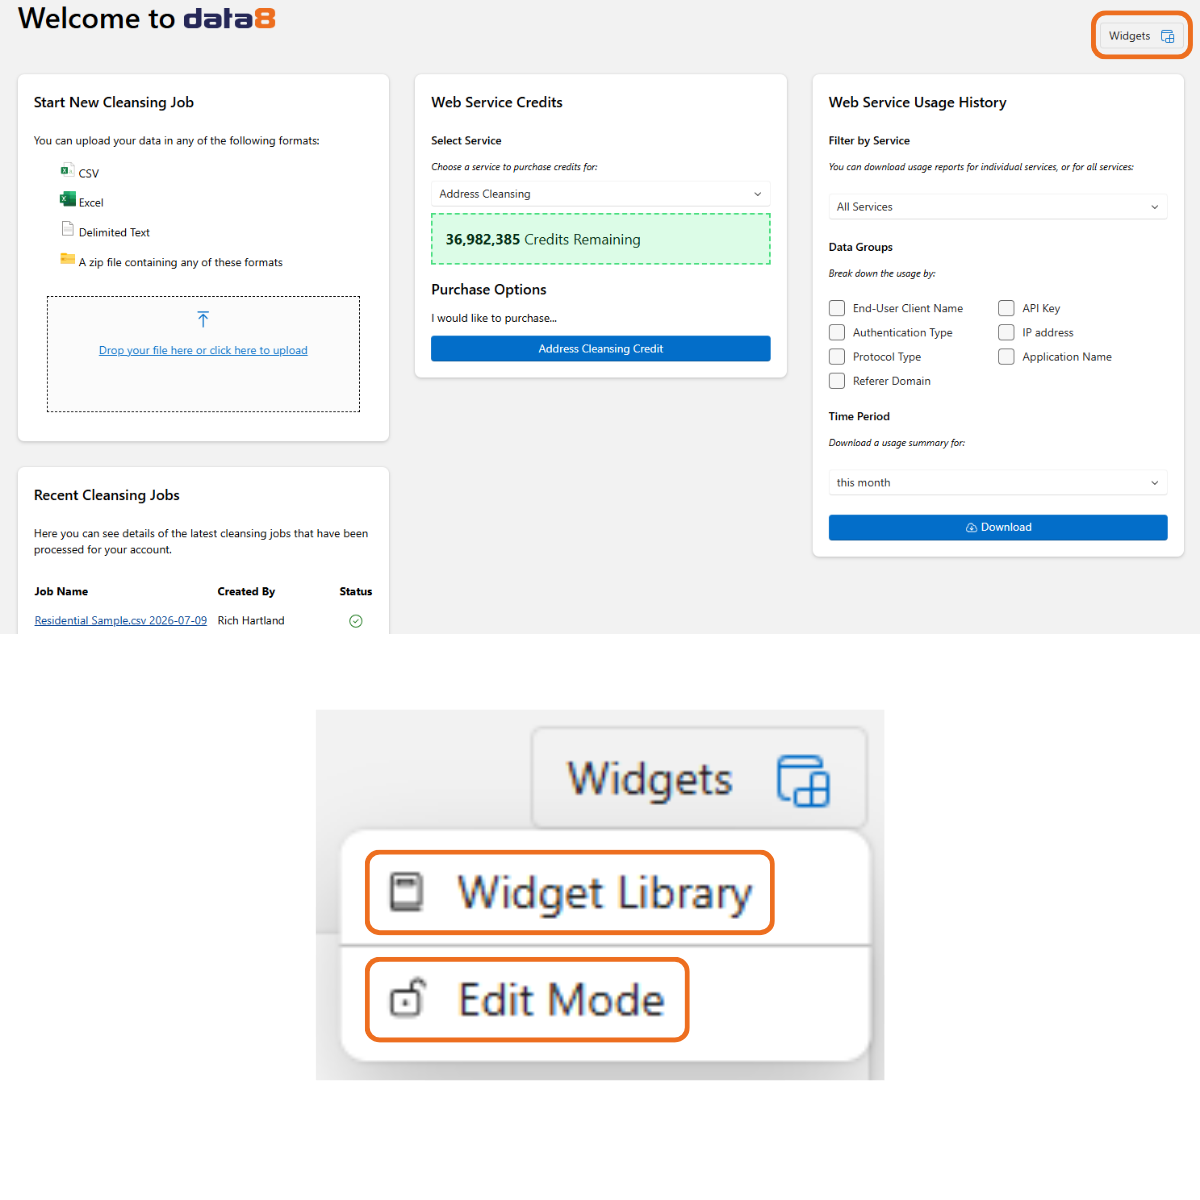
Click the Widgets button at the top right of the Dashboard screen to display two options:

  1. Widget Library: Takes you to the Widget Library screen 
  2. Edit Mode: Turns the Dashboard screen into an editable interface 

Widget Library

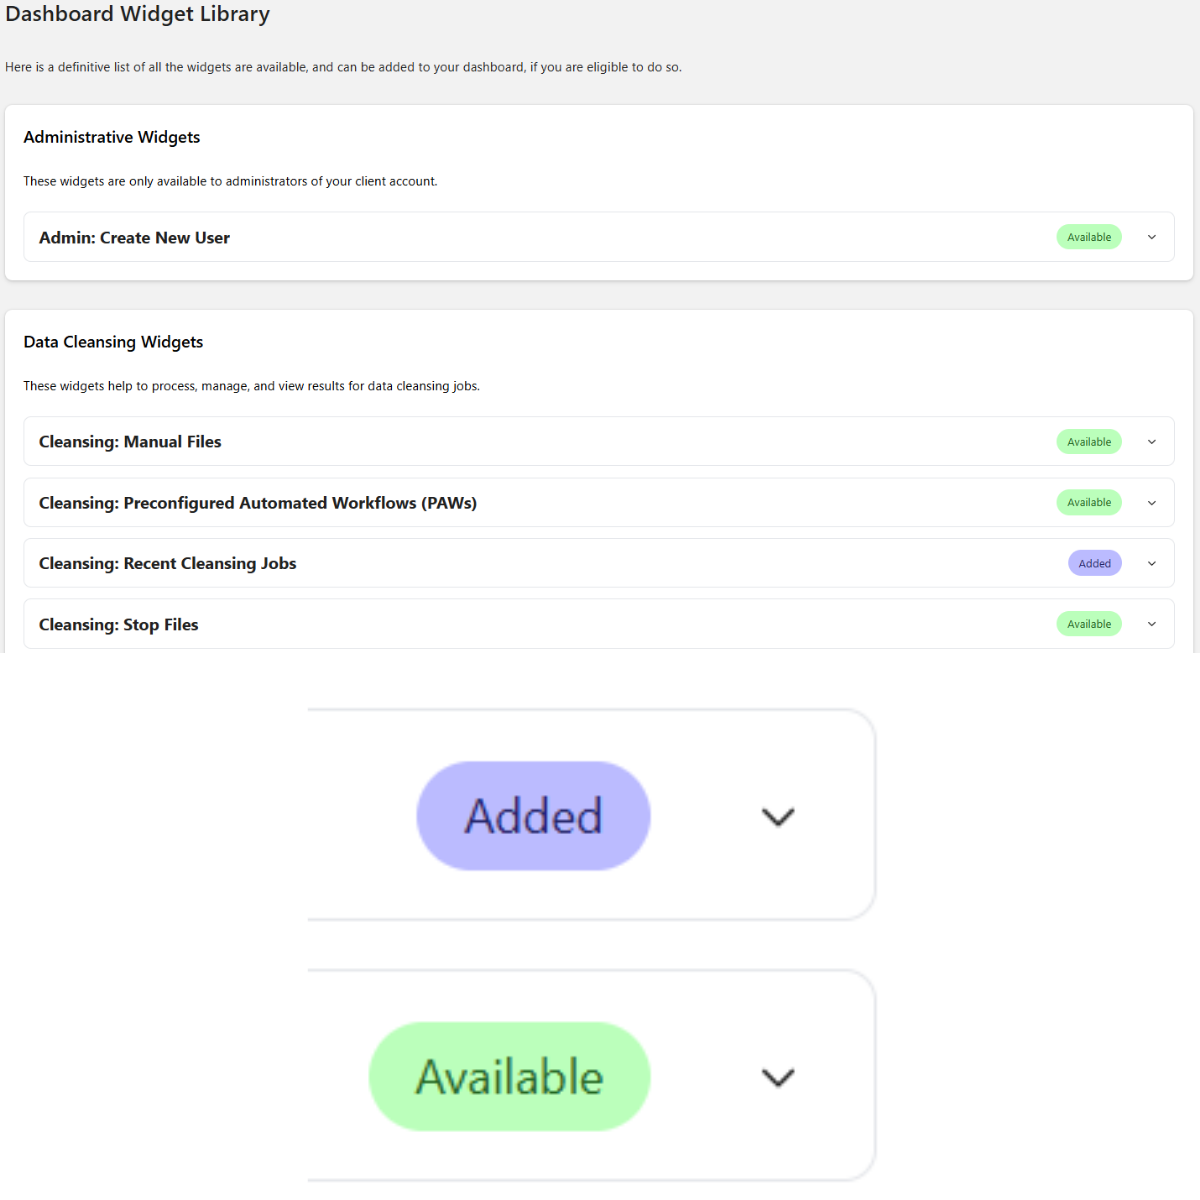
The Widget Library screen gives you the option you add multiple widgets to your dashboard in one process.

The widgets are separated into categories and identified as either:

  • Added: The widget has already been added to your dashboard 
  • Available: The widget can be added to your dashboard 
  • Ineligible: The widget exists, but you are not eligible to use it (for further assistance, please contact your Account Manager)

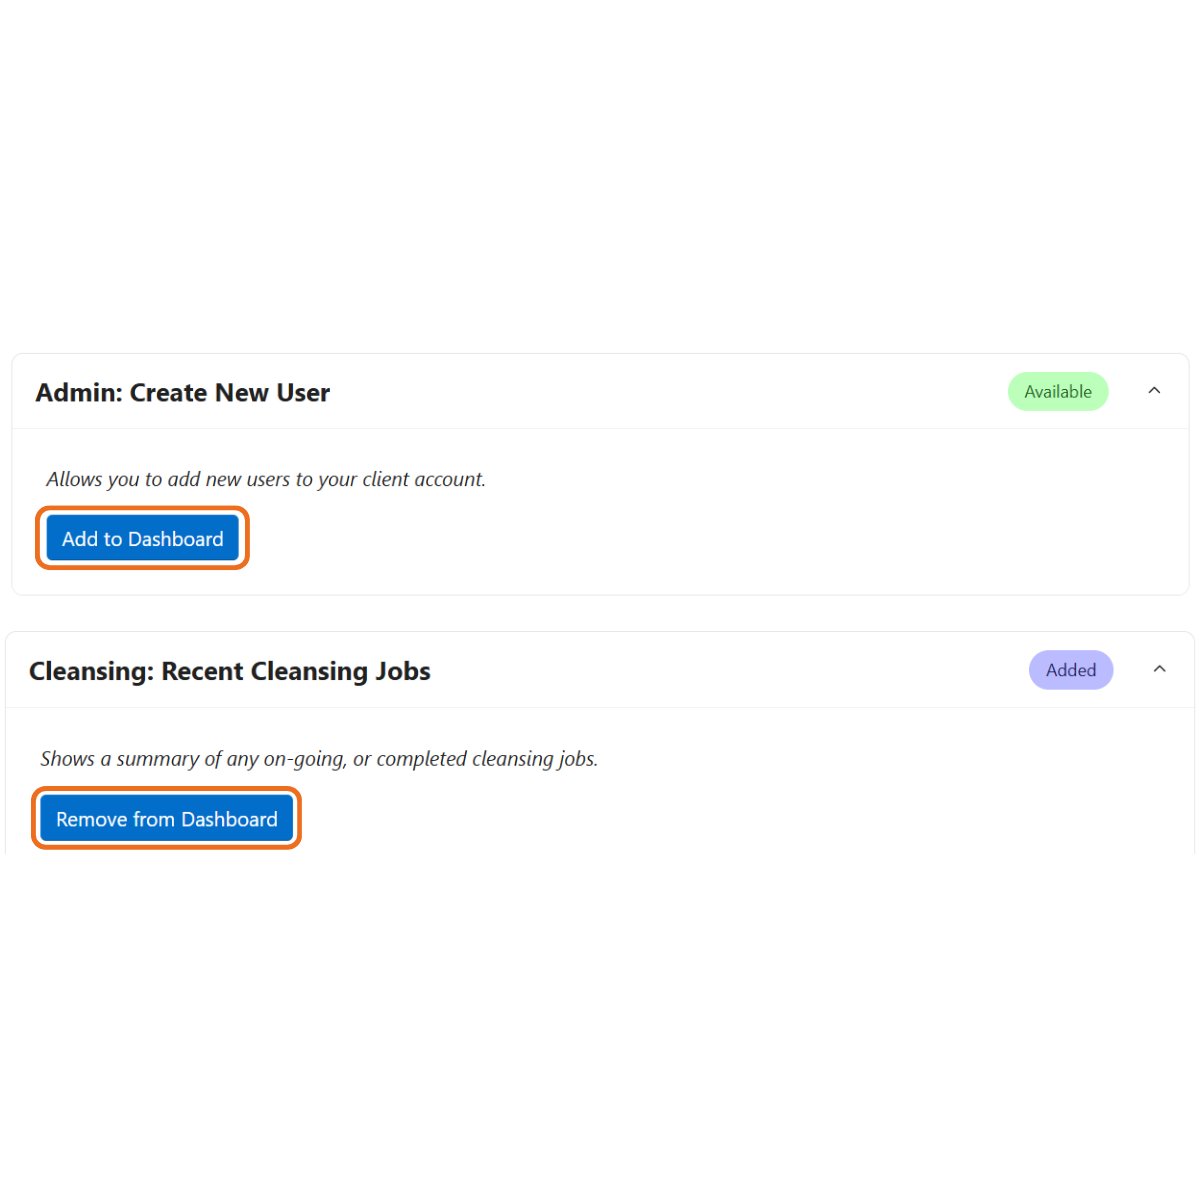
To add a widget to your dashboard, open up the box using the down arrow and click Add to Dashboard

To remove a widget from your dashboard, open up the box using the down arrow and click Remove from Dashboard

Edit Mode

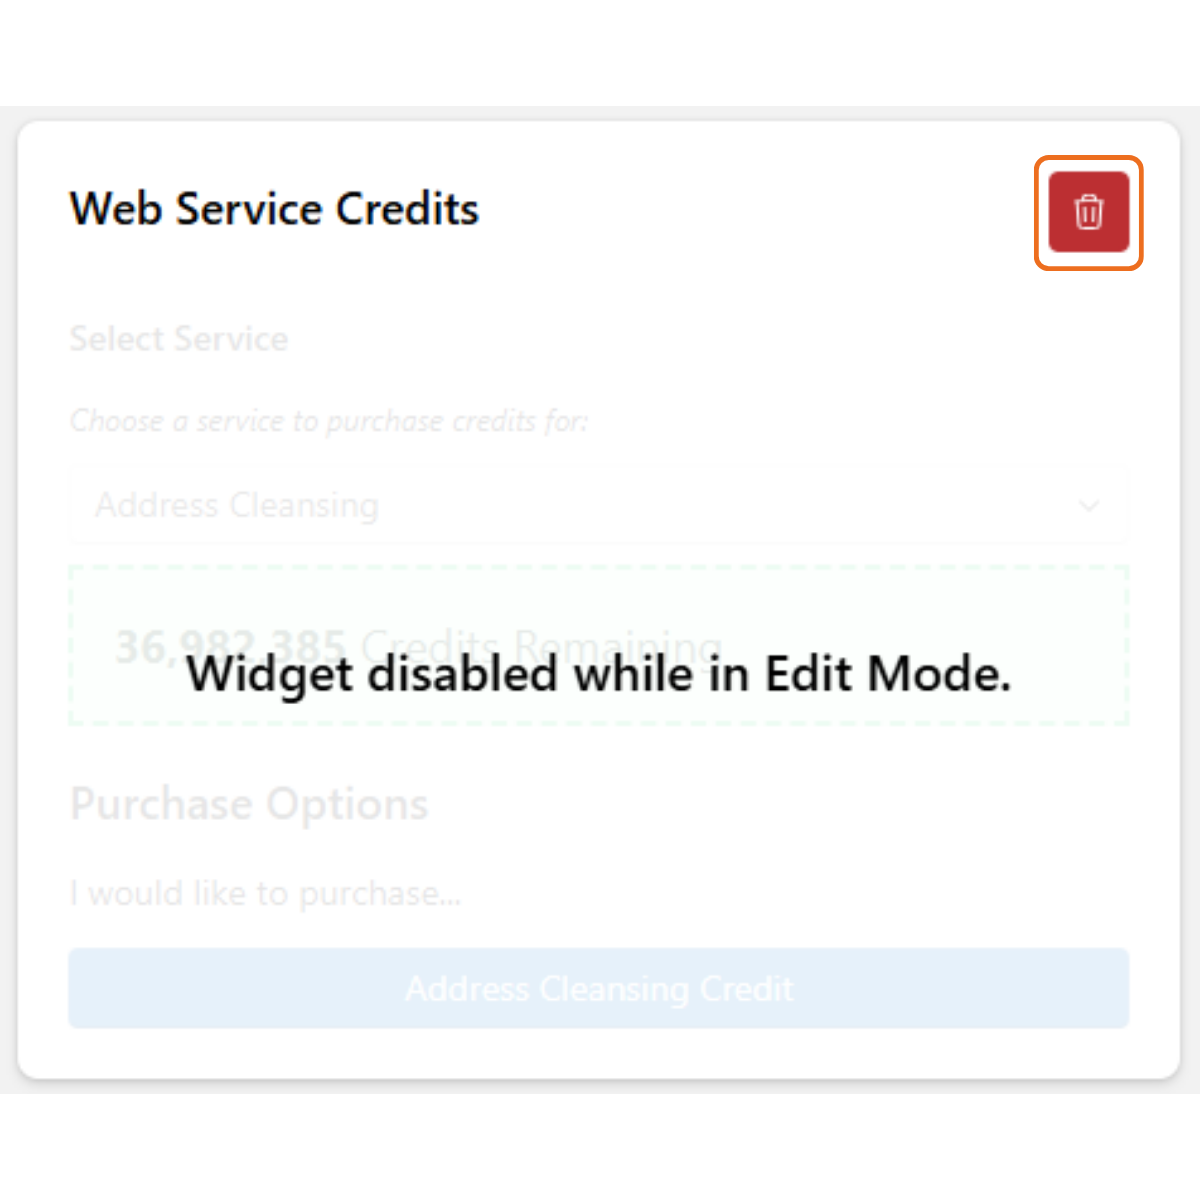
The Dashboard screen will now become editable, with each of the widgets displaying the message ‘Widget disabled while in Edit Mode’. 

To delete any widget from the screen, click the Rubbish Bin button located in the top right corner of the widget. 

N.B: This will only be displayed once you have clicked on the widget you want to delete. 

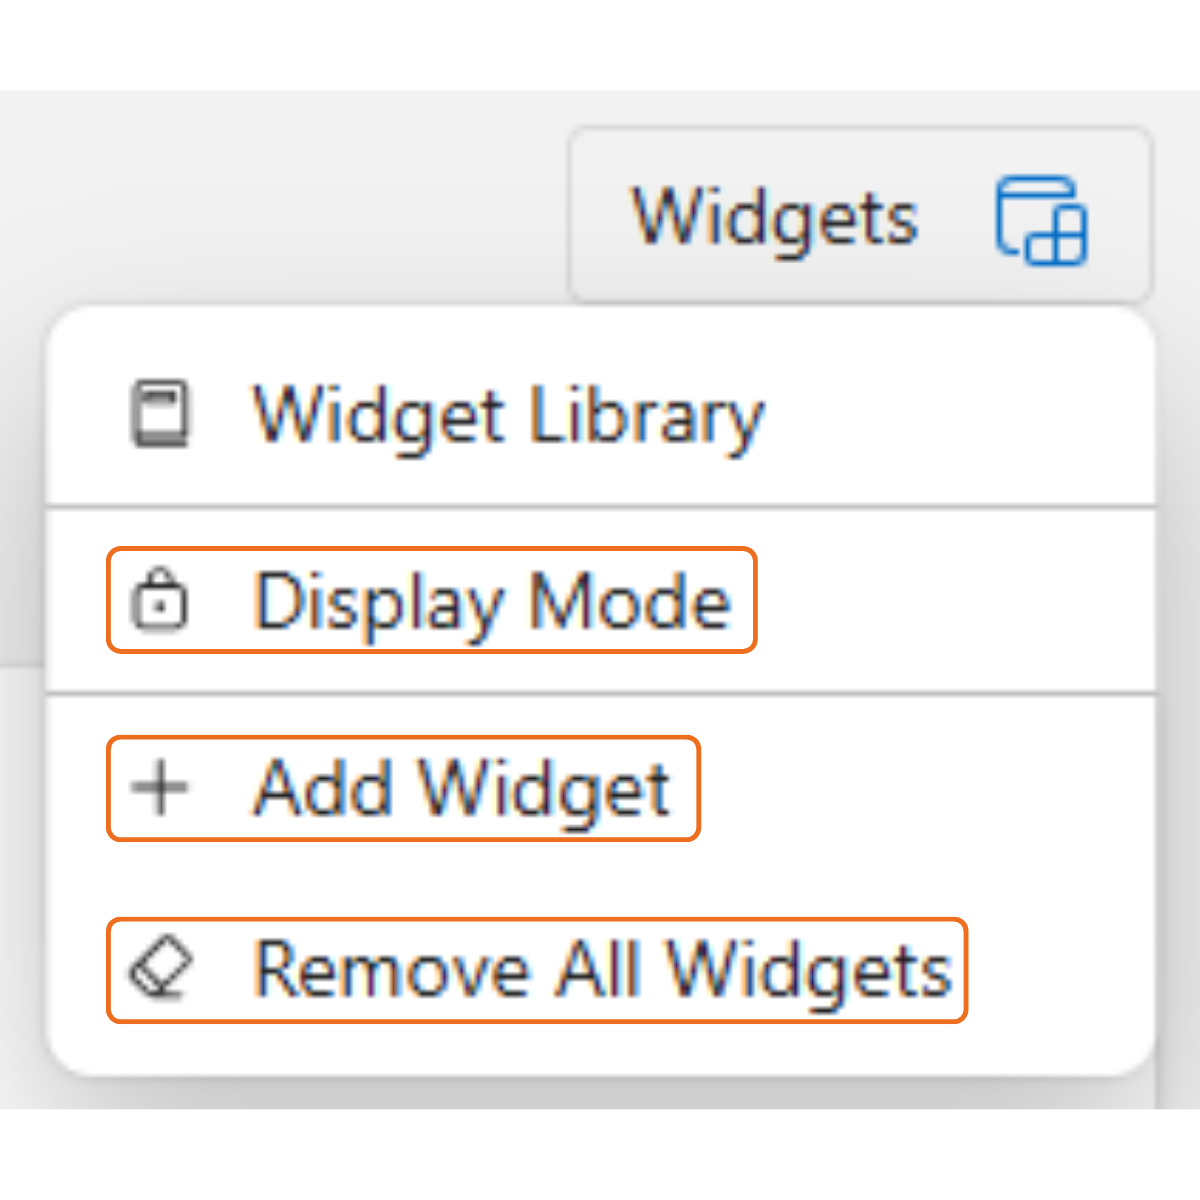
Beneath the Widgets button there will now be three new options: 

  • Display Mode: Returns you to the static Dashboard screen
  • Add Widget: Opens the Dashboard Widgets pop-up to select a widget to add to your dashboard 
  • Remove All Widgets: Removes all widgets from your dashboard, leaving you with an empty Dashboard screen

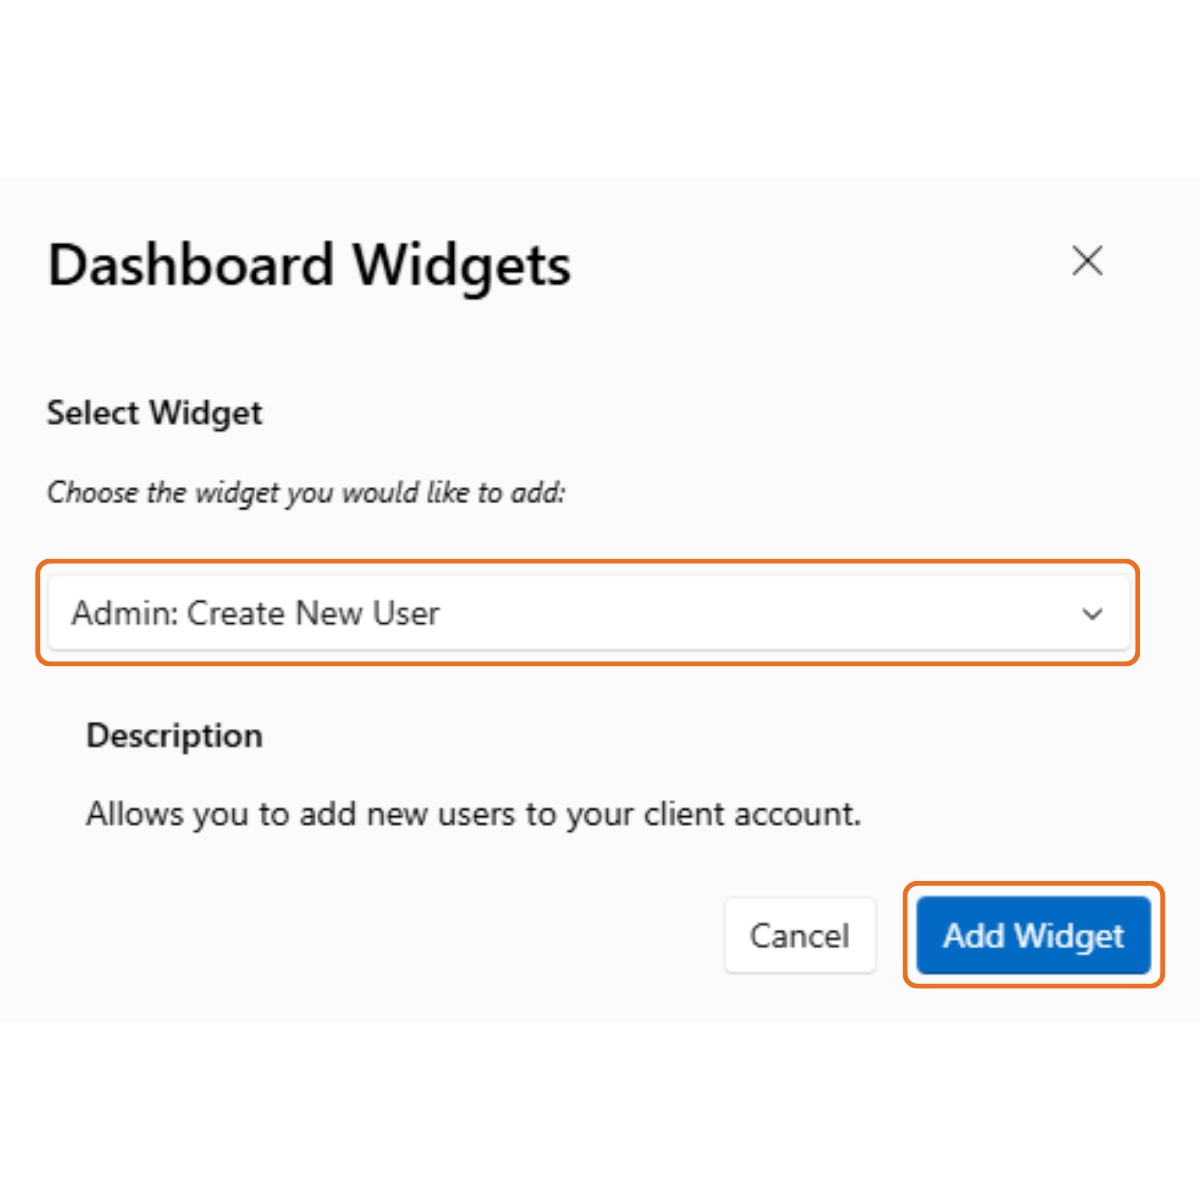
The Dashboard Widgets pop-up gives you the option to select a new widget to add to your dashboard from a list of all the widgets available to you (that have not already been added). 

Use the drop-down box to choose the widget you would like to add. 

The description below will change to describe the widget you have selected. 

Click Add Widget to close the pop-up to return to the editable dashboard. 

The Create New User Widget

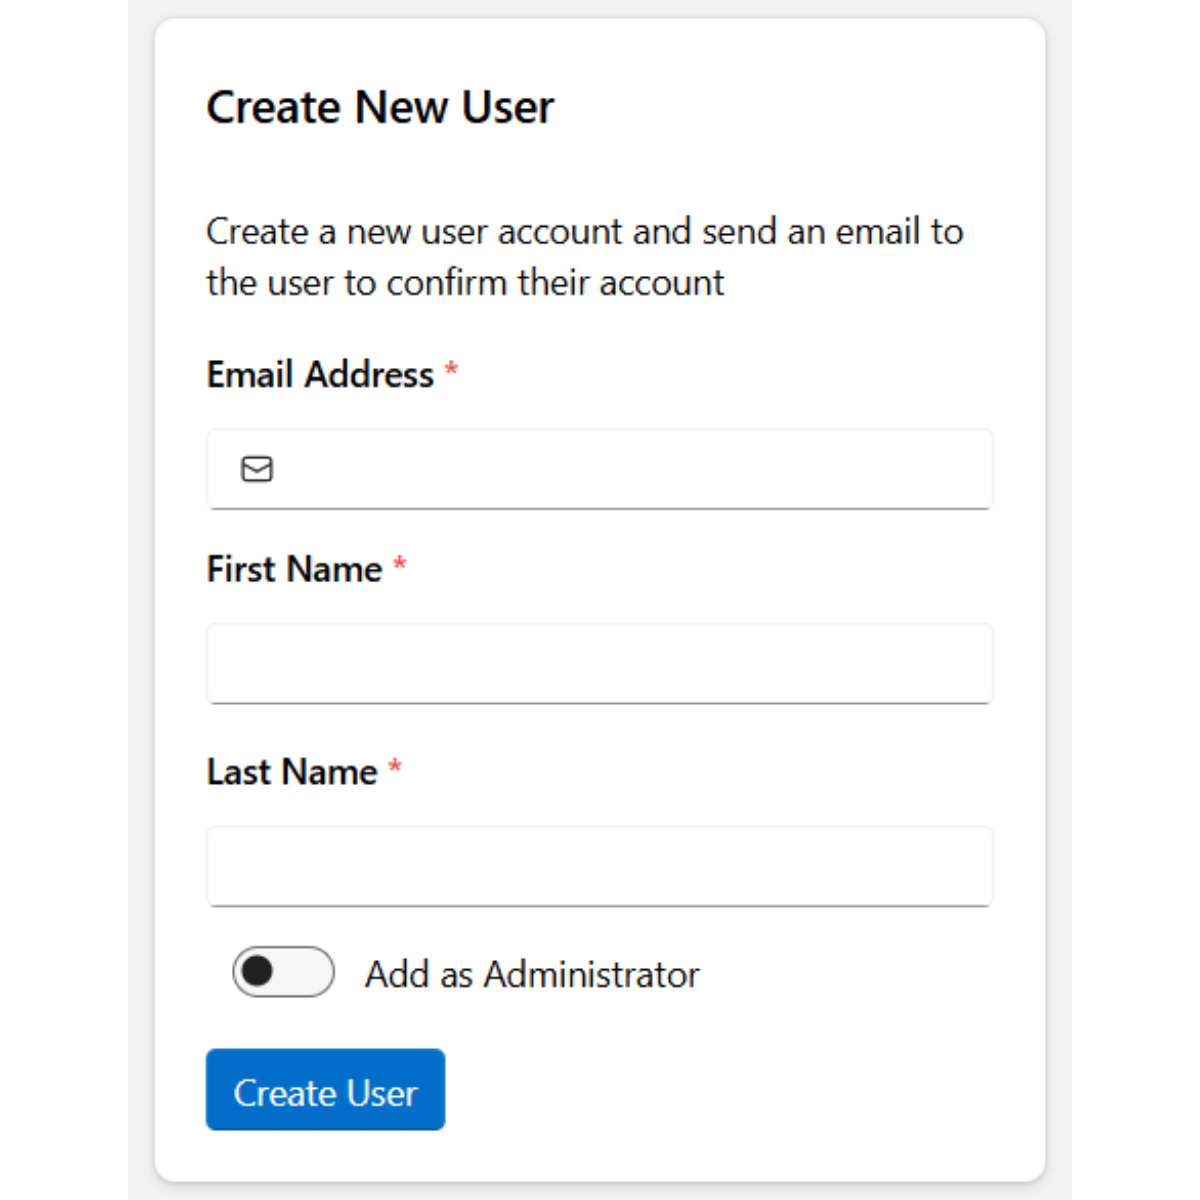
The Create New User widget allows an administrator to create a new user account, triggering an email to be sent to the user to confirm their account.

To create a new user, the following information must be provided:

  • Email Address
  • First Name
  • Last Name


You can also choose whether you would like to give the new user administrative permissions. 

The Recent Cleansing Jobs Widget

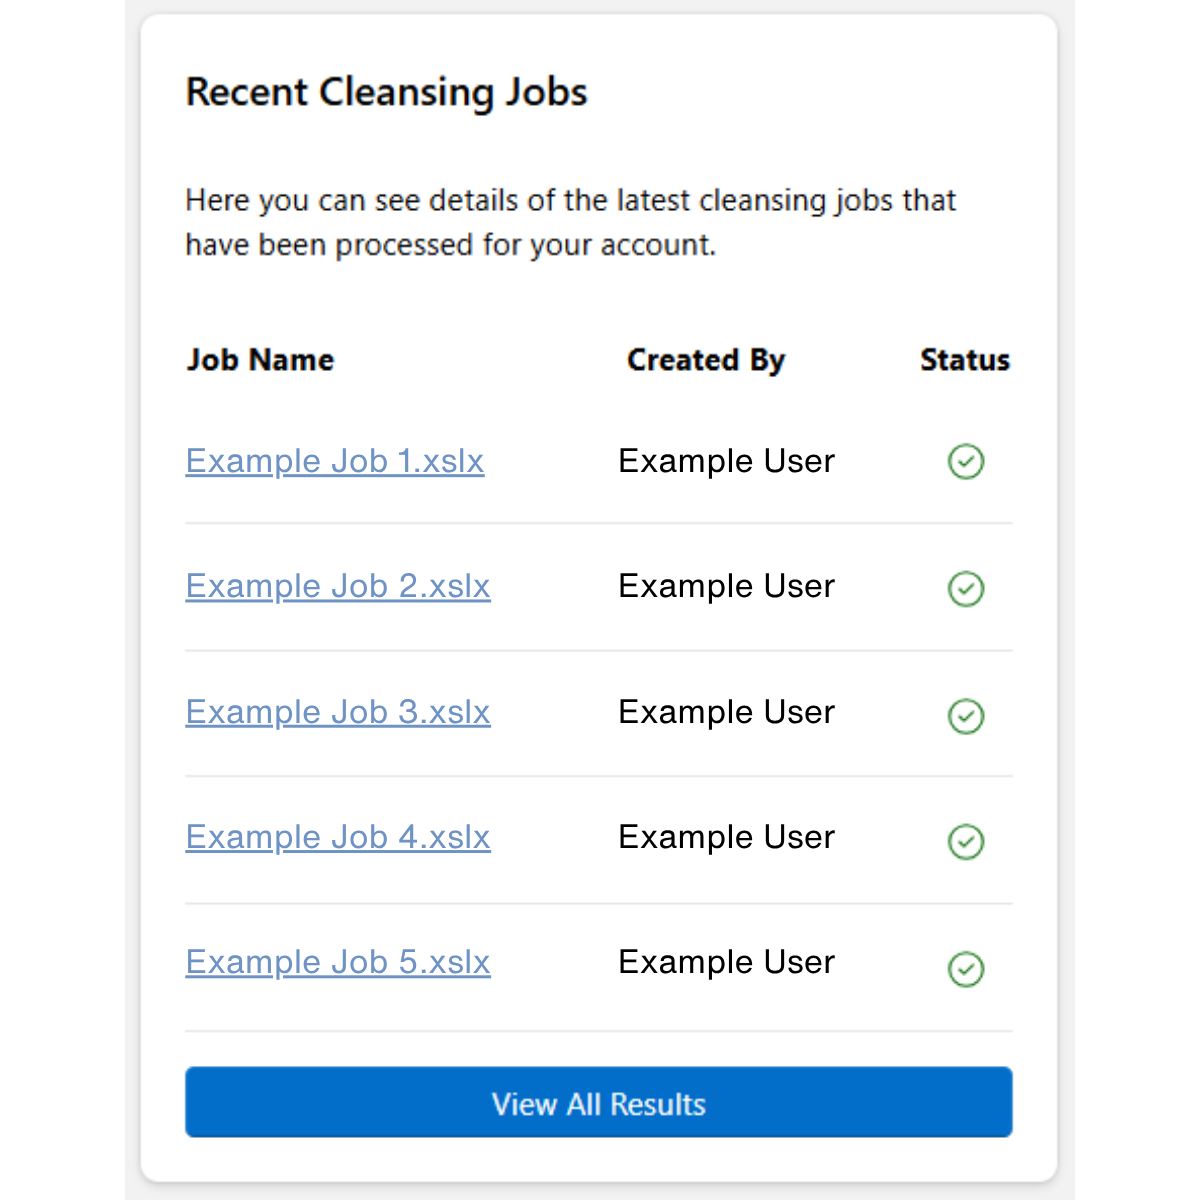
The Recent Cleansing Jobs widget displays the name, creator and status of the 5 most recently ran data cleansing jobs. 

Clicking View All Results will take you to the Download Cleansed Data screen, where you can search for all cleansed data jobs that have previously run.

The Start New Cleansing Job Widget

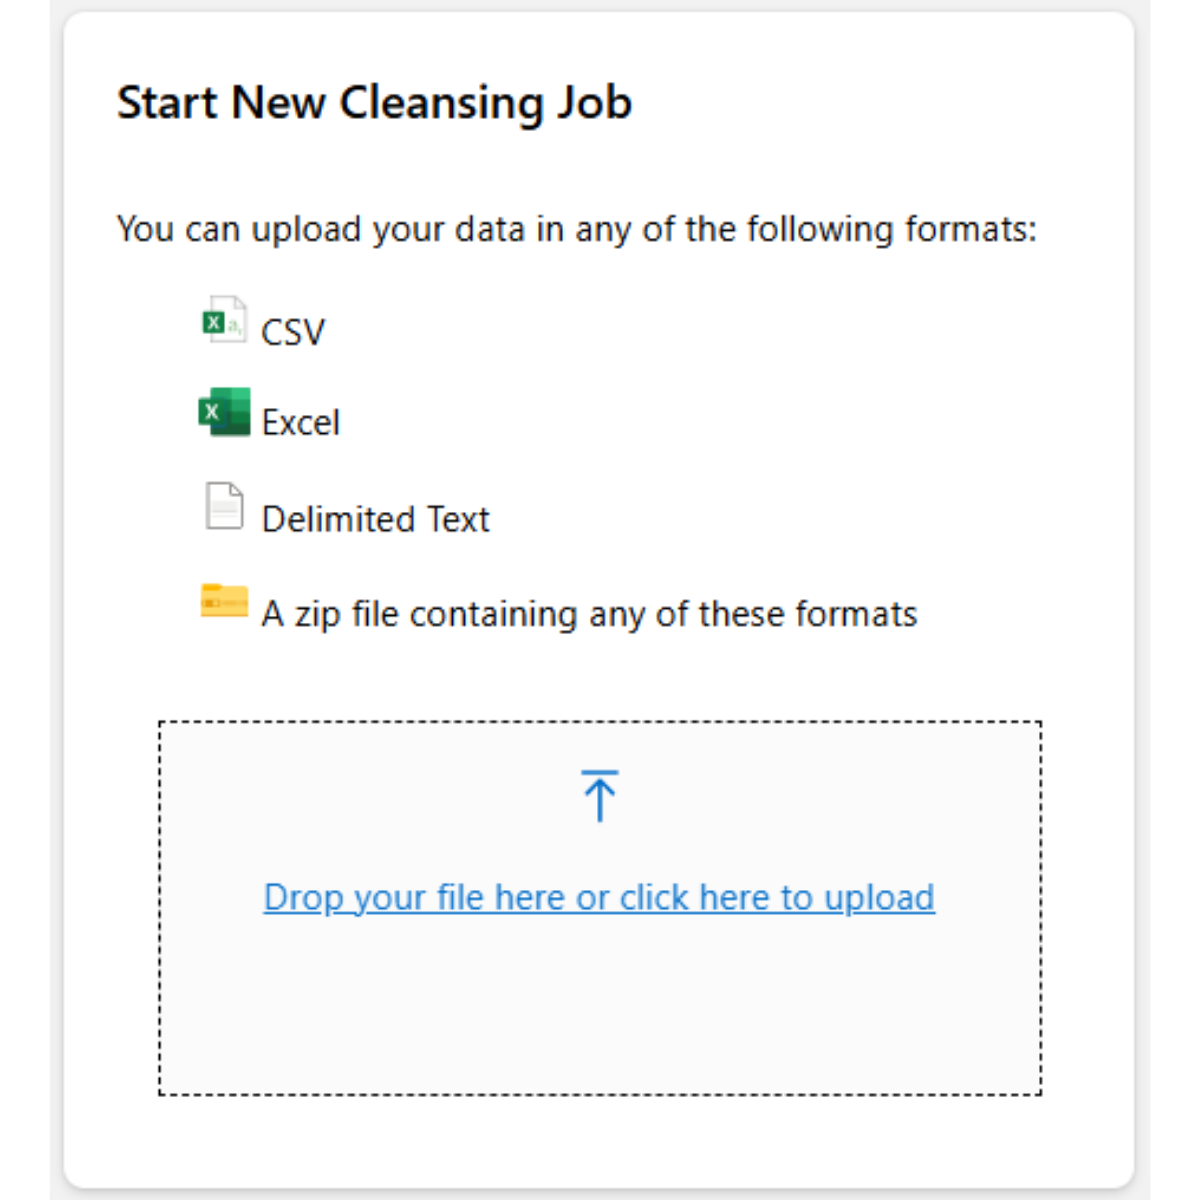
The Start New Cleansing Job widget displays the accepted file formats that can be used to import data within the Data8 Online Portal, and a box to upload your file by either drag and drop or click to upload. 

The Bank Account Validation Widget

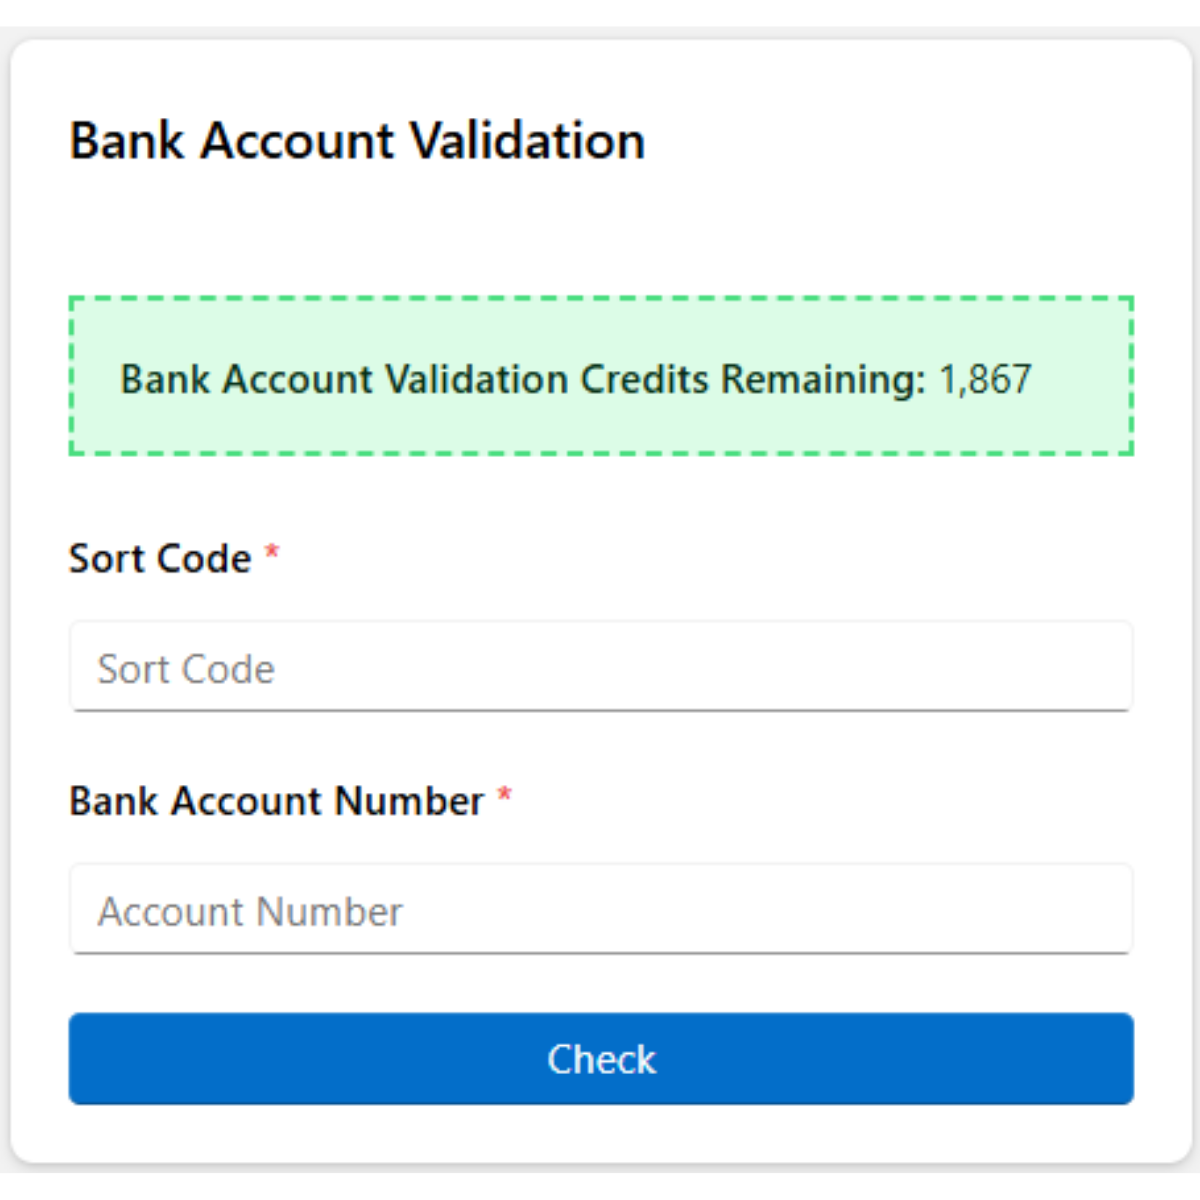
The Bank Account Validation widget will display the number of credits available in your account for running bank account validation queries.

N.B: If your credits are 0 there will be a link to purchase additional credits below this. 

To validate a bank account, the following information must be provided:

  • Sort Code
  • Bank Account Number


Click Check to run validation.

The Business Validation Widget

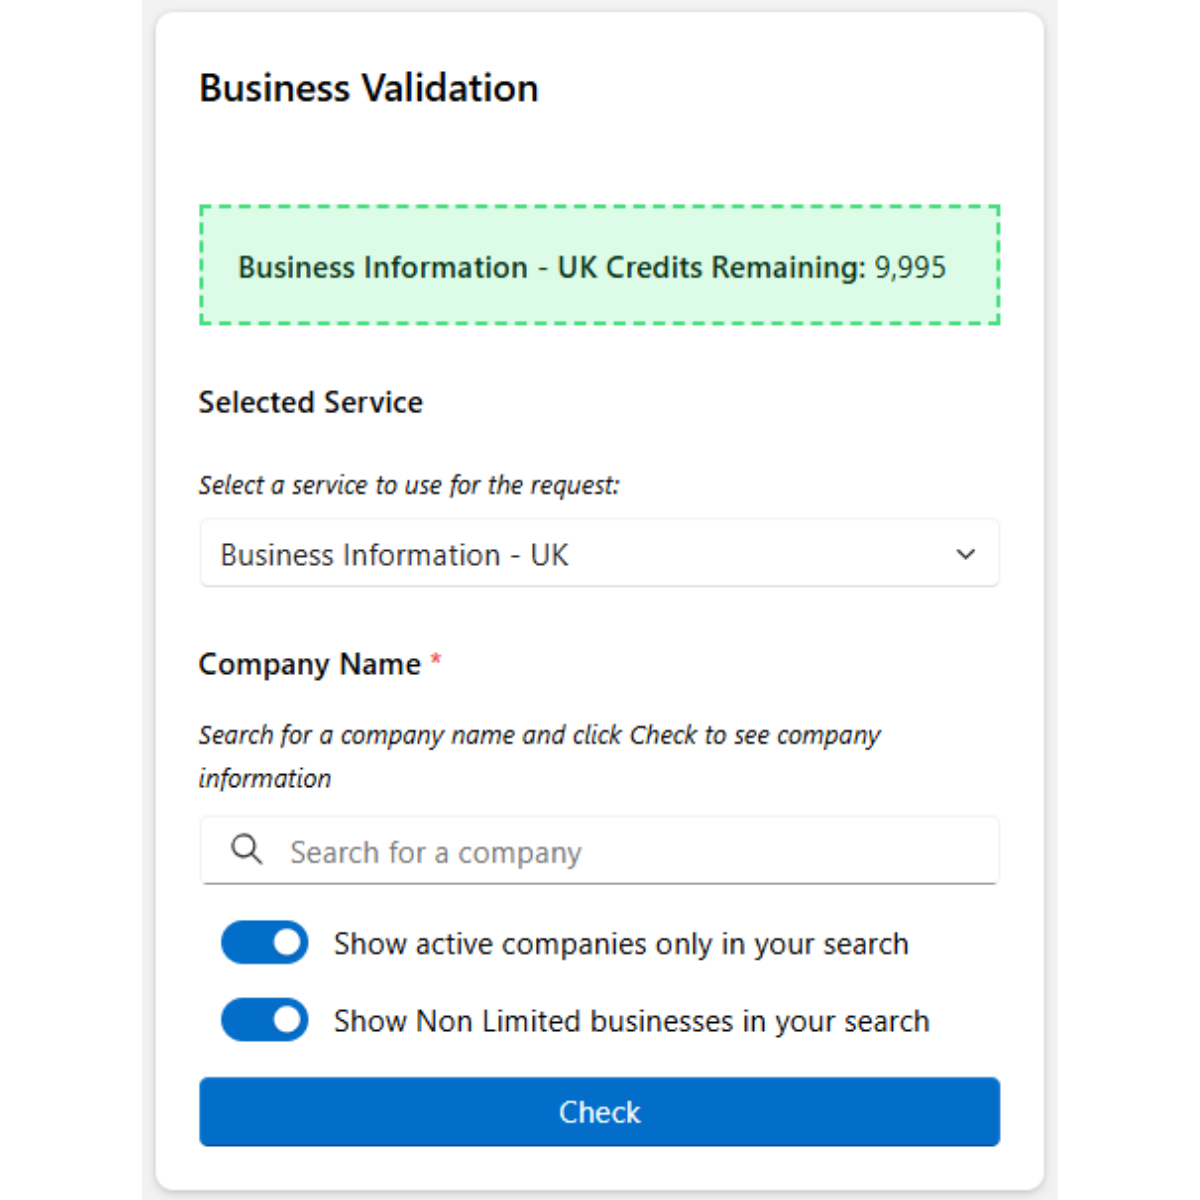
The Business Validation widget will display the number of credits available in your account for running business validation queries.

N.B: If your credits are 0 there will be a link to purchase additional credits below this. 

To validate a business, the following information must be provided:

  • Which service you would like to use
  • Company Name 


Click Check to run validation.

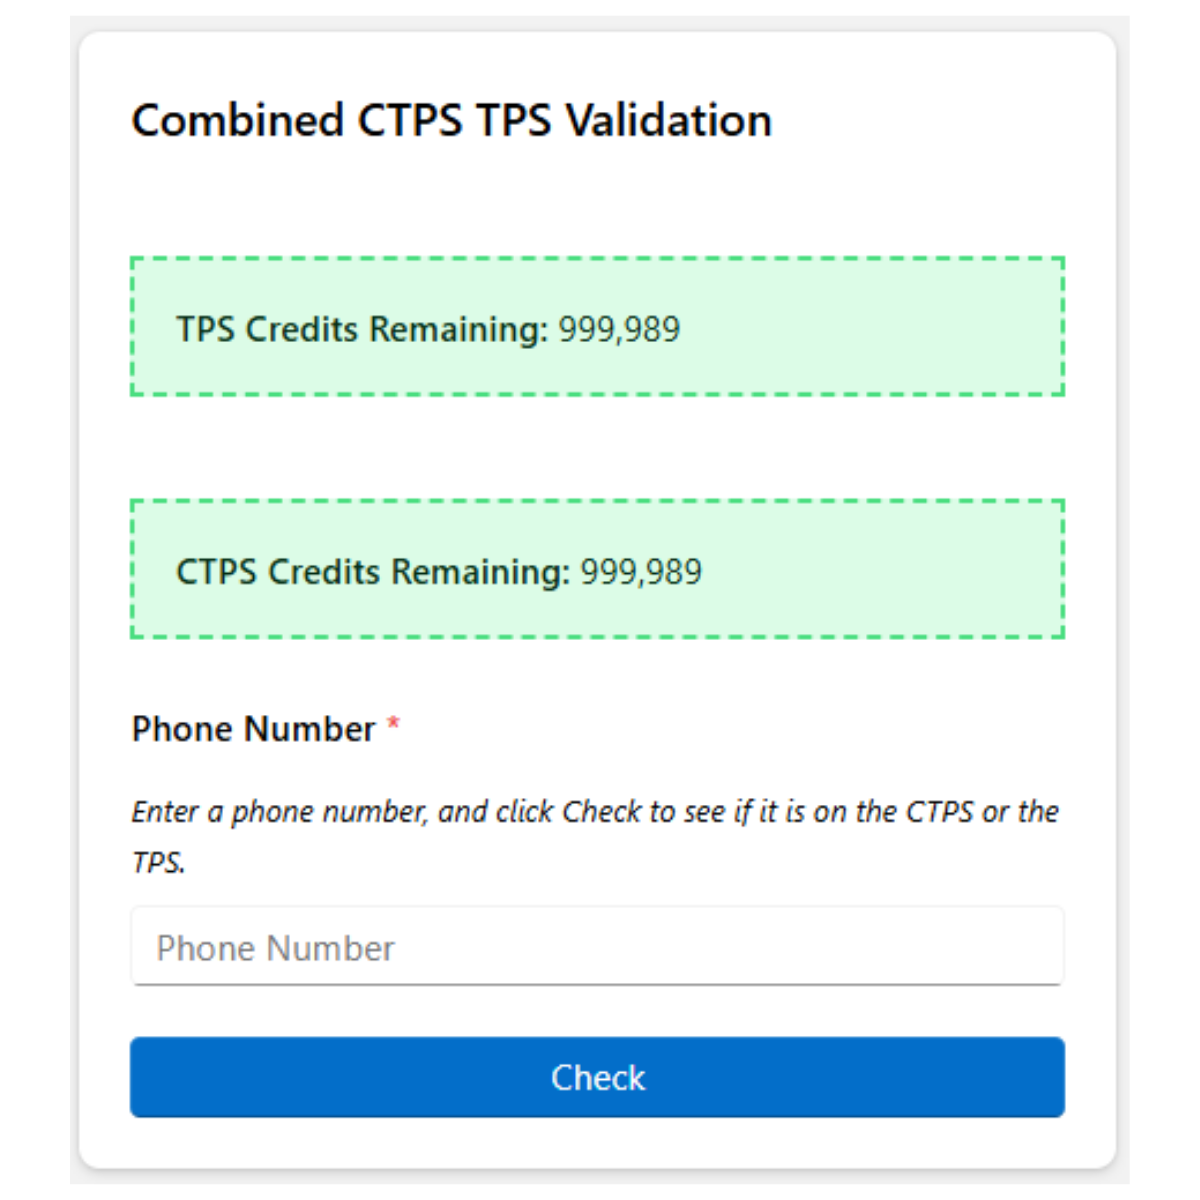
The Combined CTPS TPS Validation Widget

The Combined CTPS TPS Validation widget will display the number of credits available in your account for running both TPS and CTPS validation queries.

N.B: If your credits are 0 there will be a link to purchase additional credits below this. 

To validate a phone number against CTPS and TPS, the following information must be provided:

  • Phone Number


Click Check to run validation.

There is also a separate CTPS Validation and TPS validation widget if you only require one of these services.

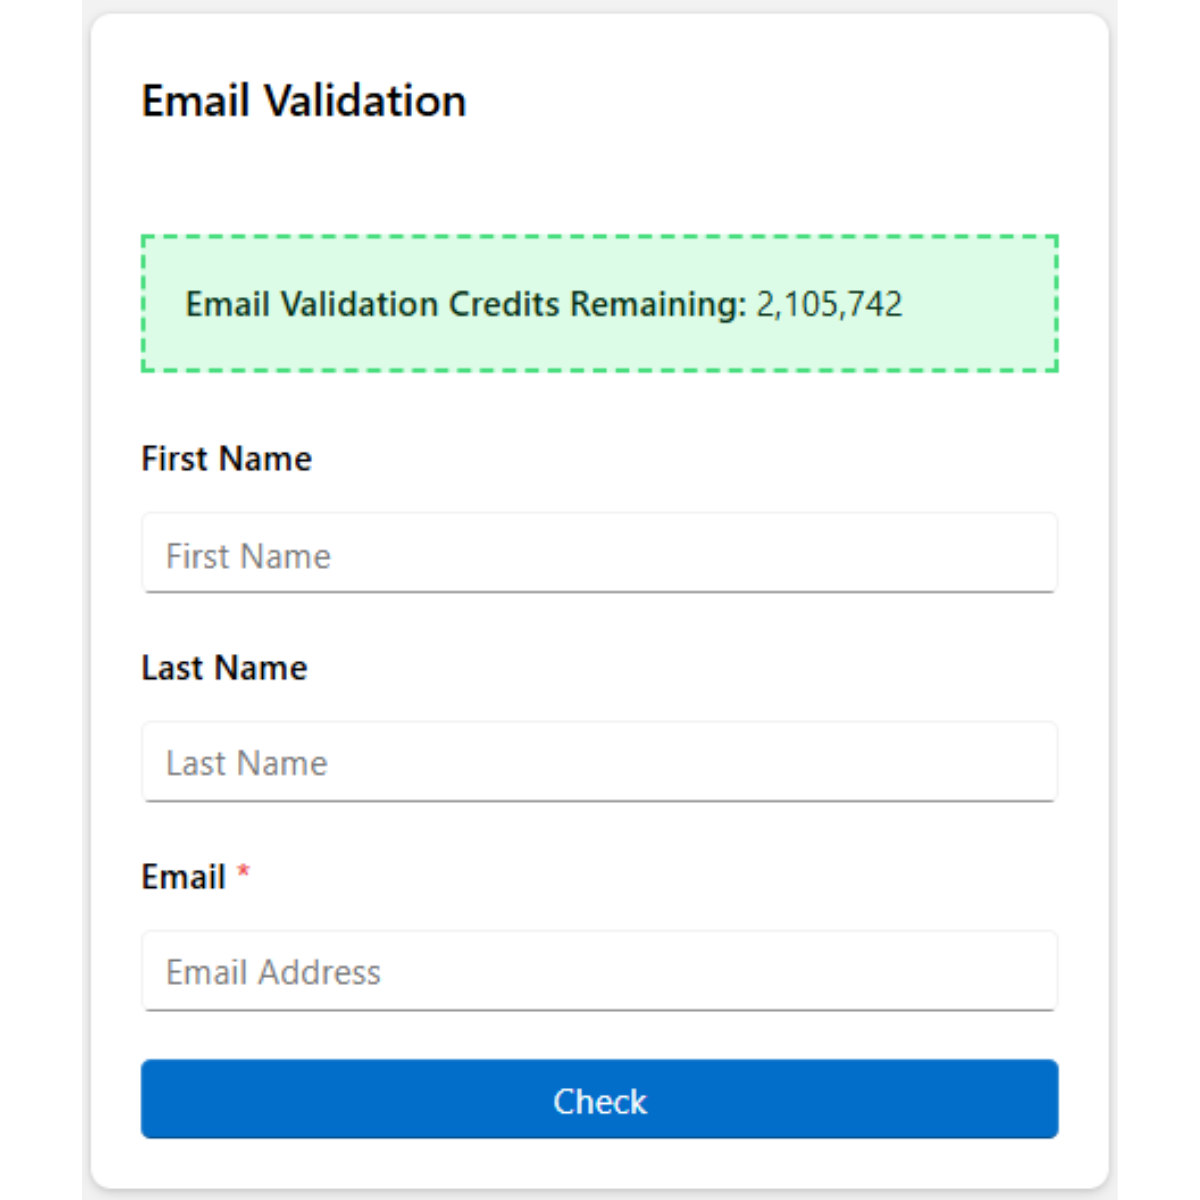
The Email Validation Widget

The Email Validation widget will display the number of credits available in your account for running email validation queries.

N.B: If your credits are 0 there will be a link to purchase additional credits below this. 

To validate an email address, the following information must be provided:

  • First Name
  • Last Name
  • Email Address


Click Check to run validation.

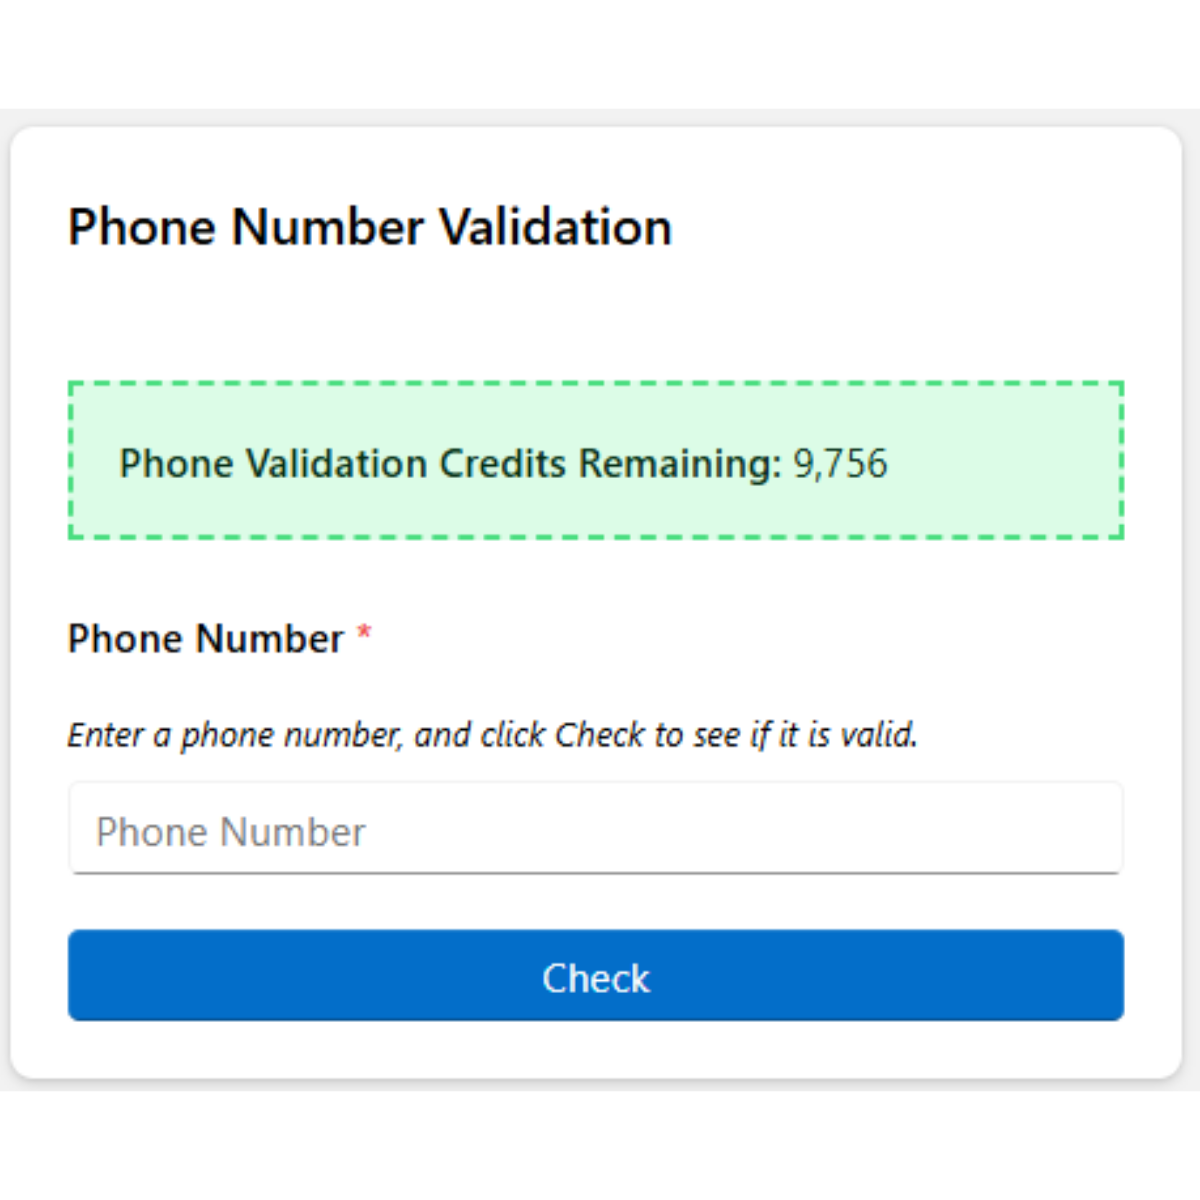
The Phone Validation Widget

The Phone Validation widget will display the number of credits available in your account for running phone validation queries.

N.B: If your credits are 0 there will be a link to purchase additional credits below this. 

To validate a phone number, the following information must be provided:

  • Phone Number 


Click Check to run validation.

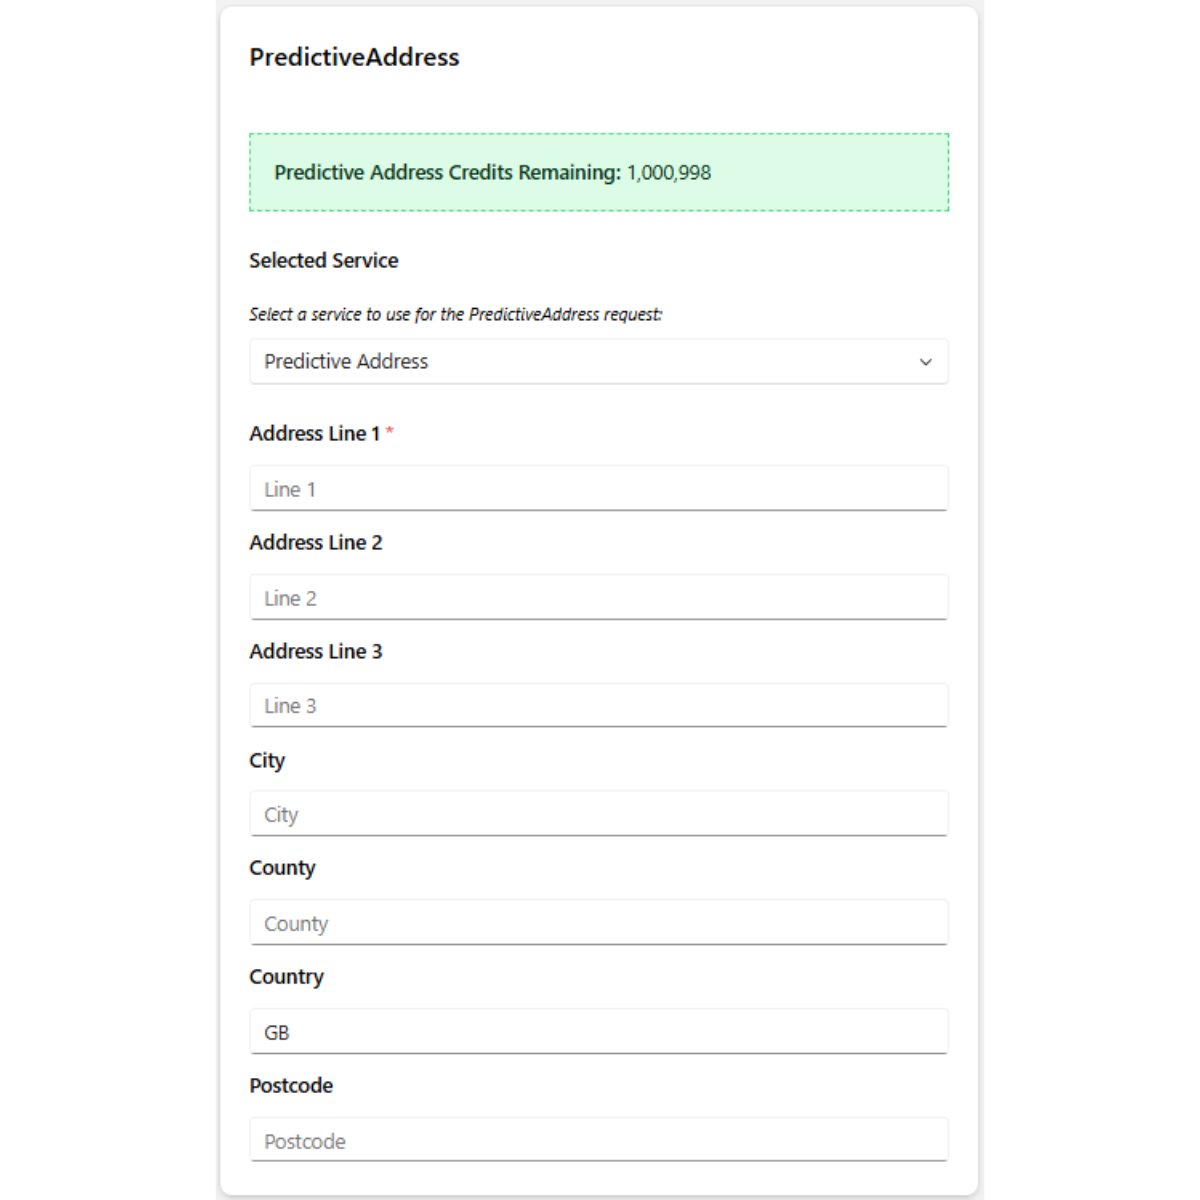
The PredictiveAddress Validation Widget

The PredictiveAddress Validation widget will display the number of credits available in your account for running address validation queries.

N.B: If your credits are 0 there will be a link to purchase additional credits below this. 

To validate an address, the following information must be provided:

  • Which service you would like to use
  • Address Line 1
  • Address Line 2
  • Address Line 3
  • City 
  • County
  • Country
  • Postcode 


As you input the information, the widget will update automatically, suggesting address options in real-time to streamline the data entry process.

Click Check to run validation.

The Add New Web Services Widget

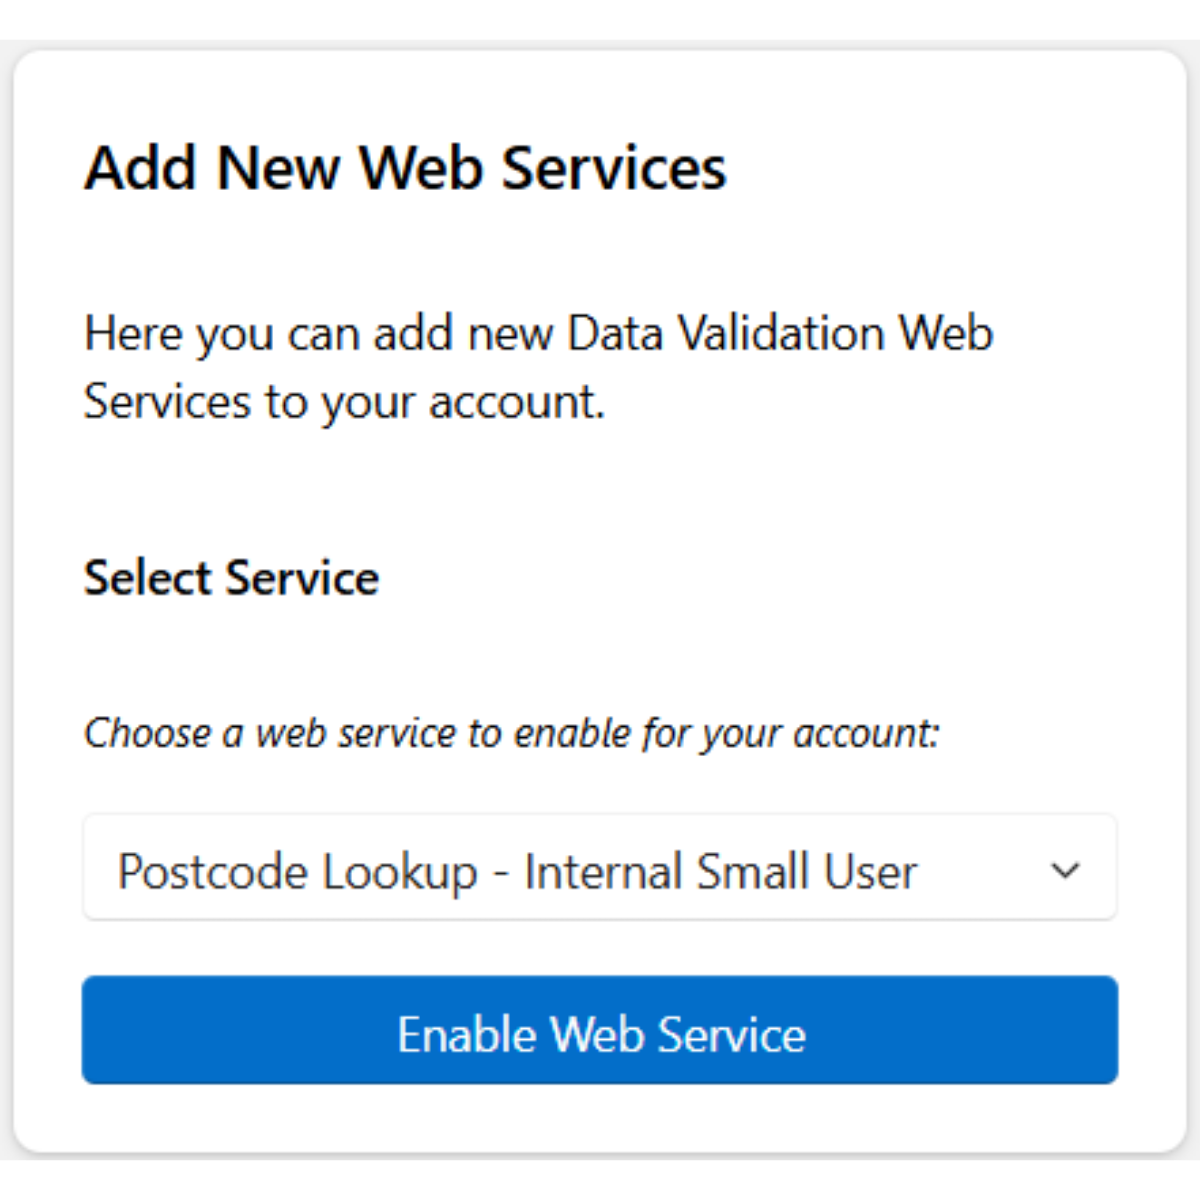
The Add New Web Services widget displays a drop-down list of web services which can be accessed via the Data8 Online Portal. 

Each web service needs to be added individually by selecting it from the list and clicking Enable Web Service.

The Unify Credit Widget

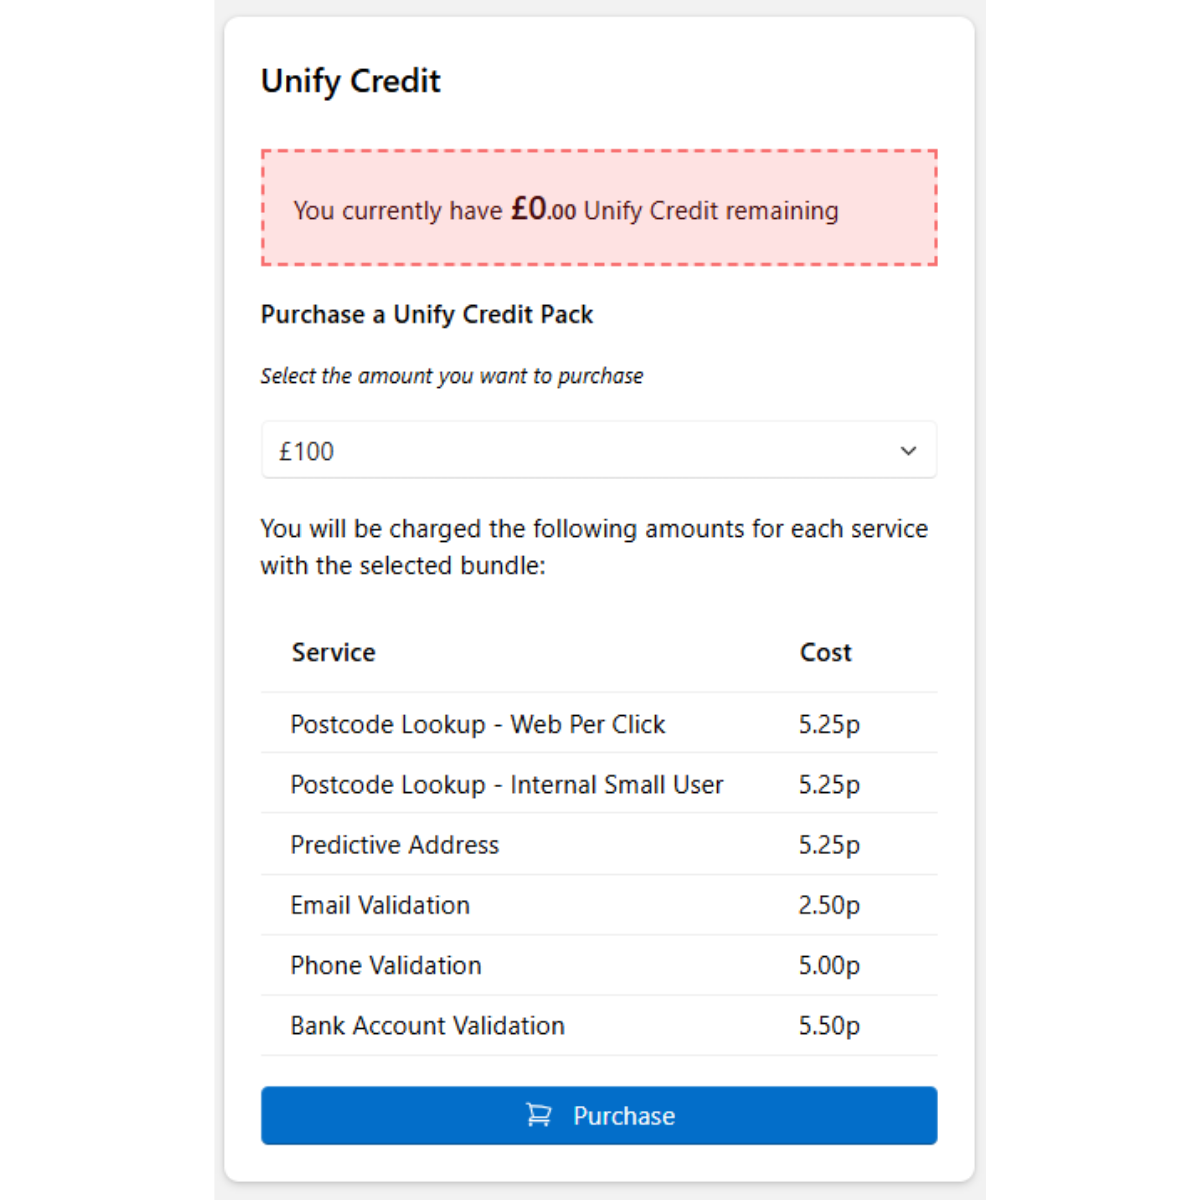
The Unify Credit widget displays the number of unify credits available in your account.

Below this, there is a drop-down which enables you to purchase additional unify credits.

The next section on the Widget provides you with both the name of the Service and the Cost of that service.

Click Purchase to buy additional unify credits.

Join the Conversation

Receive the latest news, views and hot topics directly in your inbox! Sign up below

Follow us on social media

Data8
Privacy Overview

This website uses cookies so that we can provide you with the best user experience possible. Cookie information is stored in your browser and performs functions such as recognising you when you return to our website and helping our team to understand which sections of the website you find most interesting and useful.