How to Run a Data Cleansing Job

This guide will cover the necessary steps and screens involved in running a data cleansing job within the Data8 Online Portal, providing a detailed walkthrough from start to finish. 

Uploading a File

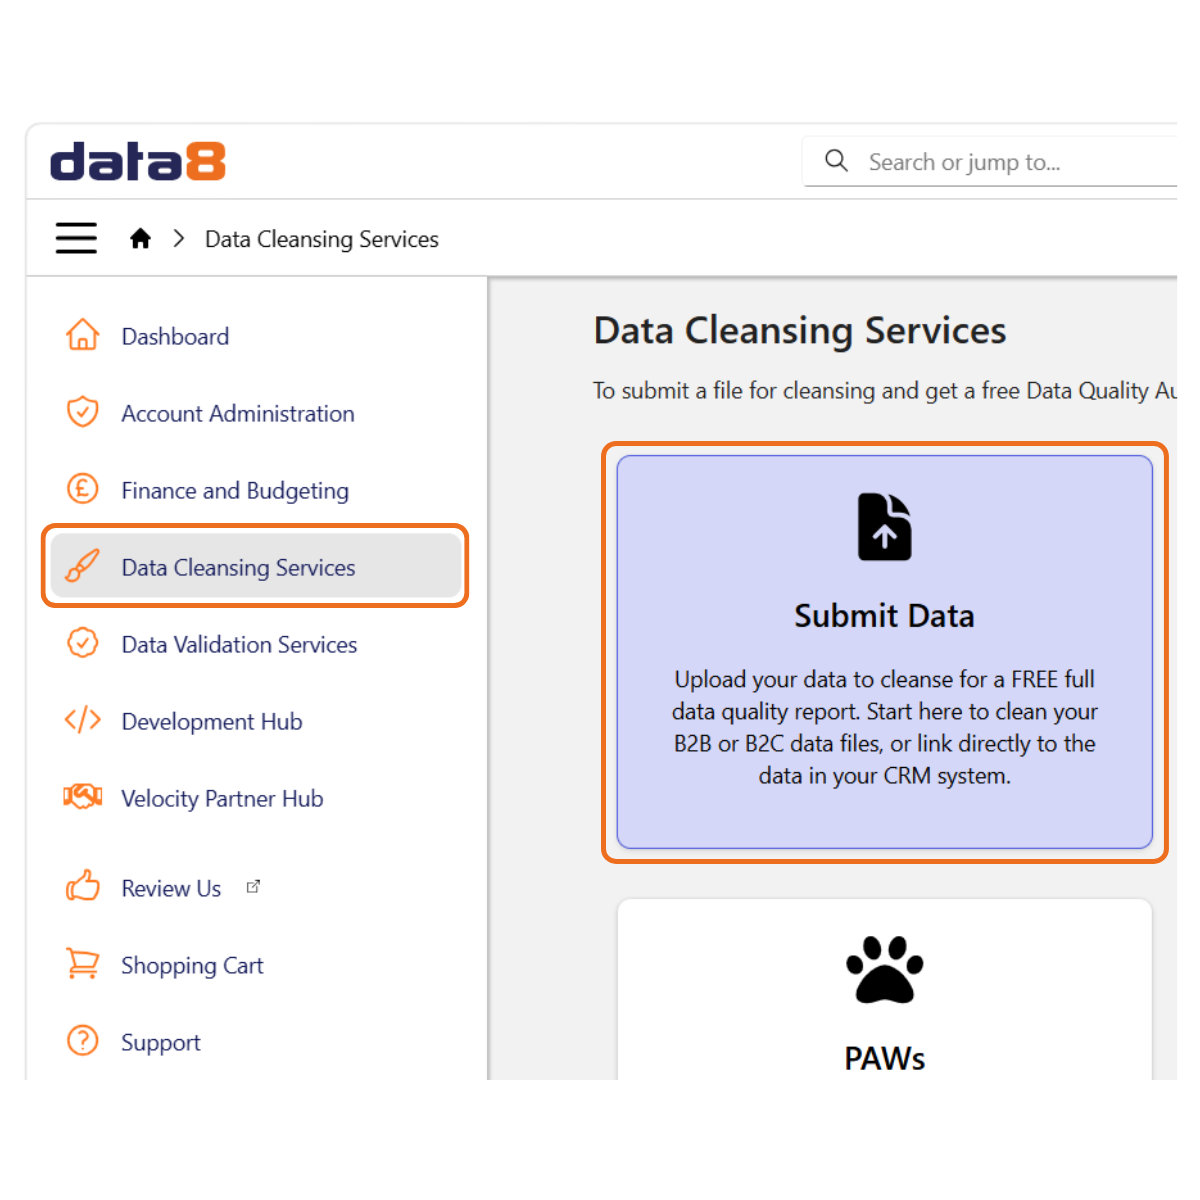
Click on the Data Cleansing Services tab to open the Data Cleansing Services screen. 

There will be a variety of options for you to choose from. 

In this example, select Sumbit Data.

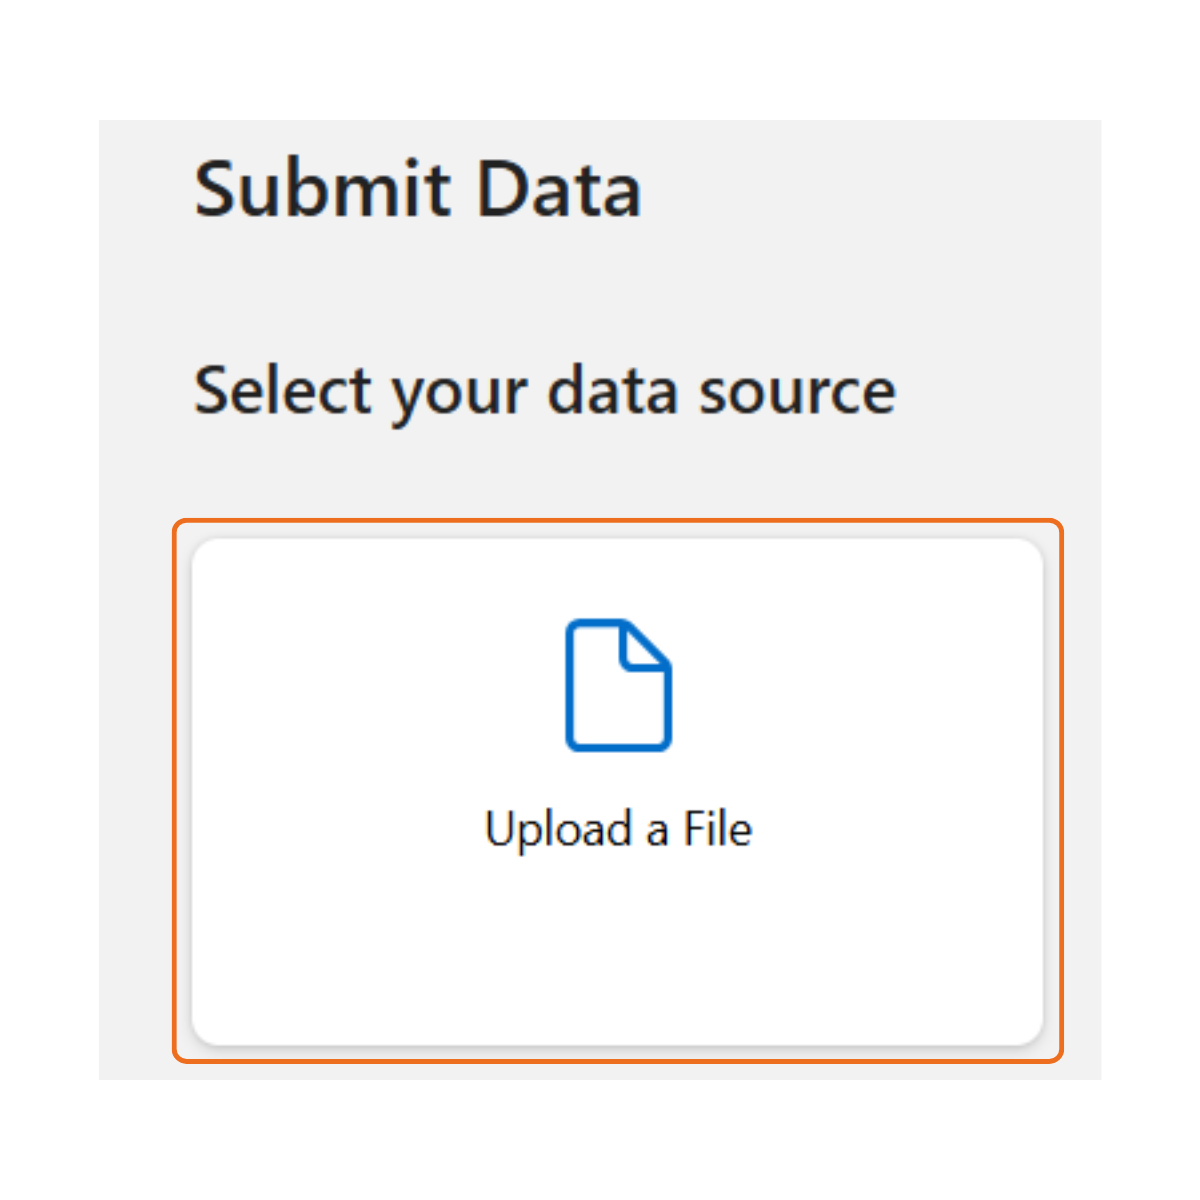
The Submit Data screen gives you the choice of three options:

  • Upload a File: Browse and locate the file you wish to cleanse from your device
  • Choose Existing File: Reuse a file that has previously been uploaded
  • Add a New CRM Connection: Create a connection to your CRM system (enabling data from a specified CRM system to be used in the cleansing process)


In this example, select Upload a File.

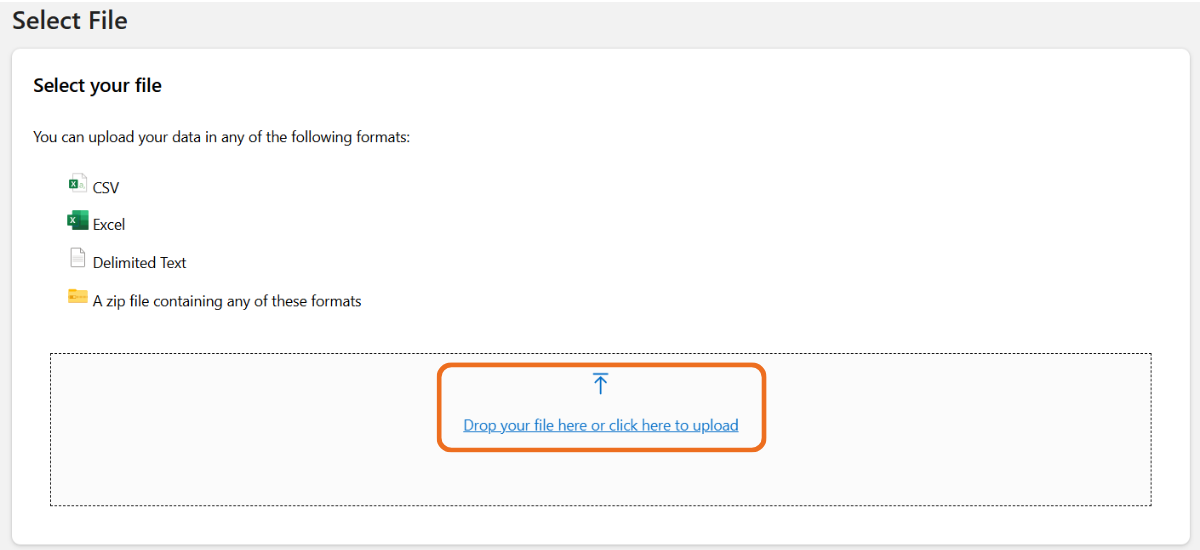
The Select File screen specifies the accepted formats (CSV, Excel and Delimited files) and provides two options for uploading your data – drag and drop or click to upload. 

N.B: ZIP files are accepted if they contain one of the supported file types.

In this example, you can upload your file either way. 

Mapping Columns

Your data will now be displayed in the Map Columns screen.

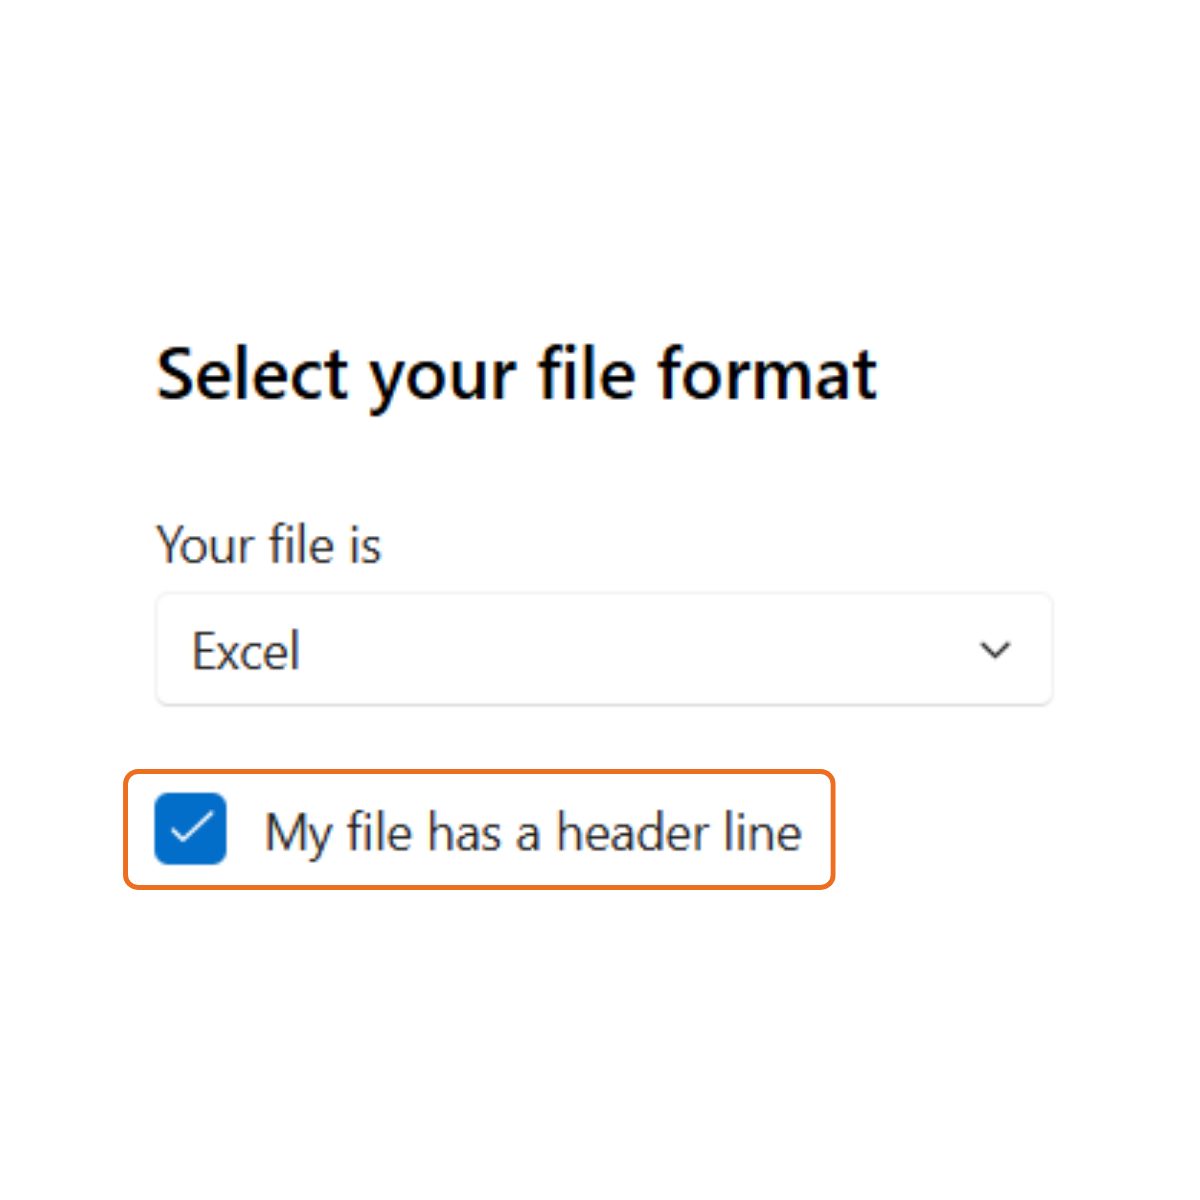
At the top is the Select your file format section.

When your file is uploaded, the system will verify the format and auto-detect whether it contains a header line. 

These can be overridden if needed. 

N.B. Always ensure that the checkbox is ticked if your file contains a header line

In this example, check My file has a header line.

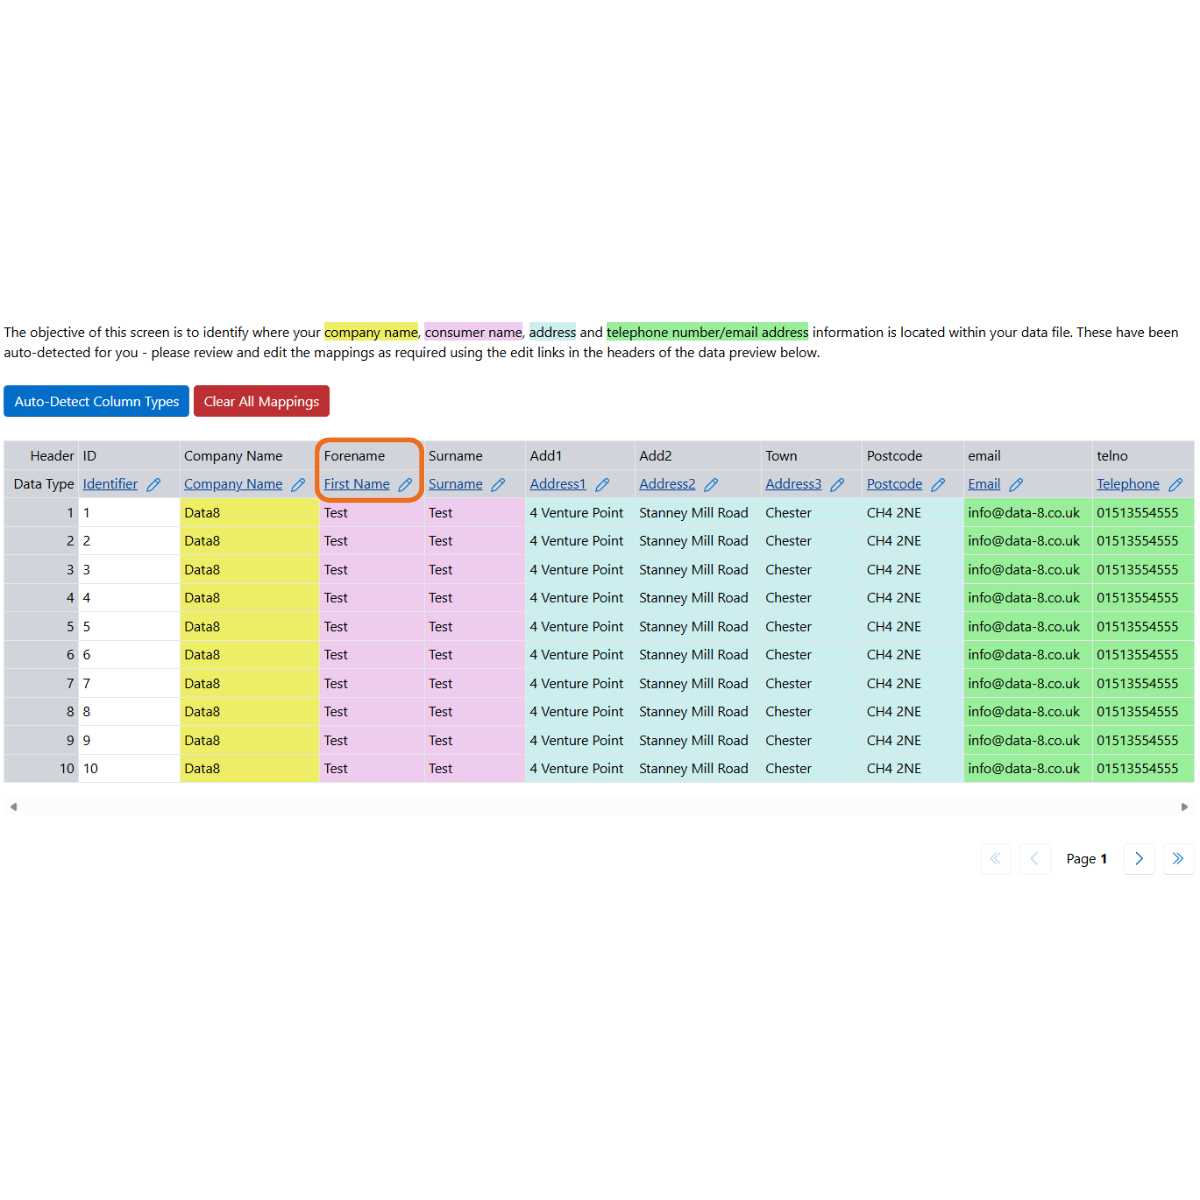
Below your data is displayed in a table for you to review and edit how the system has mapped your columns.

The top row displays the headers from the uploaded file.

The row below translates these to the relevant system header.

In this example, the system has recognised ‘Forename’ as the ‘First Name’ system header.

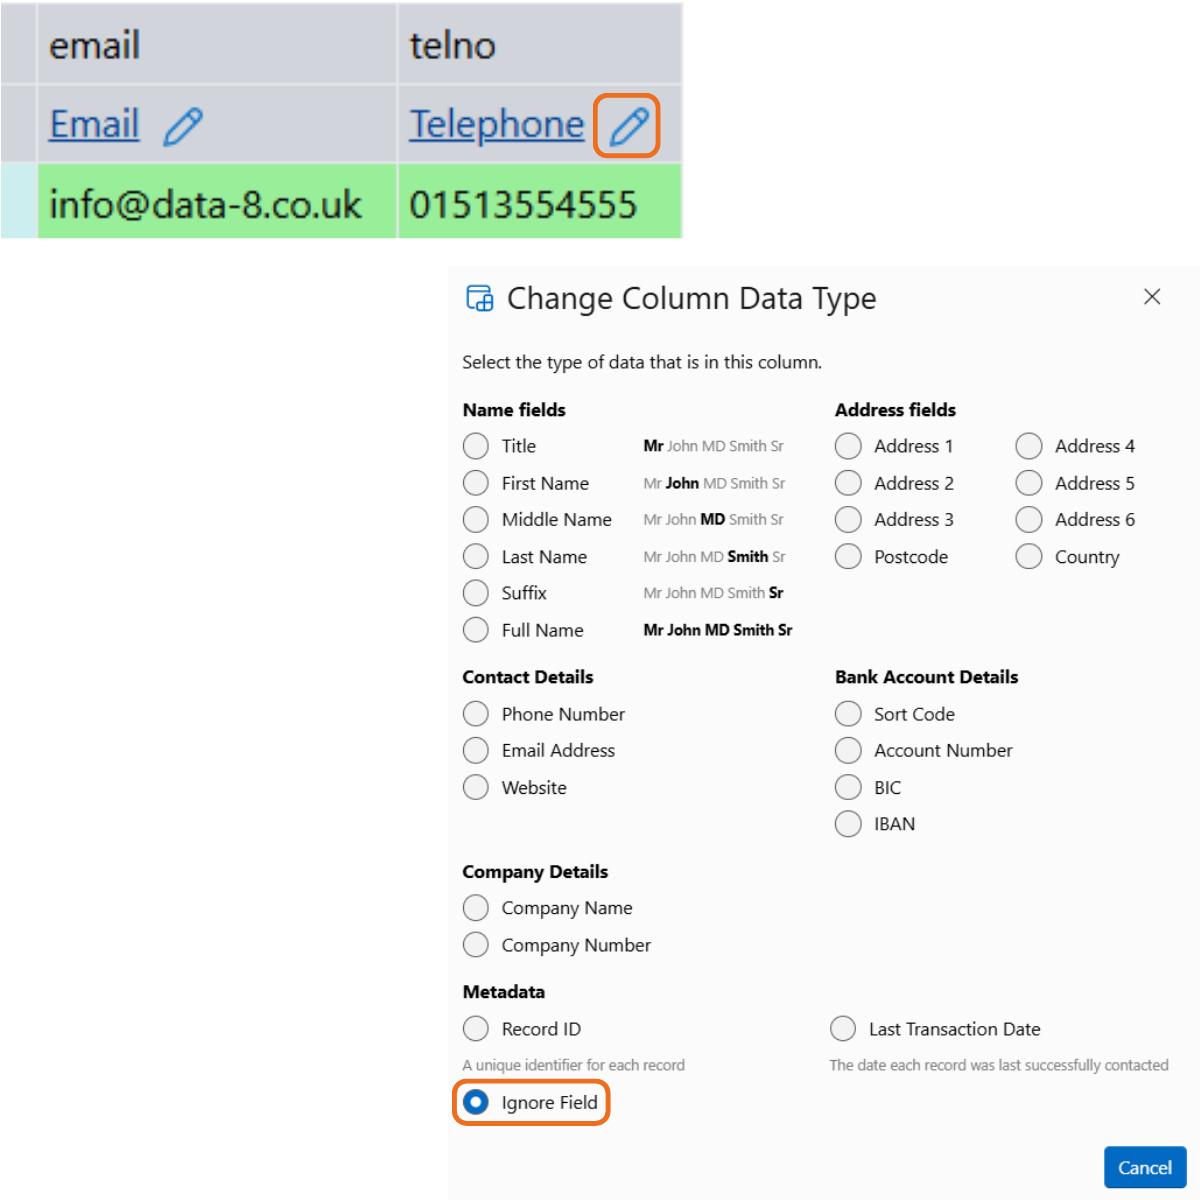
If any of the columns have been mapped incorrectly, they can be amended using the Edit button.

In this example, click the Edit button to open the Change Column Data Type pop-up. 

This gives you the option to adjust the data type of each individual column, with all available header fields displayed.

In this example, check Ignore Field to exclude the column from this job.

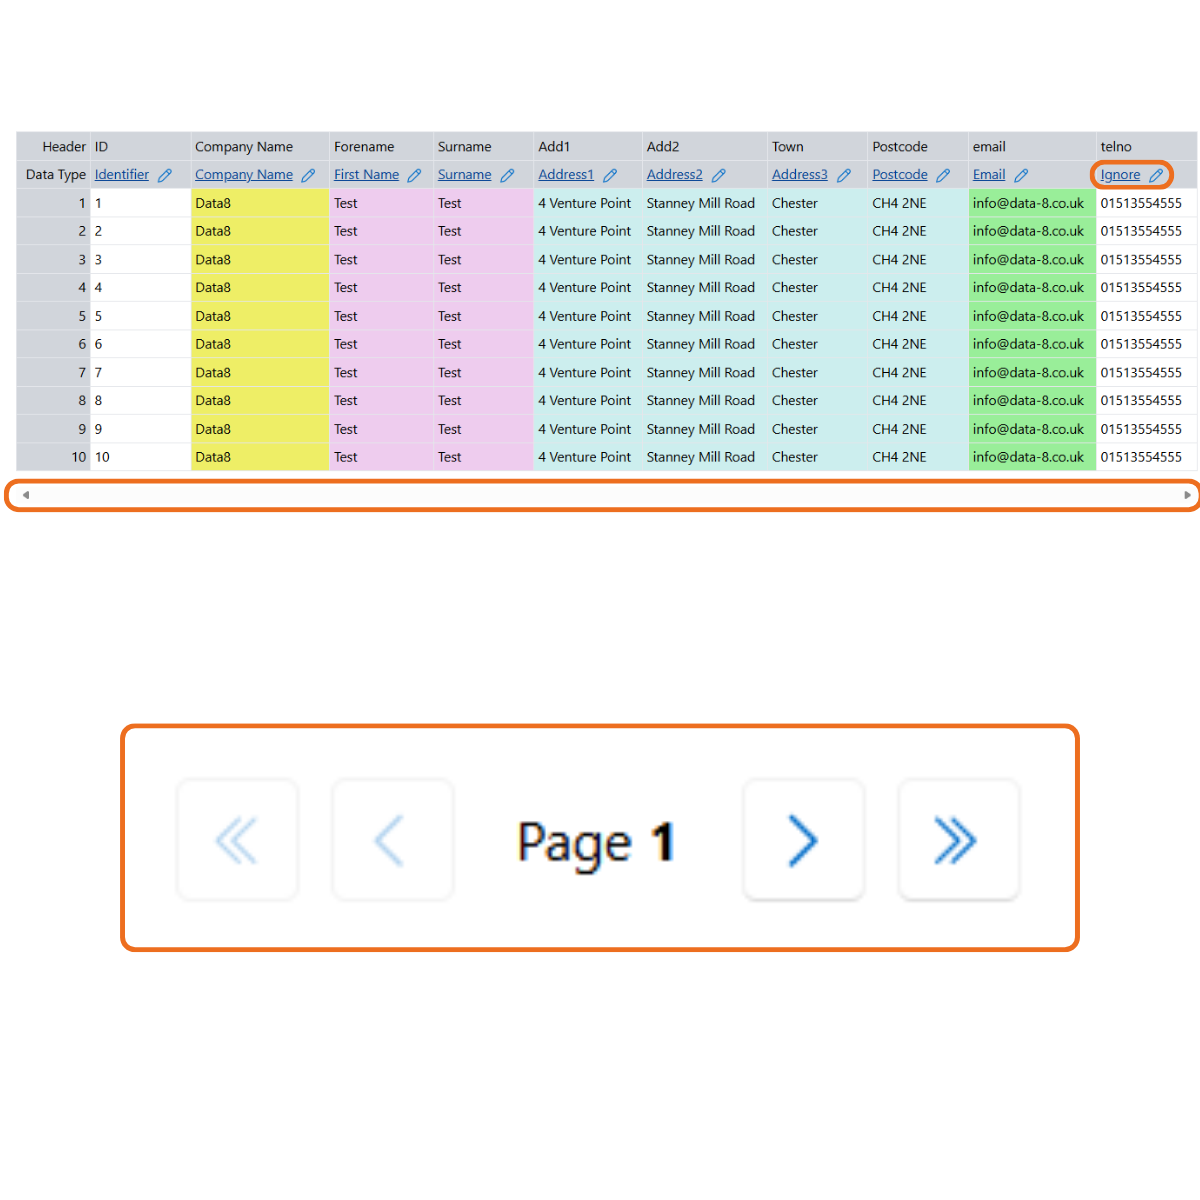
The telno header field has now changed from Telephone to Ignore.

Underneath the data table, left and right arrows allow you to navigate through the data. To check the data being imported is correct and is correctly mapped, with no shifts into incorrect columns.

There is also a screen number indicator with single and double arrows for further navigation.

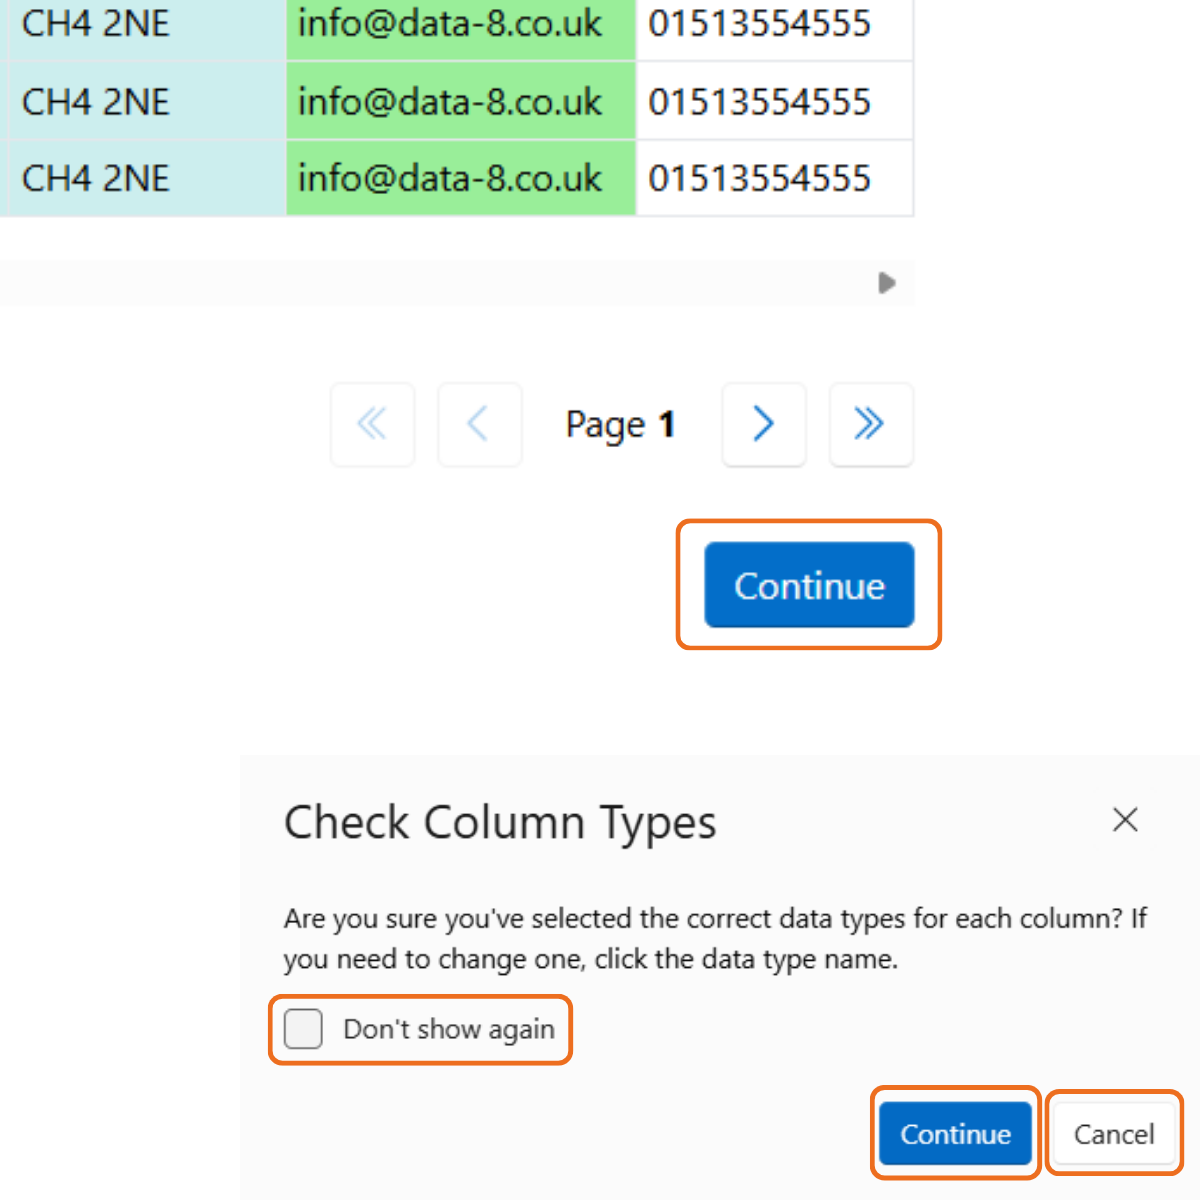
When you are happy with the mapping of your columns, click Continue to open the Check Column Types pop-up.

Click Cancel to return to the Map Columns screen if further amendments are required.

In this example, click Continue.

N.B: Check Don’t show again to prevent this pop-up from showing up on subsequent jobs. 

Creating a Workflow

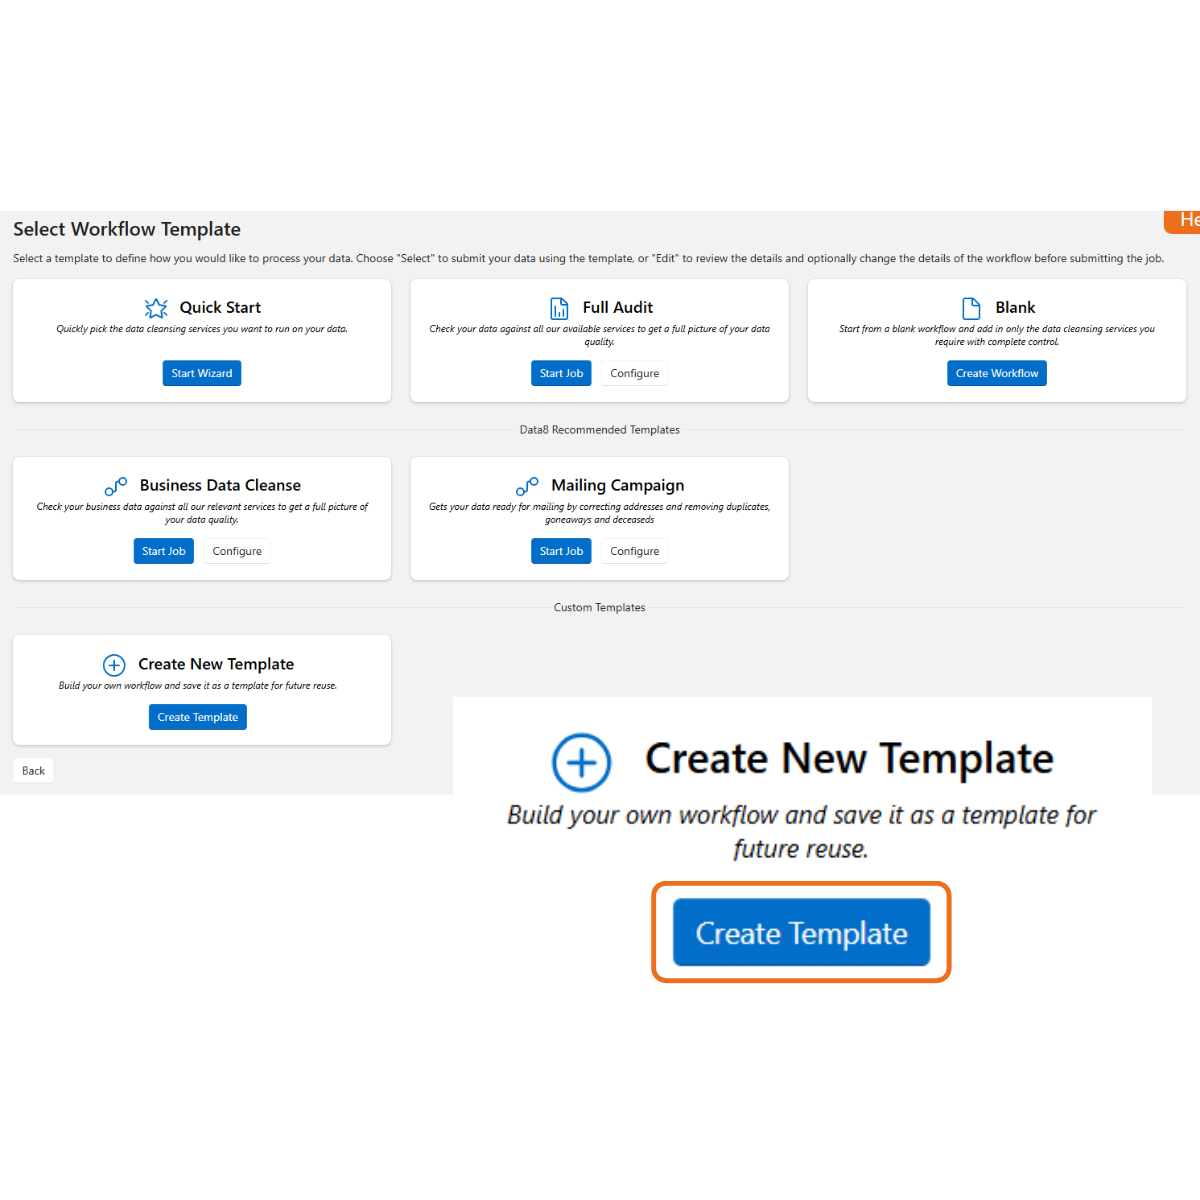
The Select Workflow screen gives you the option to choose from predefined templates or create one from scratch.

The pre-defined templates available include:

  • Quick Start
  • Full Audit
  • Business Data Cleanse 
  • Mailing Campaign


N.B. Additionally there is a Business Data Cleanse template only displayed when the data contains a business name.

In this example, select Create Template.

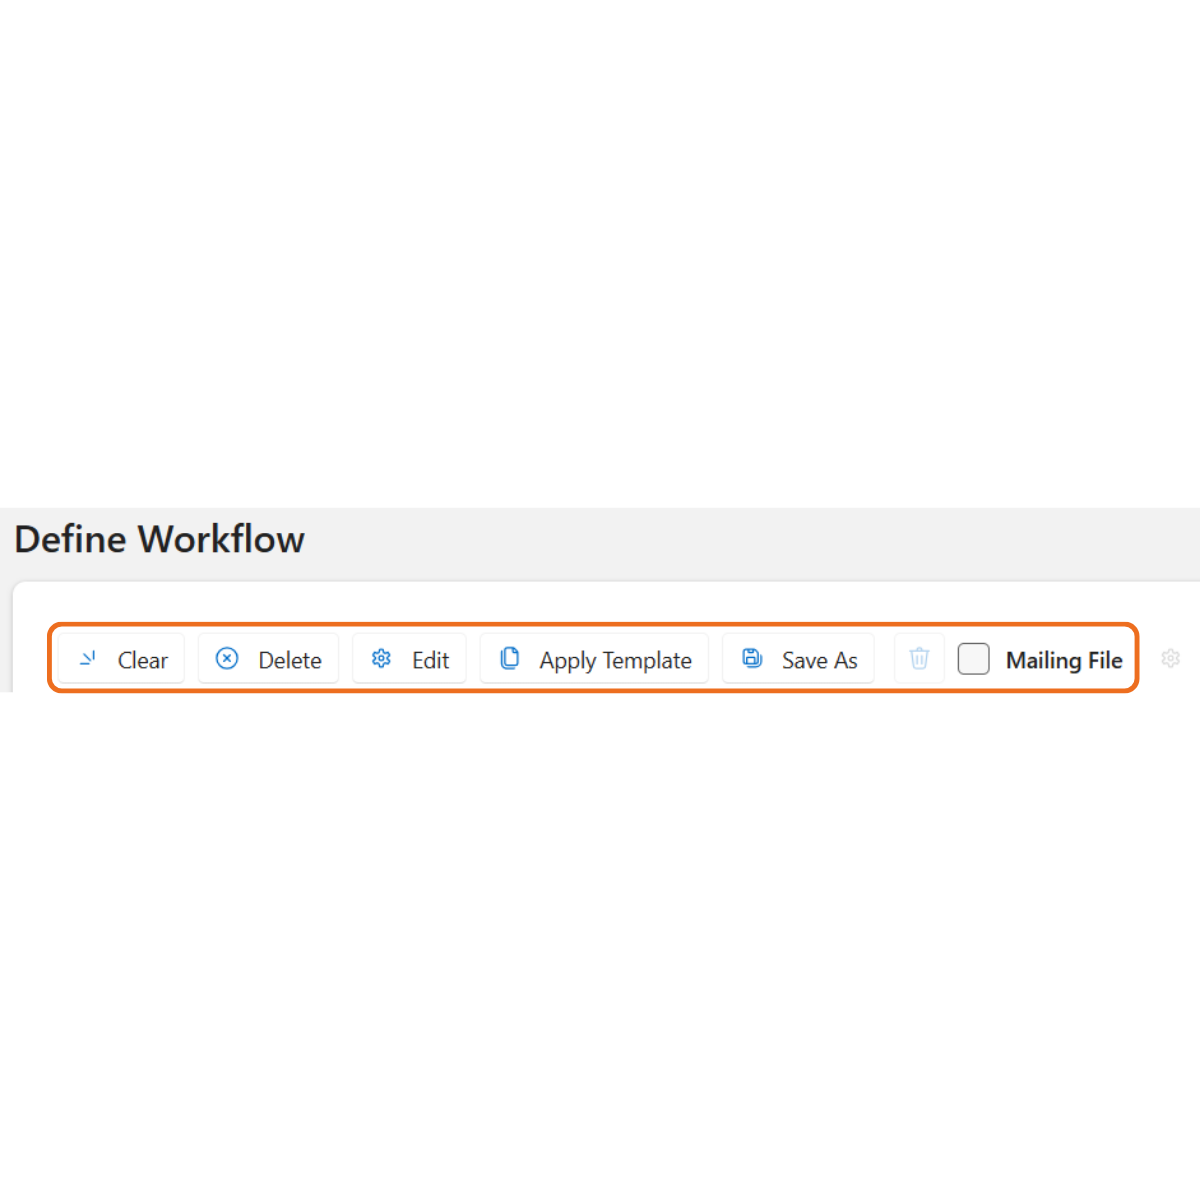
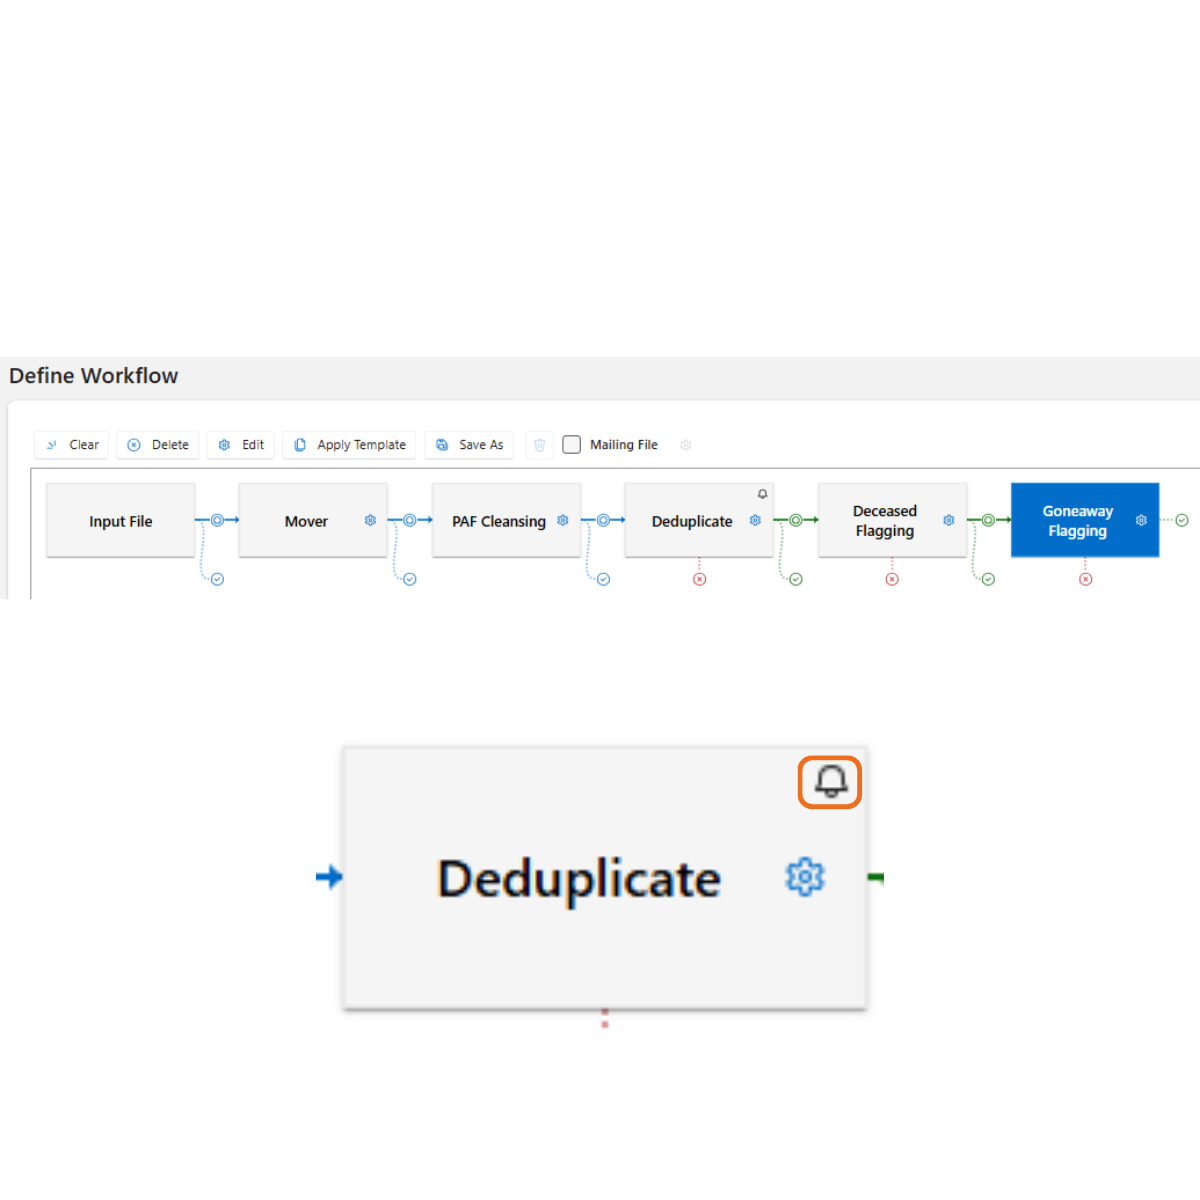
The Define Workflow screen is where you will configure your workflow.

Above the workspace there are several buttons:

  • Clear: Removes all services from the workflow
  • Delete: Removes a highlighted service from the workflow 
  • Edit: Opens a pop-up to modify a highlighted service within the workflow
  • Apply Template: Opens the Select Template pop-up, displaying all the  templates available to you
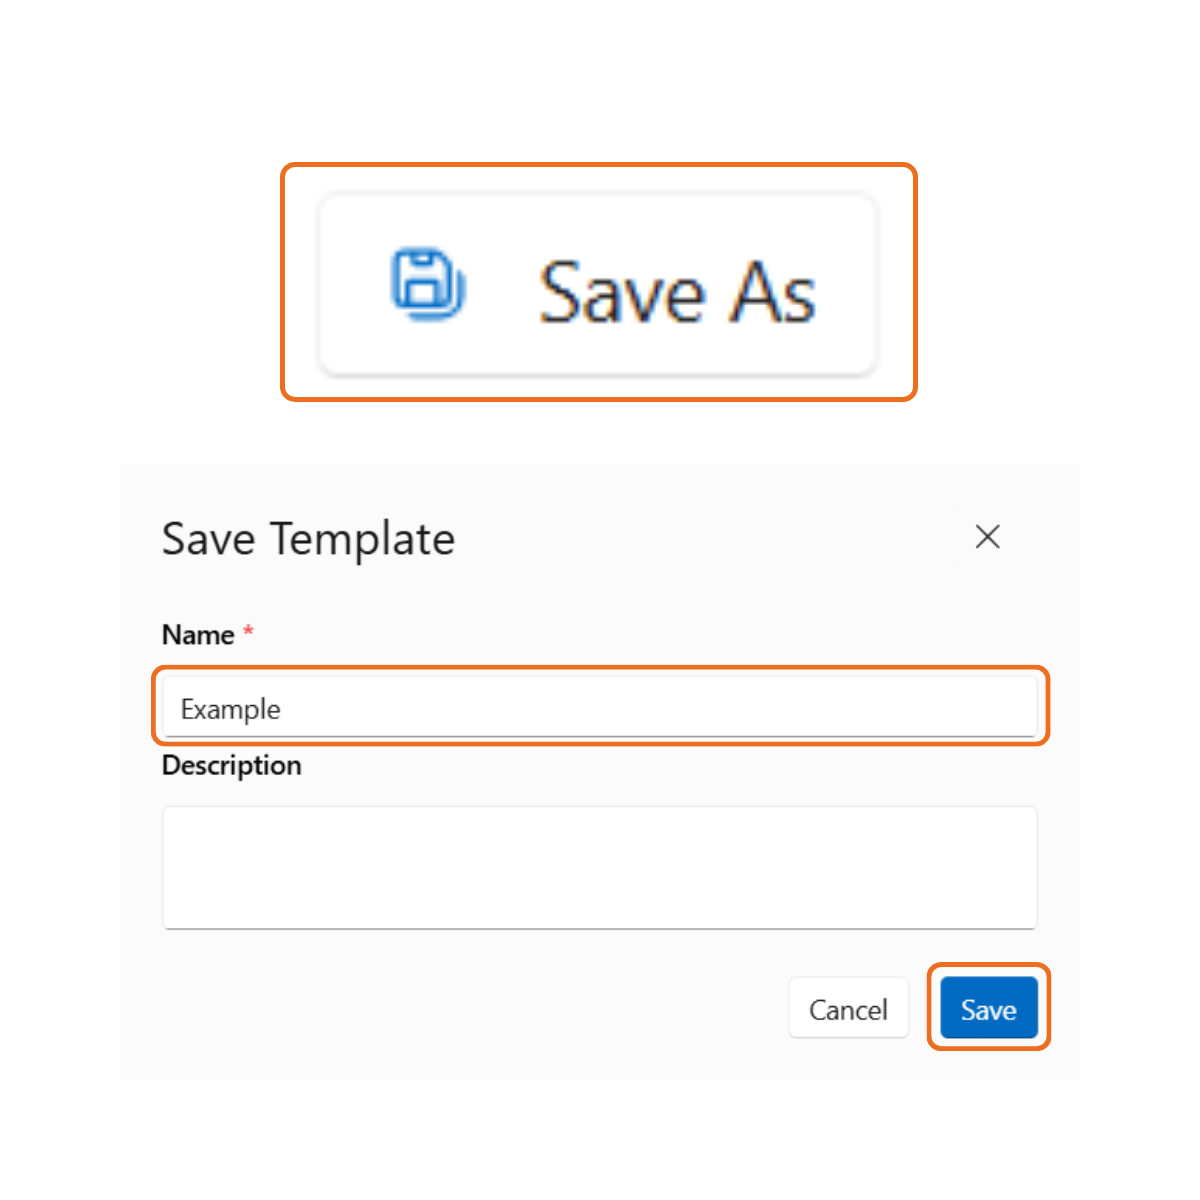
  • Save As: Saves the current workflow as a template for future use
  • Rubbish Bin: Deletes any template created by the user within the system
  • Mailing file: Ensures the data file is output in the correct format for a mailing file

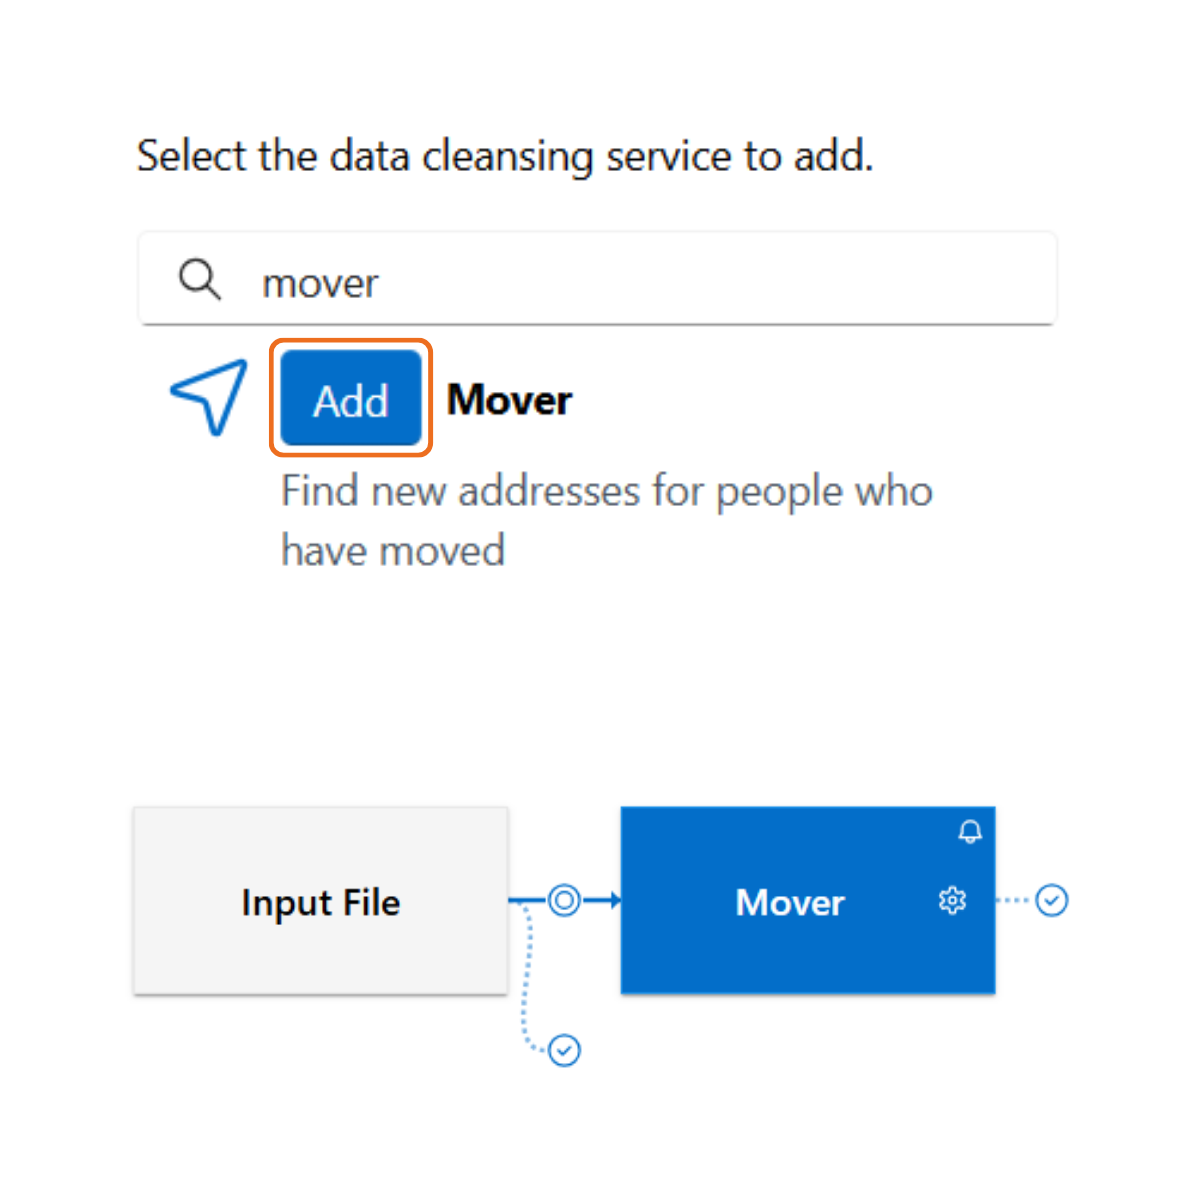
To the right of the workspace, you will find all the data services available to add to your workflow.

All services are arranged in alphabetical order for easy navigation. At the top of the list, there is a search bar to easily locate your required services. 

In this example, search for ‘Mover’ and click Add to move the service into your workflow.

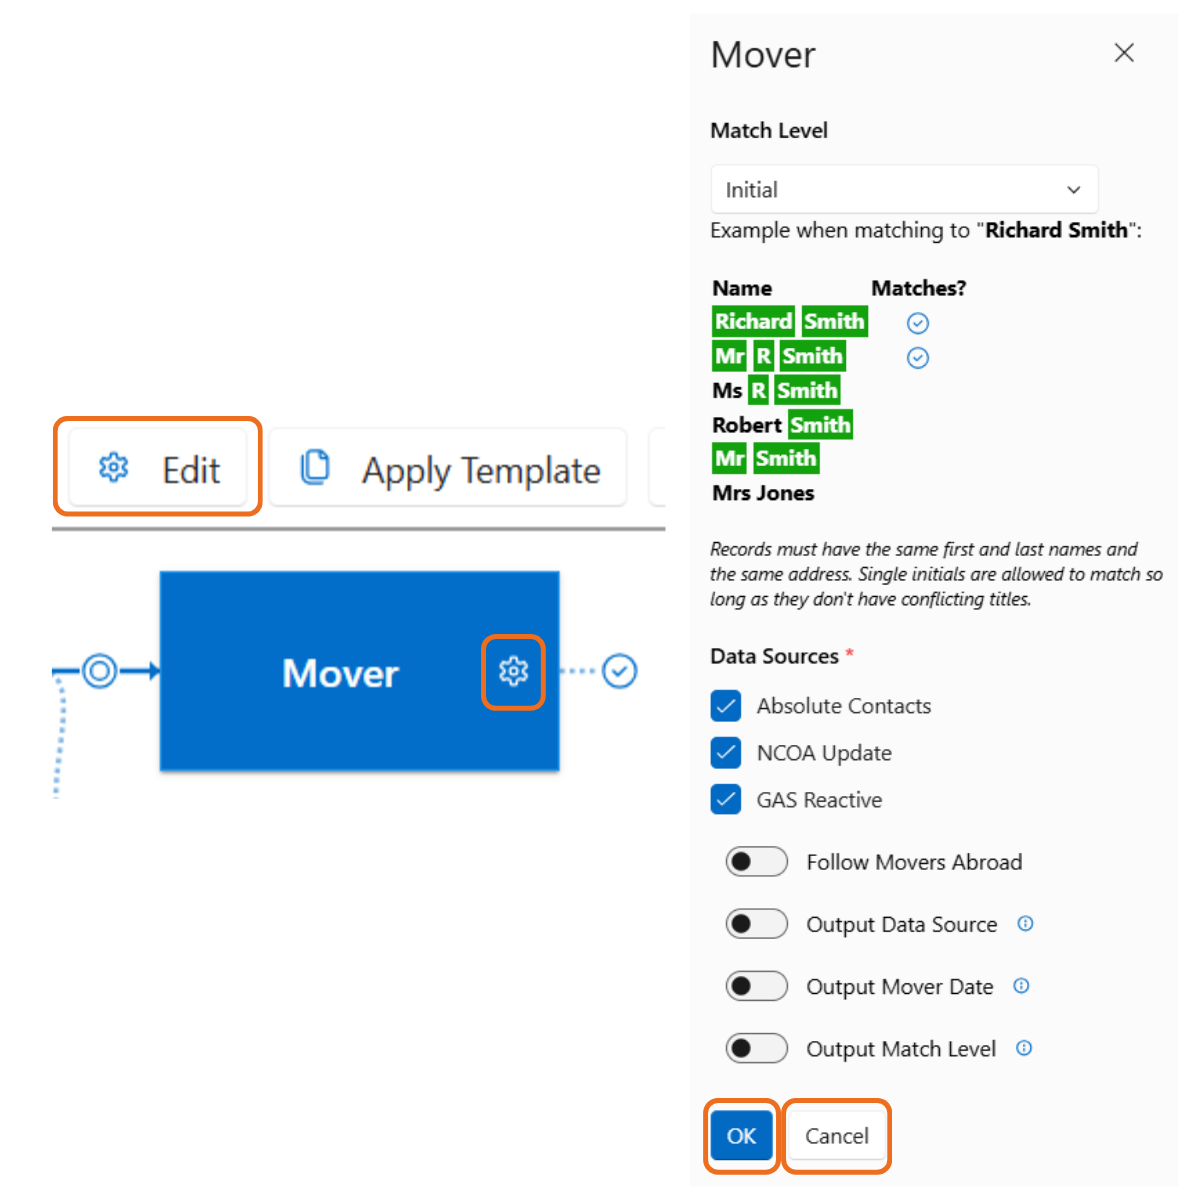
To adjust the options available for a service, click on the cog icon on the node.

Alternatively, with the node highlighted, click Edit at the top of the screen.

The options will be displayed in a pop-up on the right-hand side of the screen.

Click Cancel to discard any changes made or OK to apply the changes to the service. 

Continue this process until you have added all the required services for your data cleansing job.

N.B. If a service hasn’t been reviewed, a bell icon will appear at the top right of the node, reminding you to review the options available. 

If you would like to use this workflow again, click Save As to open the Save Template pop-up.

Type in a name, and description if needed, to identify the template in the future. 

In this example, give your template a name and click Save. 

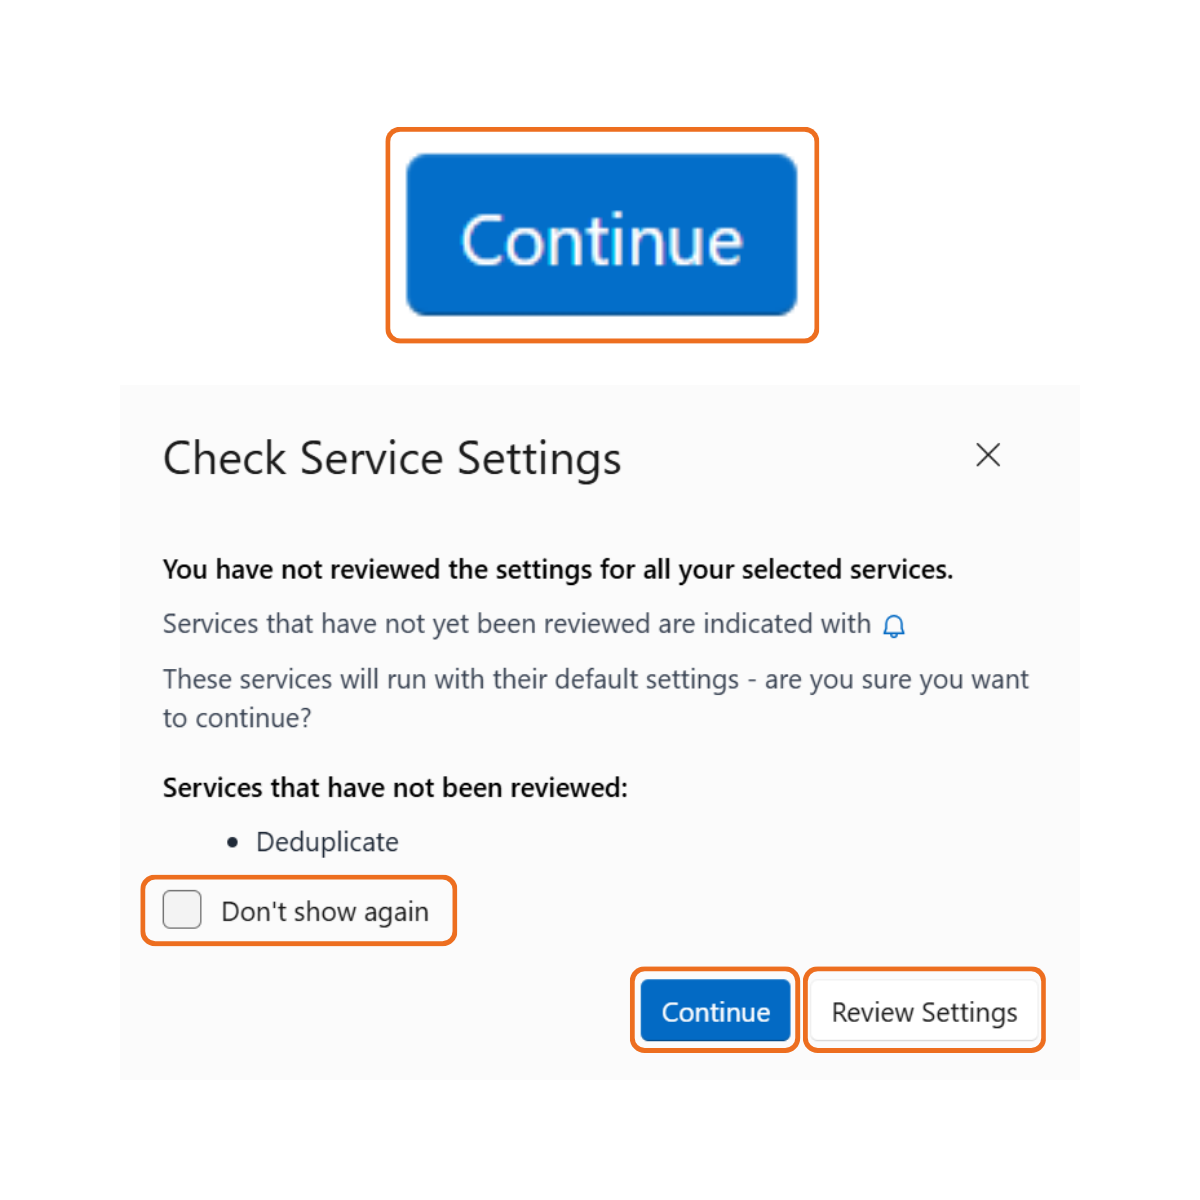
Once you are happy with your workflow, click Continue.

If a service hasn’t been reviewed, the Check Service Settings pop-up will be displayed.

Click Review Settings to return to the Define Workflow screen to review the options for any services that haven’t been modified.

In this example, click Continue to use the default settings.

N.B: Check Don’t show again to prevent this pop-up from showing up on subsequent jobs. 

Confirming a Job

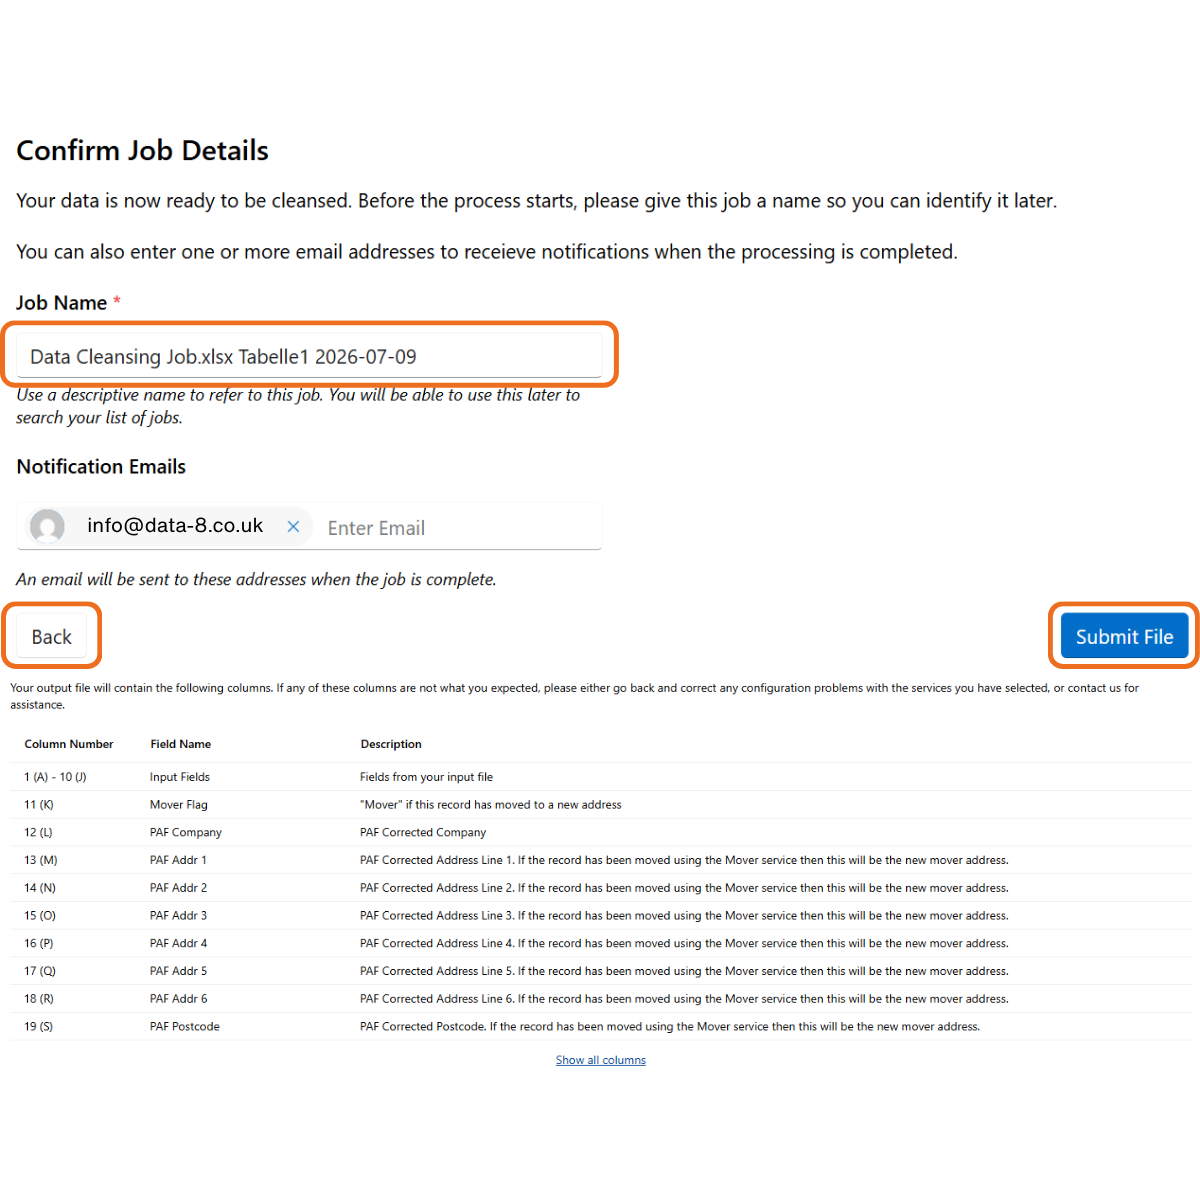
The Confirm Job Details screen, gives you the option to rename the job, edit who will be notified once the job is complete and review the fields that will be included in the output file. 

There is also a Back button to return to the Define Workflow page if any changes are required. 

In this example, click Submit File to begin the job. 

Viewing Results

The View Job Results screen will load as your job is being processed.

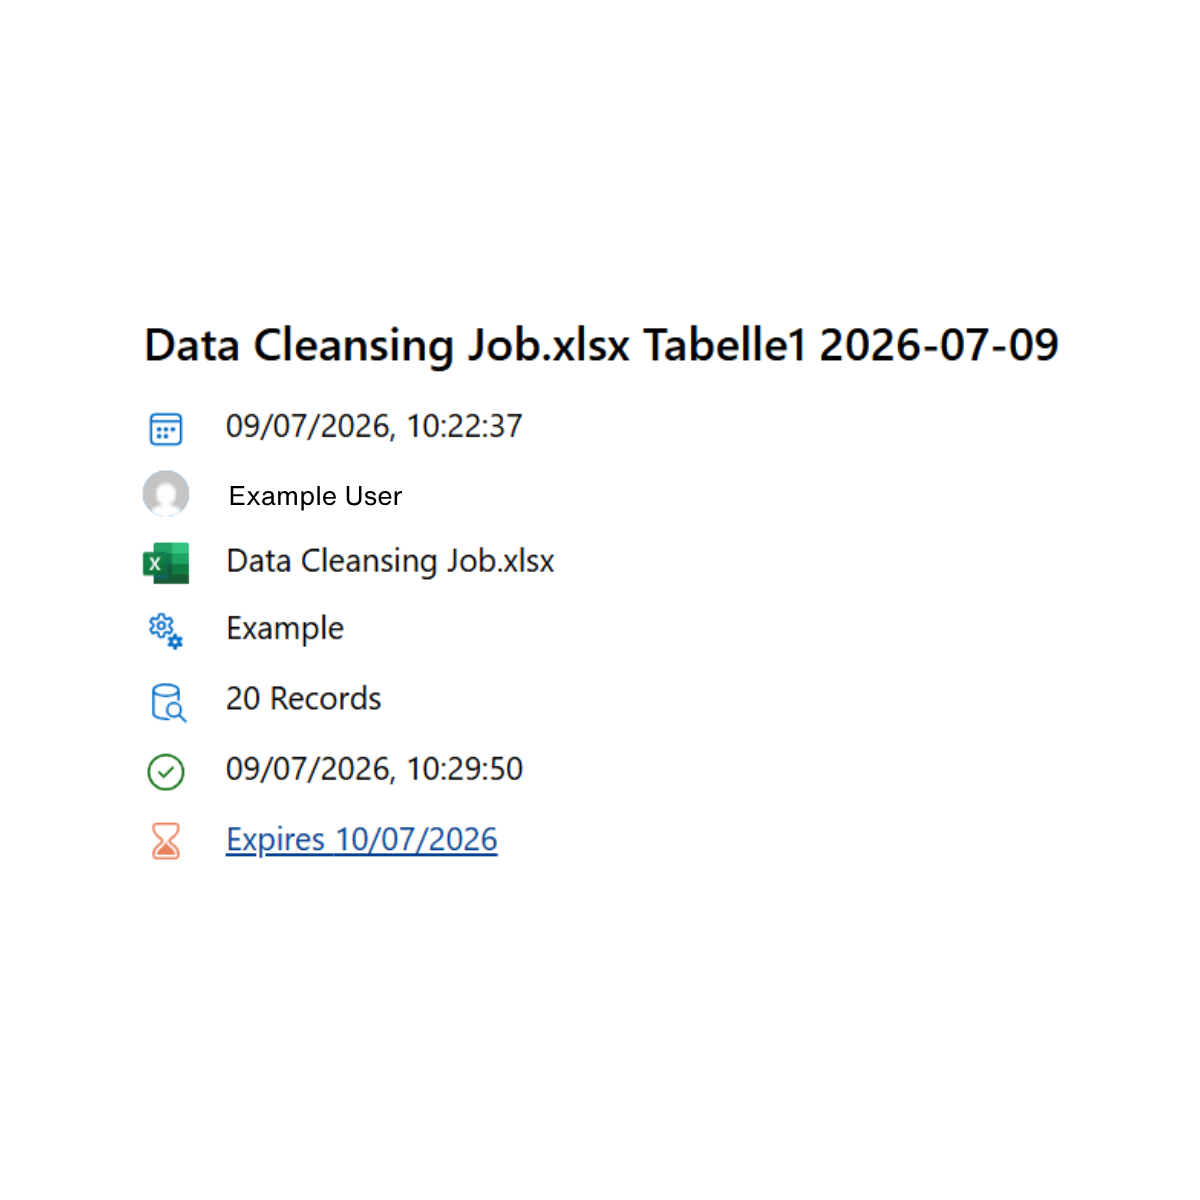
At the top of the screen, information about the job is displayed including:

  • The date and time the job was processed
  • The name of the user who initiated the cleanse
  • The name of the data file used
  • The name of the template used
  • The number of records included in the data file
  • The date and time when the job was completed
  • The expiry date


N.B: Some information will only be available once the job is complete – a progress bar will be displayed for you to track the progress.

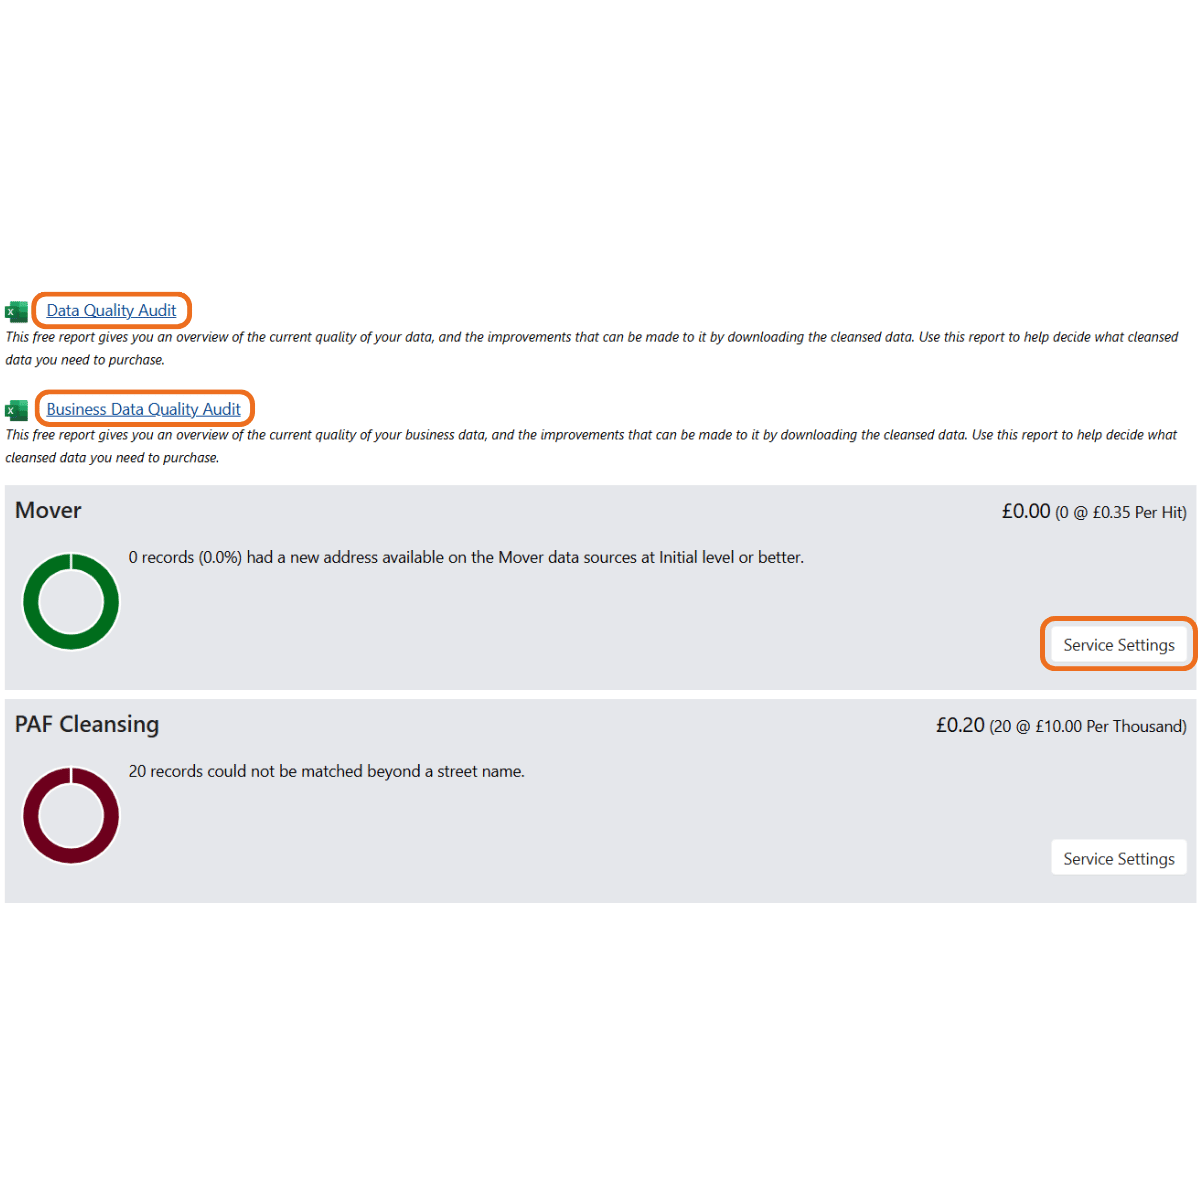
Upon completion of the job, you will have access to the following files:

  • Data Quality Audit: A free report giving you an overview of the current quality of your data, and the improvements that can be made to it by downloading the cleansed data
  • Business Data Quality Audit: A free report giving you an overview of the current quality of your business data, and the improvements that can be made to it by downloading the cleansed data


You will also be presented with a break down of the results from each service, including:

  • The number of records cleansed
  • The number of matches made
  • The cost for each service with price card details


N.B: Click Service Settings if you would like to review the settings of the service. 

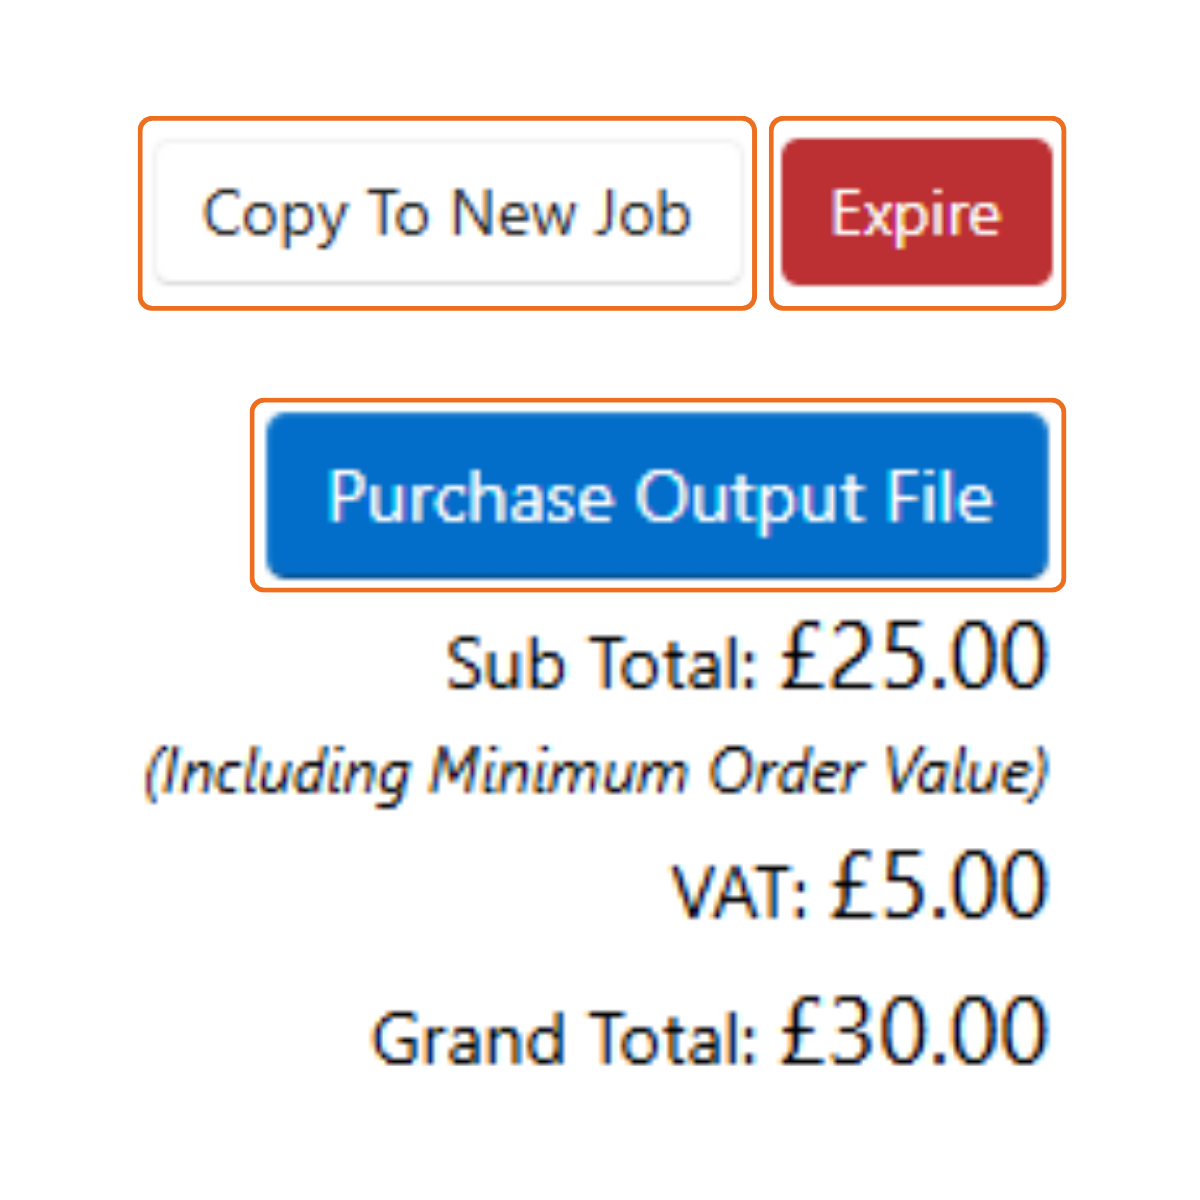
At the bottom of the View Job Results screen is three buttons:

  • Copy to New Job: Set up a new job using the same data but with different services or settings
  • Expire: Manually archive the job before the 30 day expiration period (both the job and associated data will be archived and deleted from our server)
  • Purchase Output File: Purchase the cleansed data (there is also a button beneath the expiry date at the top left of the screen)

Purchasing a File

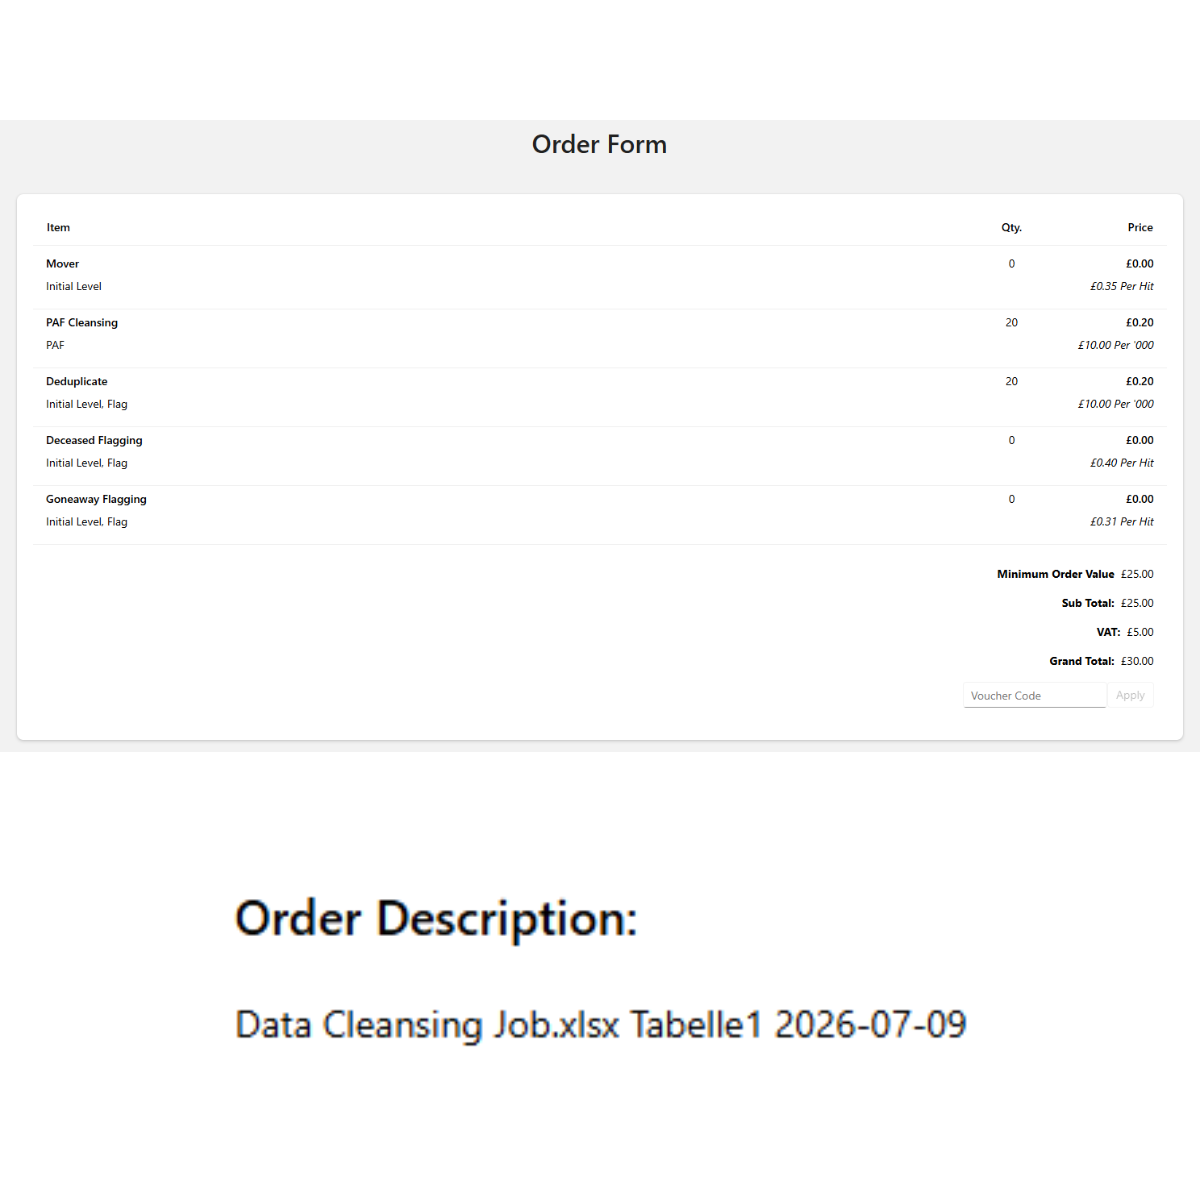
The Order Form screen displays information about your output file.

The top section provides a breakdown of the selected services, including:

  • Match levels
  • The unit price,
  • The number of matches per service
  • The total price


Beneath this is the Order Description which displays the job name. 

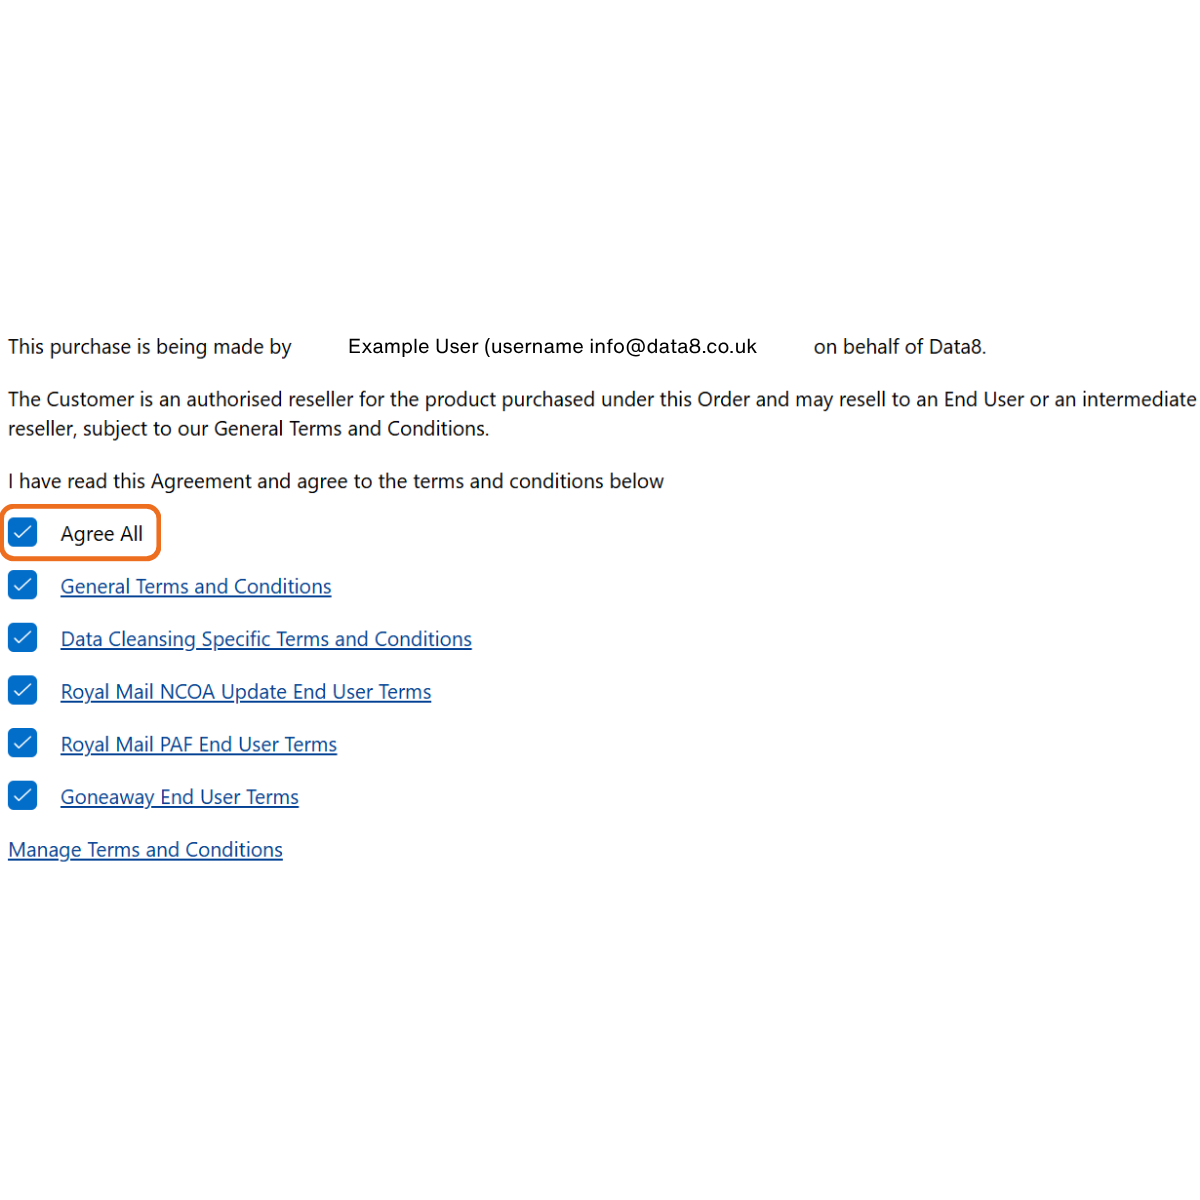
At the bottom of the Order Form screen, there are links to all the Terms & Conditions and End User Terms for the different services used in the workflow. 

Clicking on an individual link will open the relevant document for you to review.

In this example, check Agree All.

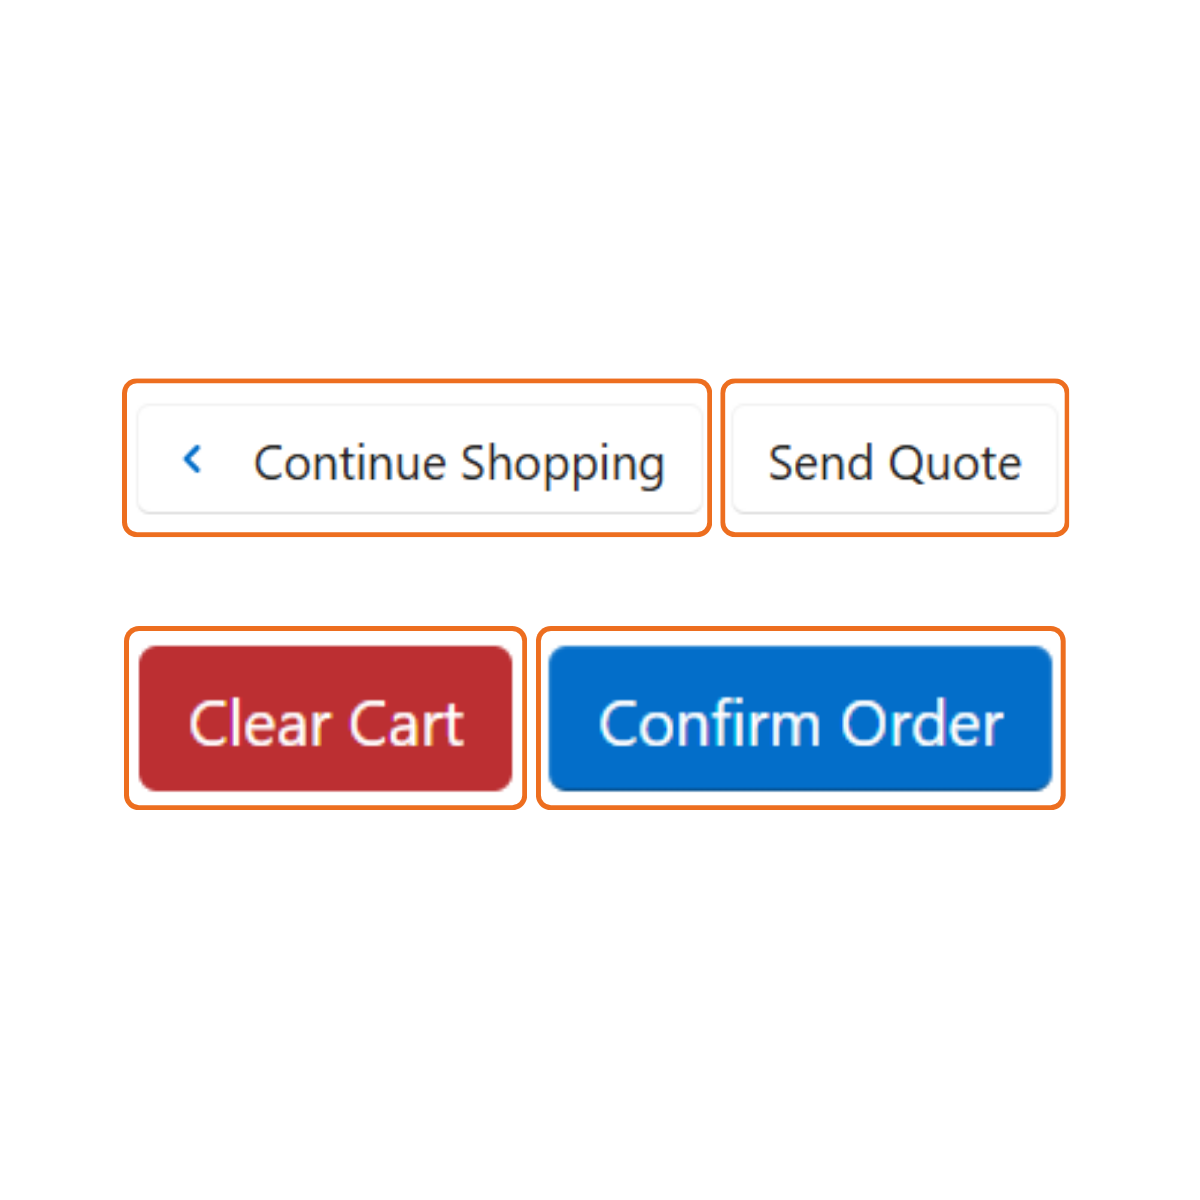
At the bottom right of the Order Form screen, there are four buttons:

  • Continue Shopping: Returns the user to the View Job Results screen
  • Send Quote: Displays a Choose Email Addresses pop-up screen – enter the email addresses of the recipients and Click OK to send the quote
  • Clear Cart: Cancels the job
  • Confirm Order: Completes purchase of the output file


In this example, click Confirm Order.

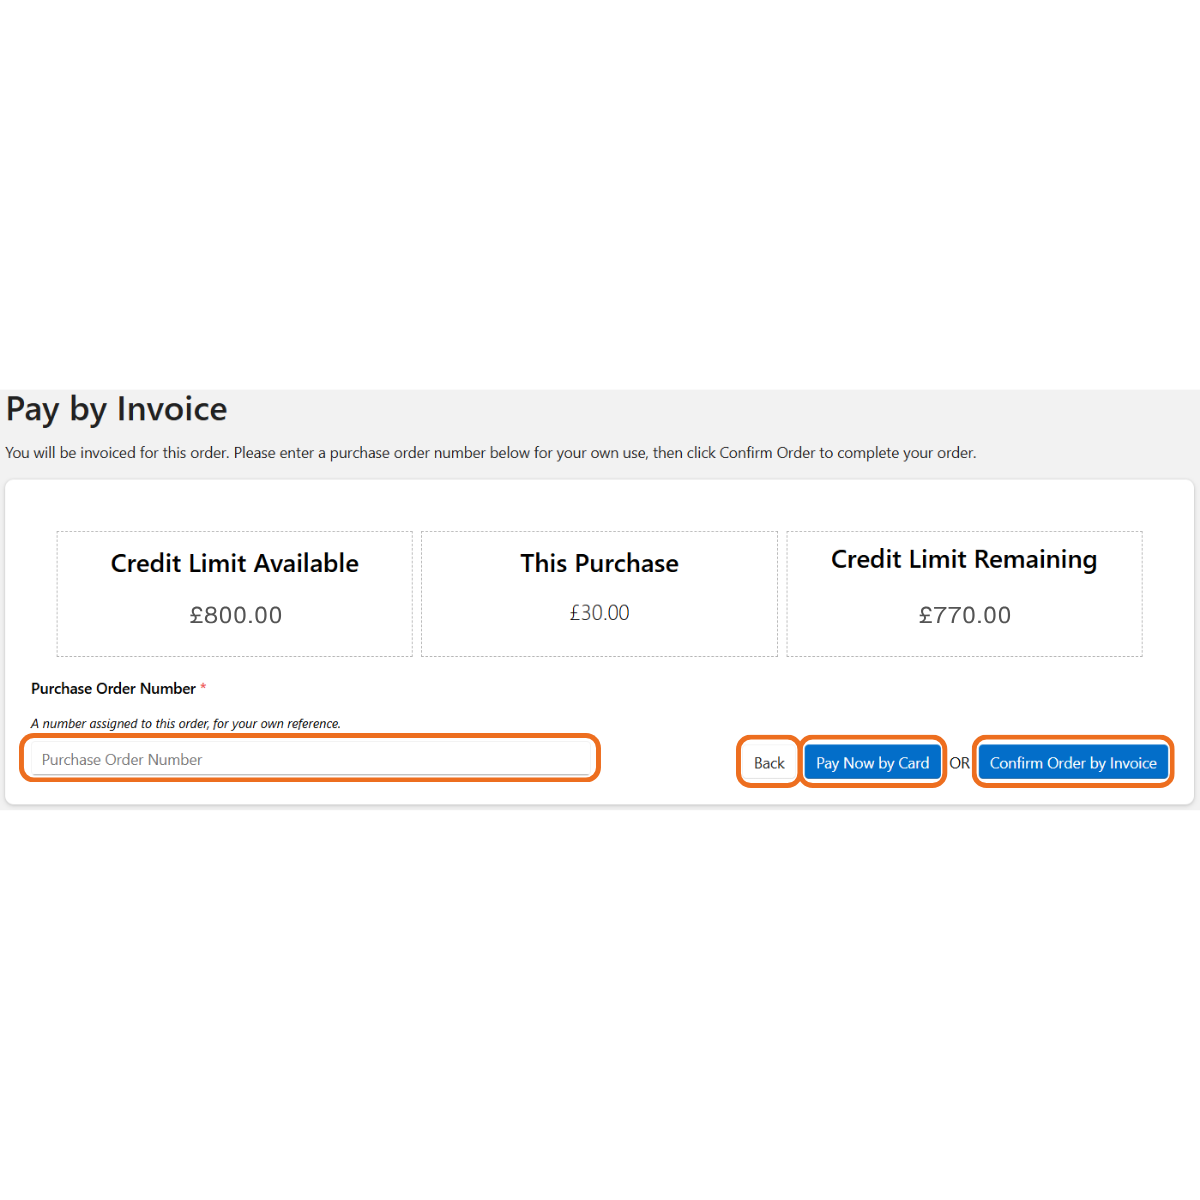
The Pay by Invoice screen displays the cost of the job to be purchased and your credit limit (if applicable). 

You also have the option to add a Purchase Order Number (which you will need if paying via invoice). 

If you no longer wish to purchase the job, click Back to return to the Order Form screen and cancel the purchase.

If you wish to purchase the job, you can either Pay Now by Card or Confirm Order by Invoice.

In this example, click Confirm Order by Invoice.

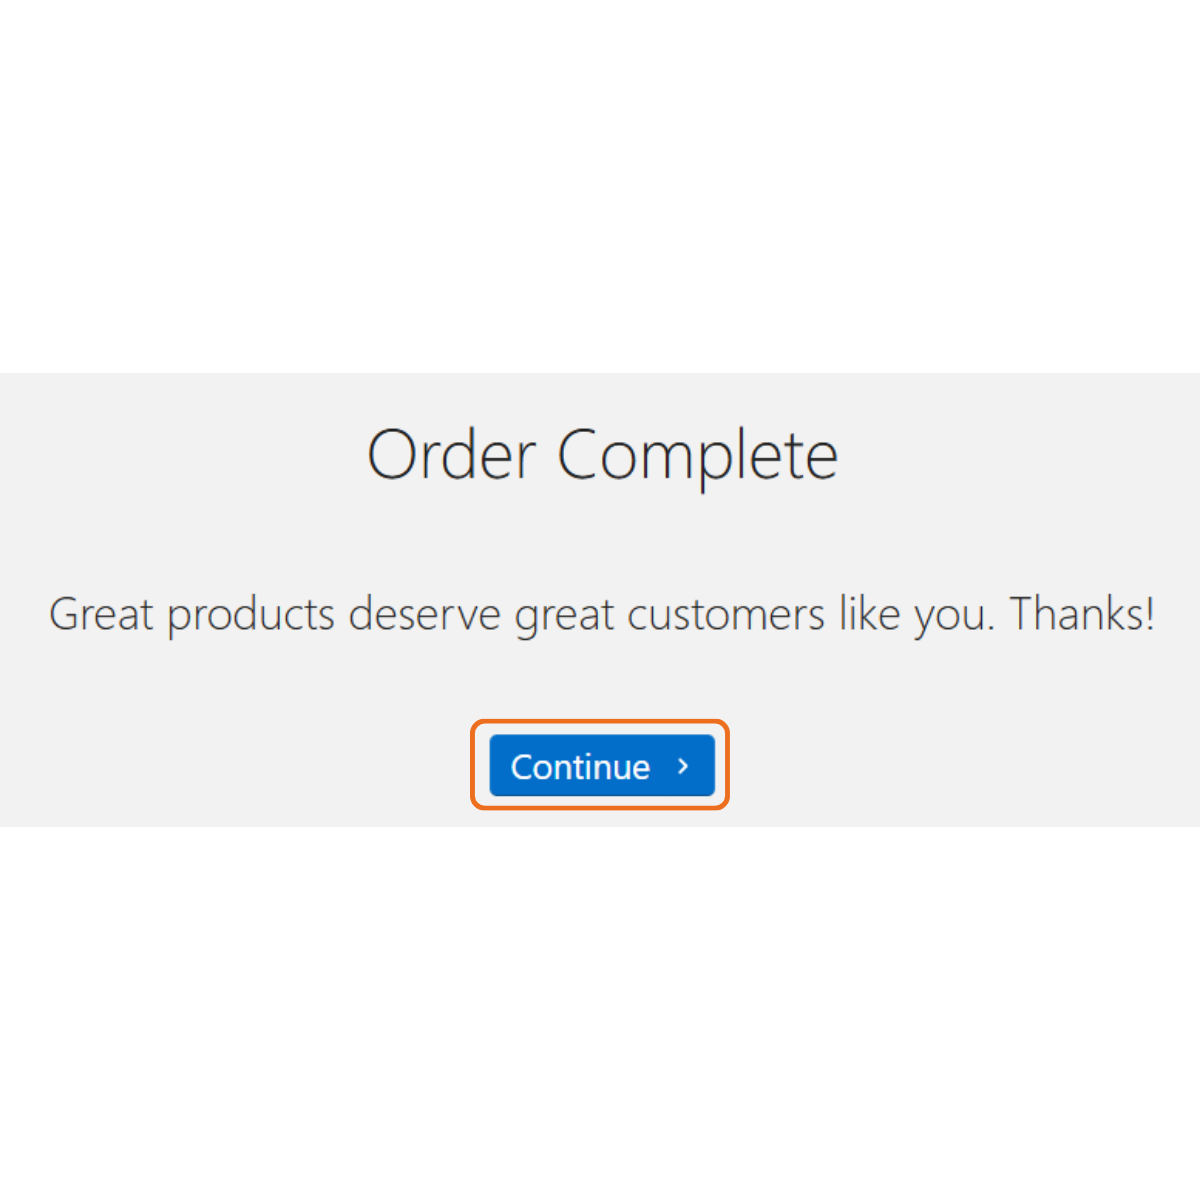
Once you have purchased the job, you will be presented with the Order Complete screen and receive an email confirming your order.

Click Continue to return to the View Job Results page and access your output file. 

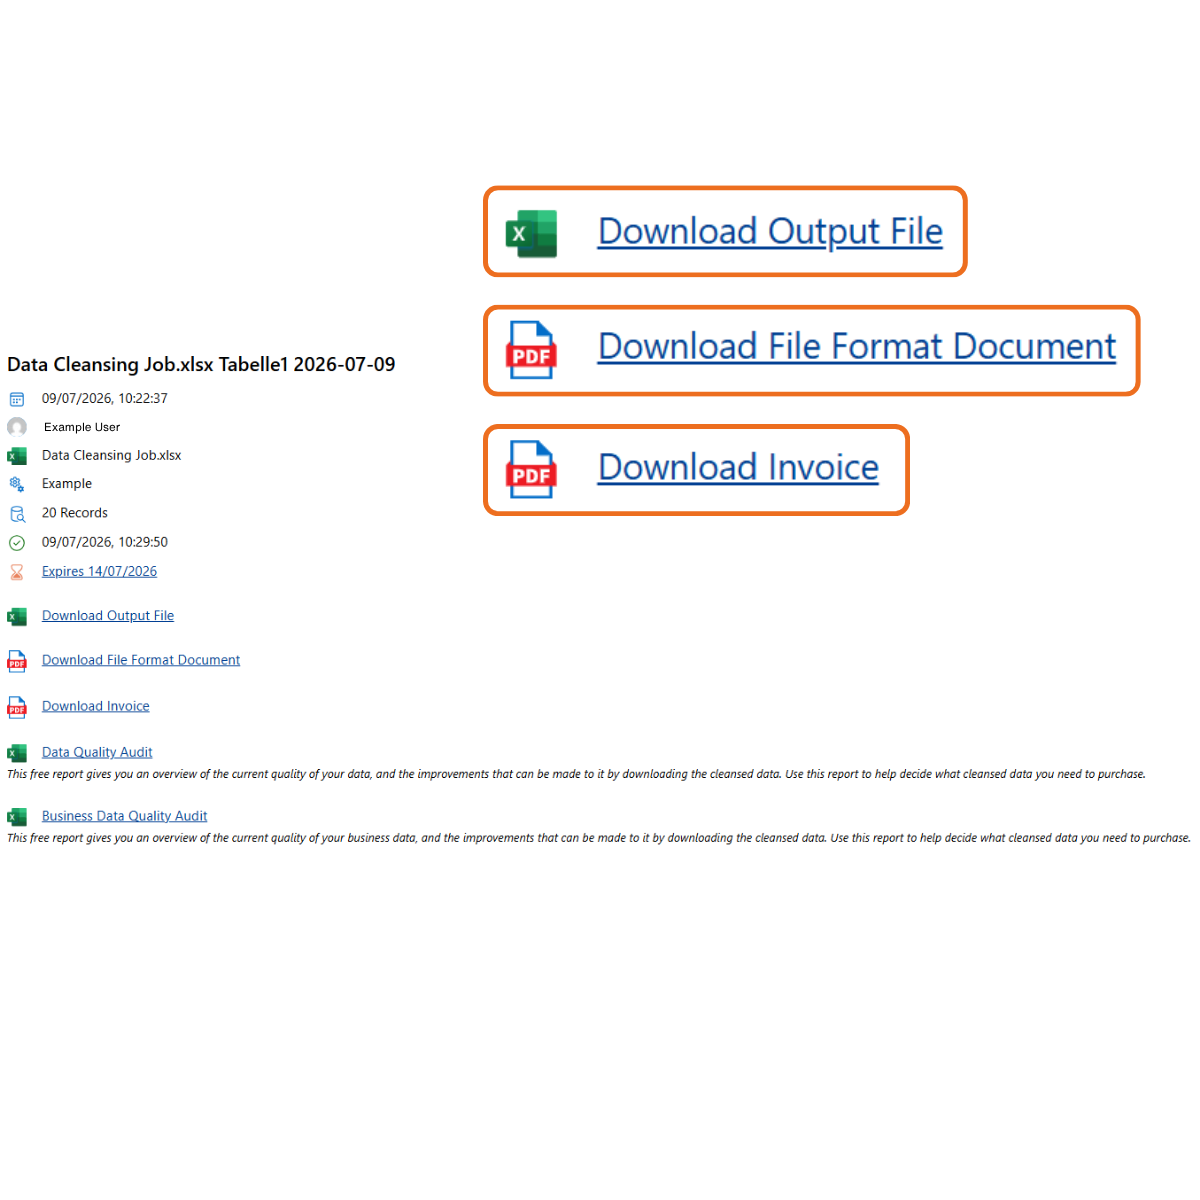
The View Job Results screen displays the same information as before, with the
following additional options:

  • Download Output File: Downloads the cleansed data
  • Download File Format Document: Provides a downloadable document detailing the Column Number, Excel Column Name, Field Name and Description of the data included in the output file
  • Download Invoice: Downloads a .pdf copy of your invoice


This concludes the data cleansing process.

N.B: Data cleansing jobs do not need to be purchased immediately.

You can access and review previously run jobs within the system, to purchase the cleansed data at any time prior to the expiry date.

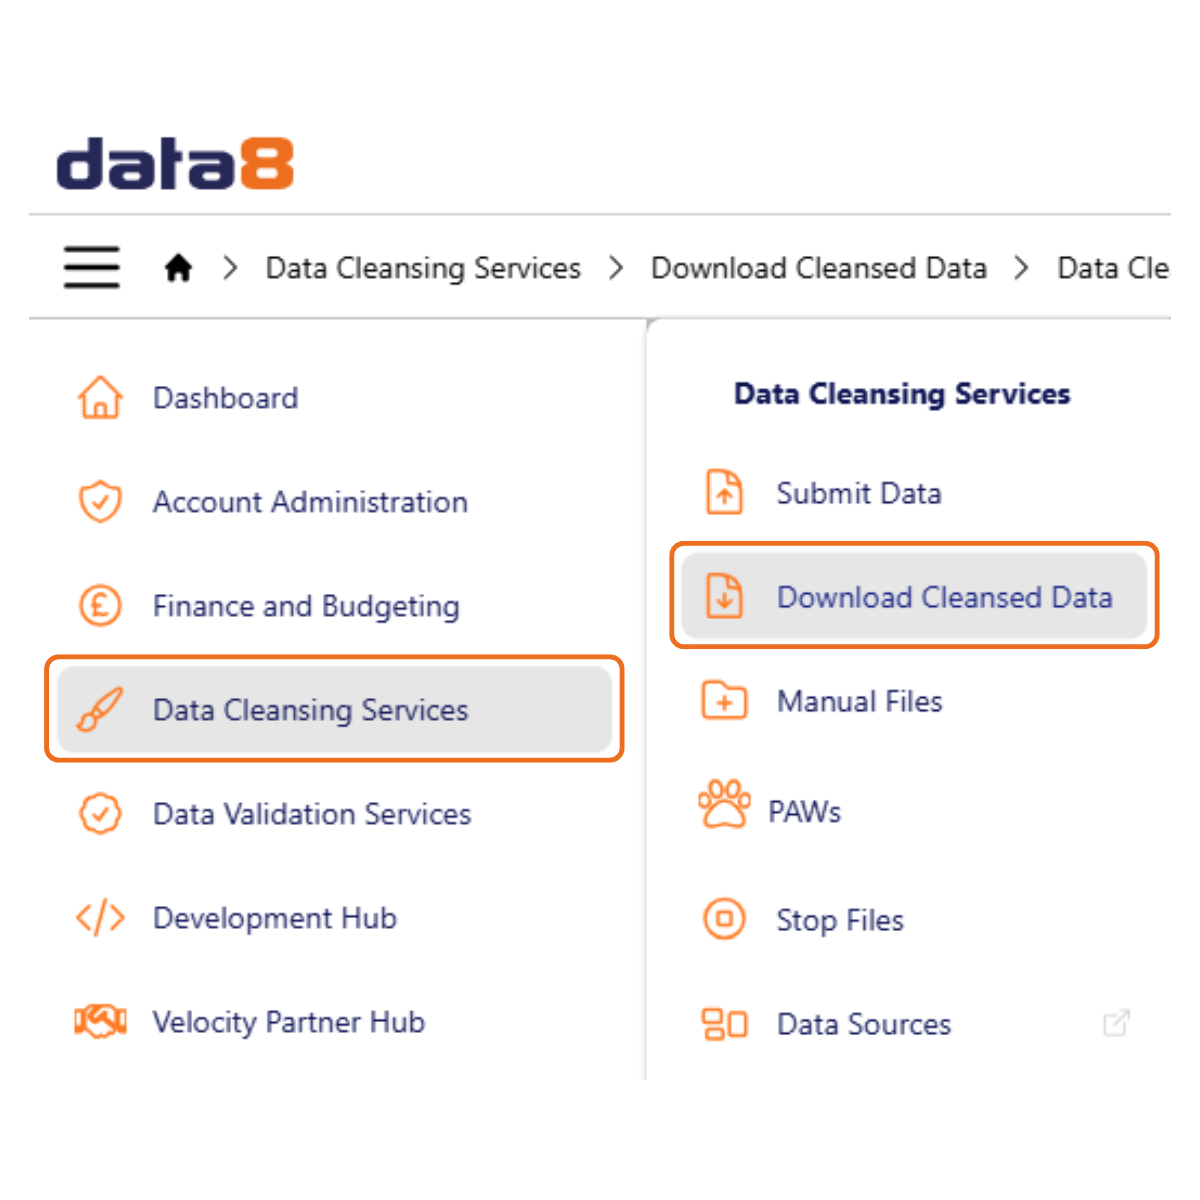
Hover over the Data Cleansing Services to see the full range of services. 

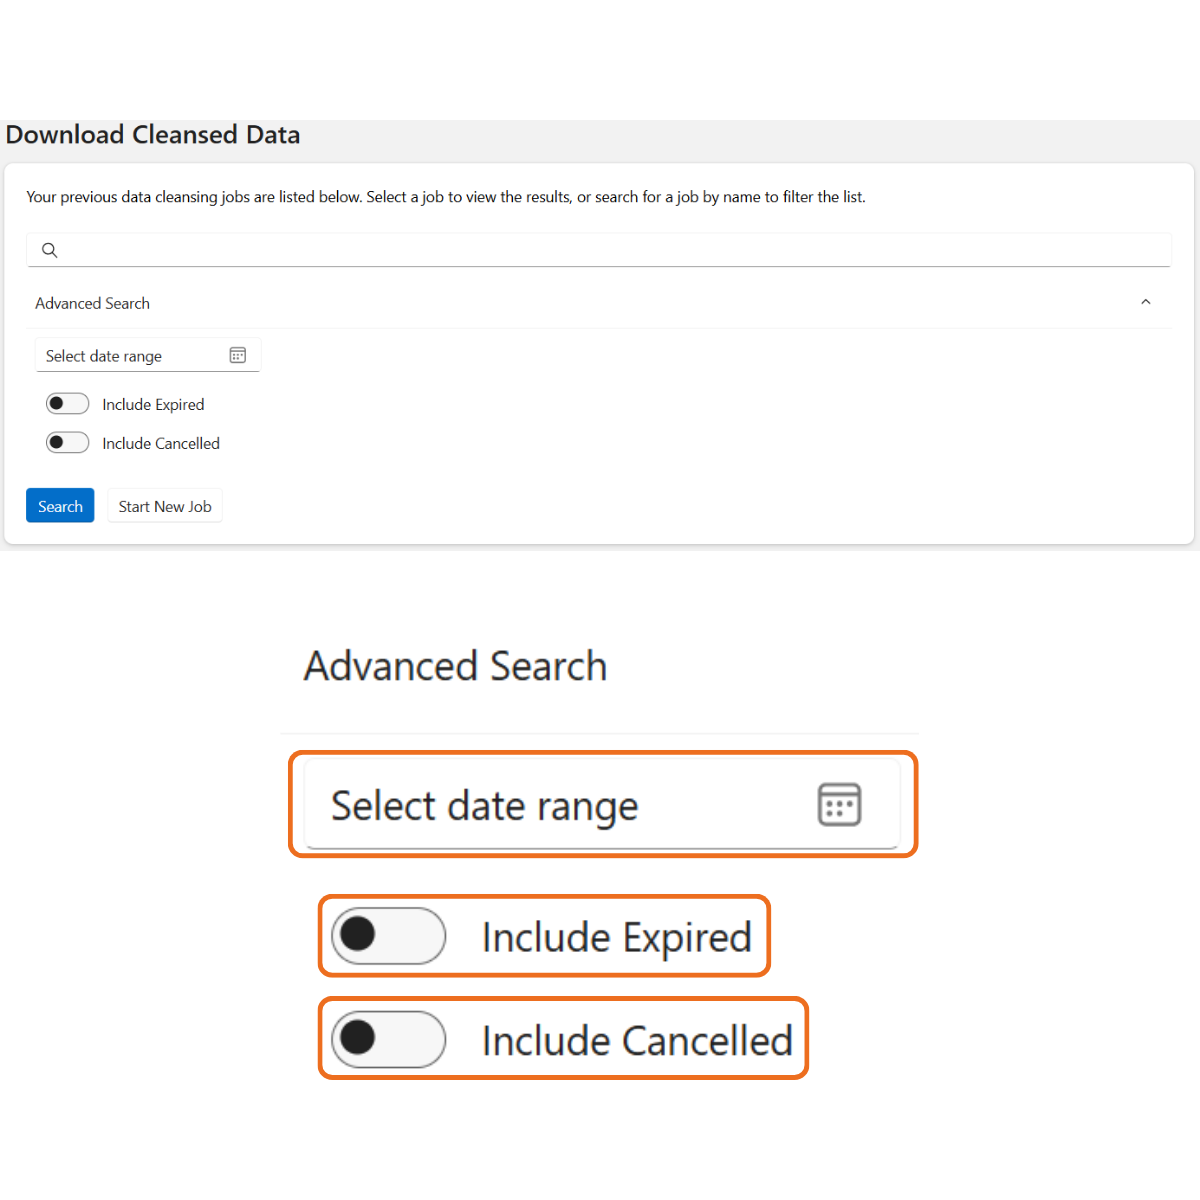
Select Download Cleansed Data to open the Download Cleansed Data screen.

There is search bar is available to search for a specific job.

There is also an Advanced Search option allowing you to specifying a date range and check whether you would like expired and/or cancelled jobs to be included. 

Clicking on any job enables the user to purchase it if it hasn’t already been purchased, as long as the job hasn’t expired.

If the data was purchased previously, the user can download it at any time.

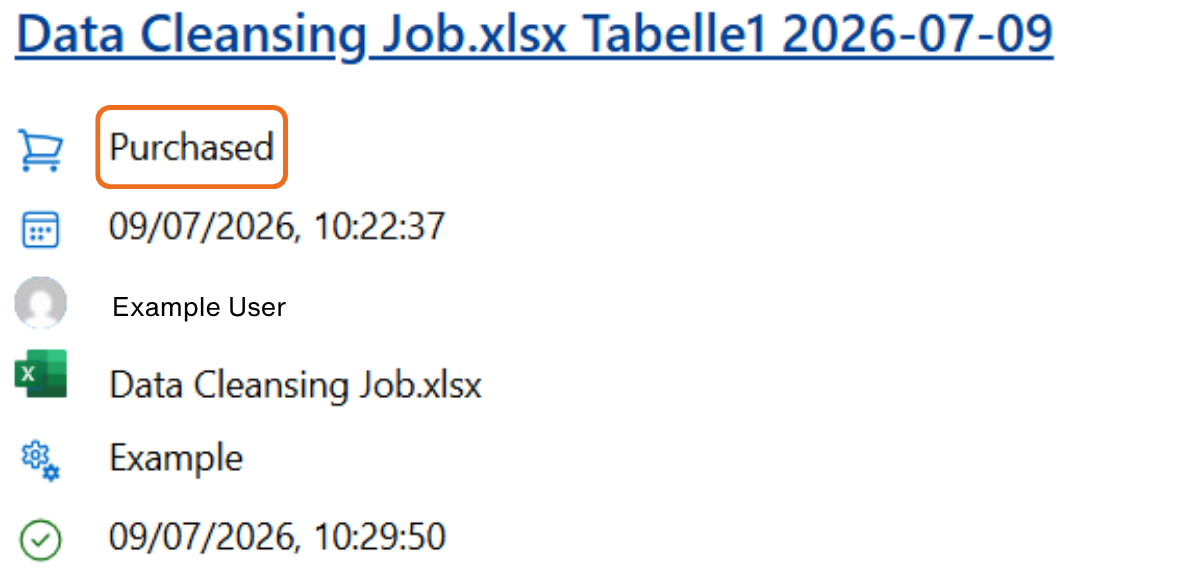
N.B. If the data for a job has been purchased, this will be specified underneath the job name. 

Join the Conversation

Receive the latest news, views and hot topics directly in your inbox! Sign up below

Follow us on social media

Data8
Privacy Overview

This website uses cookies so that we can provide you with the best user experience possible. Cookie information is stored in your browser and performs functions such as recognising you when you return to our website and helping our team to understand which sections of the website you find most interesting and useful.