
Home » Resources » How-to Guides » Salesforce Installation Guide
Salesforce Installation Guide

Find Data8’s Salesforce installation guide here to get started with your data validation journey. This guide covers version 2.0 of the Data8 Data Validation package for Salesforce Lightning, which supports the following services:
- PredictiveAddress (address lookup)
- Email Validation
- Phone Validation
- Telephone Preference Service (TPS and CTPS) screening
- Bank Account Validation
- Business Insights
Once the package is installed, see the User Guide for how to set up and use each component.
Step 1: Install the package
To install into a sandbox rather than production, choose the sandbox option when AppExchange asks where to install.
- Click the button above to open the Data8 Data Validation listing on AppExchange, then click Get It Now and sign in to your Salesforce organisation.
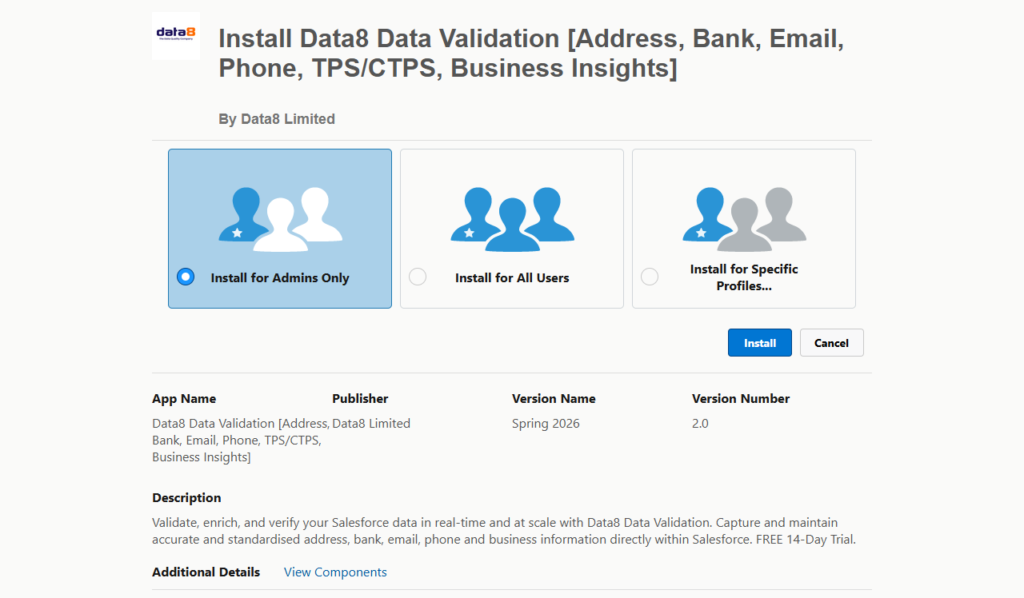
- Choose who should get access to the package: Install for Admins Only, Install for All Users or Install for Specific Profiles. If you’re not sure, Admins Only is the safest starting point. You can give other users access later with the permission set in Step 2.
- Click Install.
- When asked to approve third-party access, tick Yes, grant access to these third-party web sites and click Continue. This allows the components to call Data8’s web services at webservices.data-8.co.uk.
- Wait for the installation to finish. This usually takes a few minutes. If it takes longer, Salesforce will email you when it’s complete.
- Go to Setup → Installed Packages and check that Data8 Data Enhancement App is listed with version 2.0 and publisher Data8 Ltd.
Step 2: Assign the Data8 User permission set
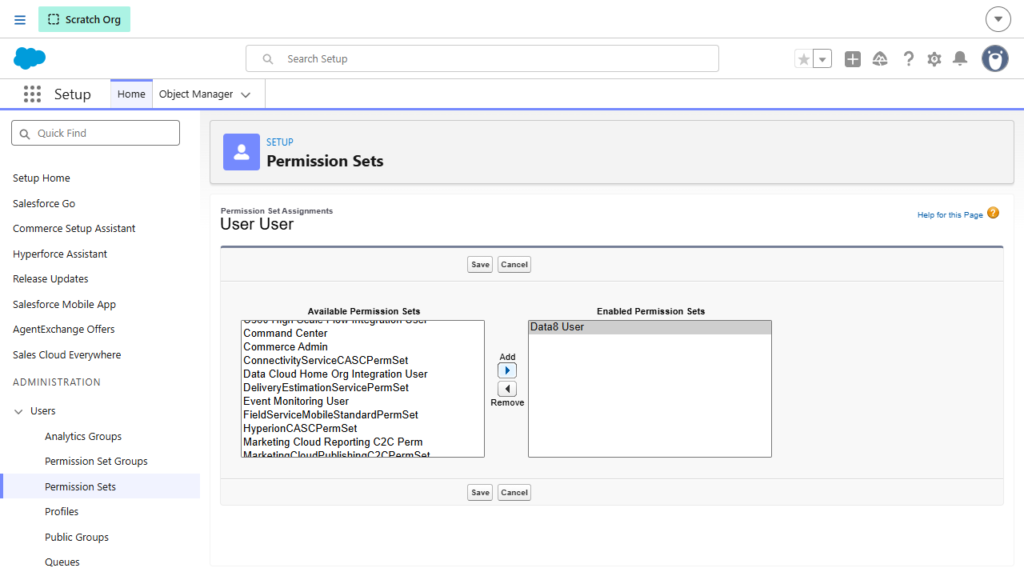
Installing the package doesn’t give anyone other than the installer access to it. Assign the Data8 User permission set to everyone who will use Data8. This gives them access to the Data8 Configuration app, the components, and the fields and objects included in the package.
- Go to Setup → Users and open the user.
- In the Permission Set Assignments related list, click Edit Assignments.
- Select Data8 User, click Add, then click Save.
- Repeat for each user who needs access.
You can also assign it to several users at once from Setup → Permission Sets → Data8 User → Manage Assignments.
Step 3: Add your Data8 API keys
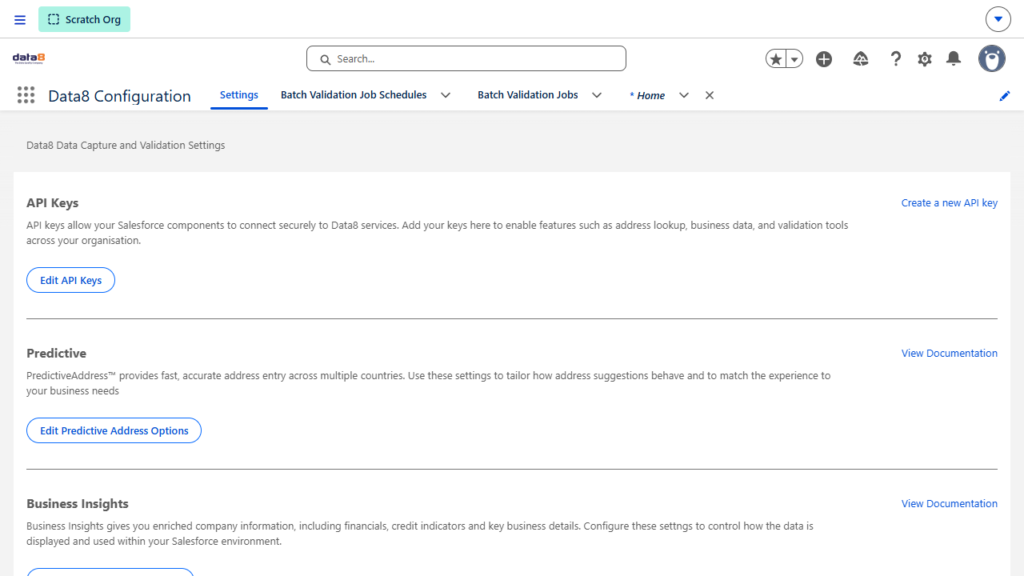
- Open the App Launcher (the grid icon, top left), search for Data8 and open Data8 Configuration.
- Open the Settings tab. In the API Keys section, click Edit API Keys.
- Paste in your Client-Side API Key (used by the on-screen components) and your Server-Side API Key (used by server-side processes and flows), then click Save.
If you don’t have API keys yet, click Create a new API key, or create them on the Data8 dashboard. Treat your keys like passwords and don’t share them.
Once a key is saved, the Settings page shows a live credit balance next to each service you subscribe to. The Settings page also controls address formatting, Business Insights options and branding. See the User Guide for details.
Check external access. The package includes a Remote Site Setting and a CSP Trusted Site for https://webservices.data-8.co.uk, both named Data8. Make sure both are present and active (Setup → Remote Site Settings / CSP Trusted Sites). If they’re blocked, the components show an “Unable to reach Data8 service” message.
Step 4: Add Data8 components
Data8’s services are provided as Lightning components that you add to record pages or Screen Flows. The components don’t create fields for you, so create the fields each component needs (such as a Validation Result and a Last Validated field) before adding it. The User Guide lists the fields for each component.
On a Lightning record page
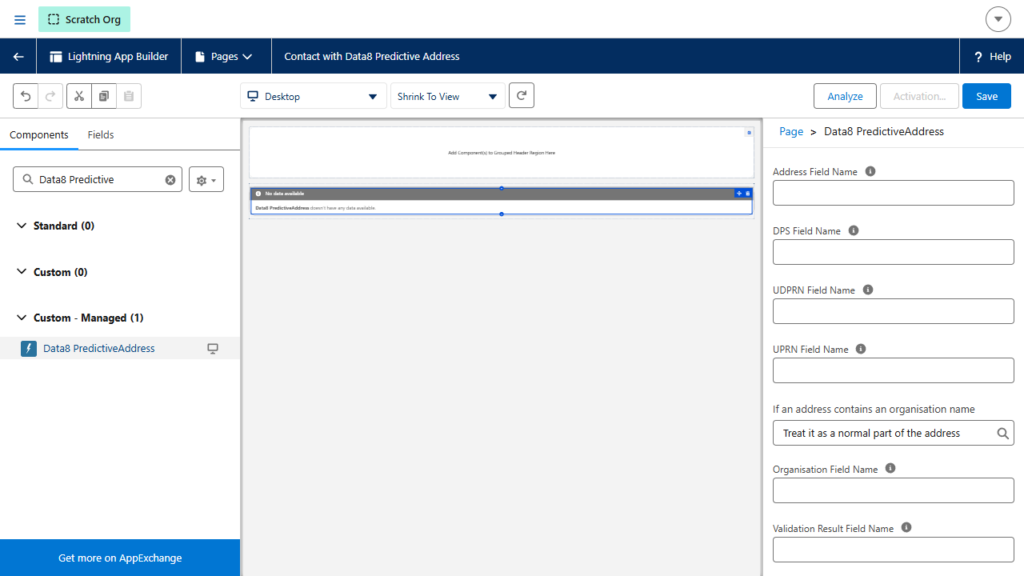
- Open a record, click the gear icon and choose Edit Page (or create a new record page in Setup → Lightning App Builder).
- Search the component list for “Data8”. The components appear under Custom – Managed: Data8 Email Validation, Data8 Phone Validation, Data8 PredictiveAddress, Data8 Bank Account Validation and Data8 Business Insights.
- Add the component to the page and enter the API names of the fields it should use in the properties panel.
- Click Save, then Activate the page for the right apps and users.
- Make sure users have Read and Edit access to every field the component uses.
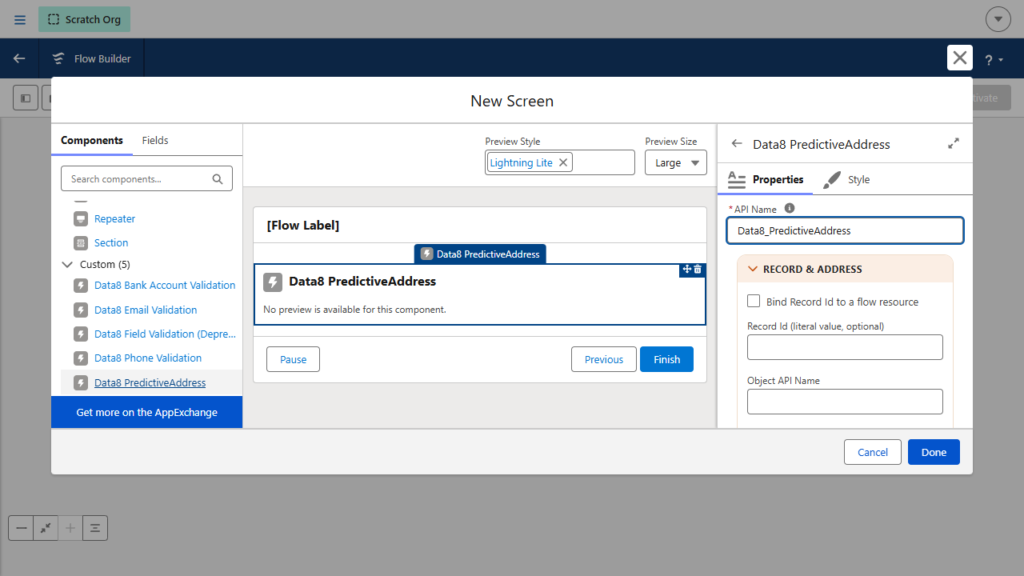
In a Screen Flow
- Go to Setup → Flows → New Flow and choose Screen Flow.
- Add a Screen element, then select a Data8 component from the Custom section of the component list.
- Configure its Record & … properties (for example, the Object API Name and field name).
- After the screen, add an Update Records or Create Records element to save the results.
- Save the flow and click Activate when it’s ready.
Next steps
The Salesforce User Guide explains how to set up and use each component:
- Before you start: create your fields first
- The Settings page
- Email Validation
- Phone Validation and TPS/CTPS screening
- PredictiveAddress
- Bank Account Validation
- Business Insights
- Using the components in a Screen Flow
To call any Data8 API from a Flow using Salesforce External Services, see Flow Integration with External Services.
Troubleshooting
- “Data8” doesn’t appear in the App Launcher. Check the installation has finished (Setup → Installed Packages) and that you have the Data8 User permission set.
- The installation seems stuck. Larger packages can take several minutes, especially with Install for All Users. Salesforce will email you when it’s done, so you don’t need to keep the page open.
- Errors when calling Data8 services. Check your API keys. A common cause is pasting the Client-Side key into the Server-Side field, or the other way round.
- Data8 components don’t appear in Lightning App Builder or Flow Builder. Check the package installed successfully and that your user has the Data8 User permission set.
- “Unable to reach Data8 service”. Make sure the Data8 Remote Site Setting and CSP Trusted Site for https://webservices.data-8.co.uk are present and active.
For more help, see the User Guide troubleshooting section or contact our support team.