Setting up persistent results
The Data8 Email Verification and Phone Validation solution now lets you save the results of email and telephone validation in a specific field, as well as storing a time stamp of when that check took place. If you are only interesting in real time email checking on the main user interface and not persisting those results, these steps are entirely optional.
In order to set up where the results will persist, please navigate to the "Data8 Validation Configuration" app and open the "Configuration Page" link from the navigation bar on the left.
Once there, scroll down to the "Email Validation Section".
Firstly, we must decide which level of email validation we want to use - for more details, please see the Data8 website. https://www.data-8.co.uk/resources/api-reference/emailvalidation/isvalid/
Secondly, we are going to configure field level mapping - select the table you are going to set up (account/contact etc) and click "Add". You'll then see a page like this.
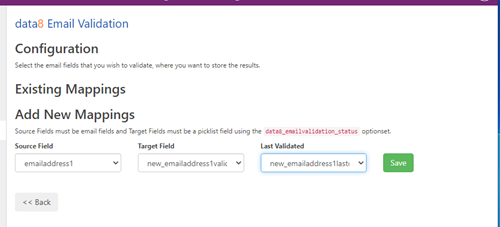
This page will list any mappings for that table (in this case, there are none as it's a brand new installation) and also give you the option to add new mappings. The drop downs are as follows:
| Source Field | The logical name of the field that will contain the email to validate i.e. emailaddress1 |
| Target Field | The logical name of the field where you wish to store the validation result. This field must be a choice with the choice list called data8_emailvalidation_status. |
| Last Validated | The logical name of the field where you wish to store the time stamp of the when the value in the field stated in "Source Field" was validated. This field is optional. |
Once you have filled in those drop down options and click "Save", the page will refresh to confirm that configuration has been saved.
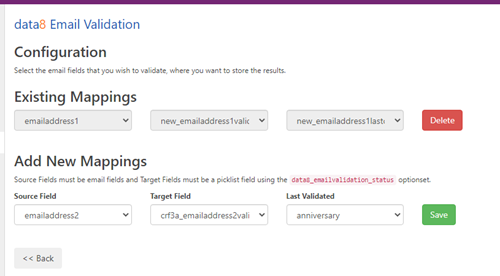
Repeat the steps until all mappings you required are listed under "Existing Mappings". Once you finished, click "<< Back", before clicking "Save All Settings".
As soon as those mappings are saved, your emails are now being validated during creation or updating without any further amendments.
Form Amendments
The solution also offers you the option to have real time feedback for your users to help them catch an invalid email at the point of entry and hopefully rectify.
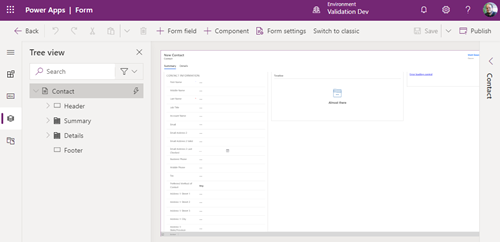
In order to set this up, head over to https://make.powerapps.com so you can make form amendments. Through your usual method, navigate to the form you wish to add real time email validation to.
We now need to add an event handler to the form - so we start by adding the resource where that event handler lives. On the left hand side, expand it and select "Form Libraries" and add the data8_validation_base.js library.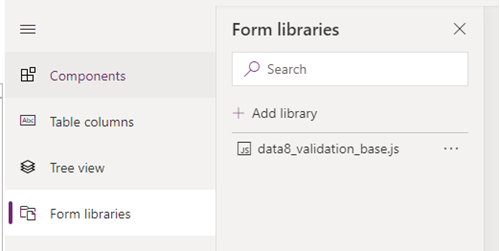
Once added, select the right hand side and choose "Events". Expand On Load and add the function called "data8_validation_start" from the data8_validation_base.js library.

Please ensure you enable it and also check the box that states "Pass execution contact as first parameter".
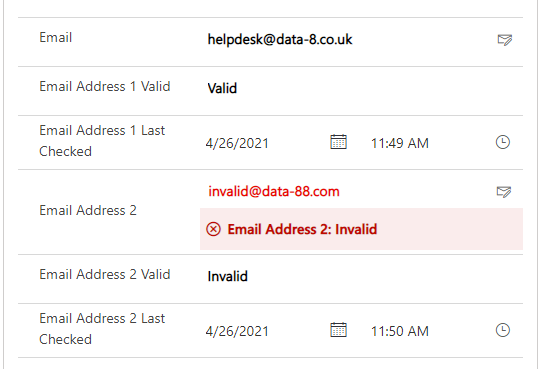
That's it - if you save and publish accordingly, your real time email validation is working. If you have your "result" and "last checked" fields on the form, you'll also notice they are starting to auto populate each time the email is amended.